Yeah, my 7-year-old is turning 12 this month...
I still hope to put her to work de-crimping primer pockets, though!
|
||||||||||||||||||||||||||||||||||||||


 Senior Member
Yeah, my 7-year-old is turning 12 this month...
I still hope to put her to work de-crimping primer pockets, though!
 Senior Member
Time to bump this again (rather than a new thread). This week I switched to running the cutter on all brass going forward.
My Sinclair hand primer was sticking with the priming ram up, and I had to pop it back down every time I went to load a primer. I finally decided to take it apart and clean it up, and Damn! There was a bunch of brass shavings inside. I expected to find one piece that was causing problem, but there was a rat's nest of brass shavings.
With the insane brass mix I work through, I have no idea what has or has not had the crimp removed.
"What would a $2,000 Geissele Super Duty do that a $500 PSA door buster on Black Friday couldn't do?" - Stopsign32v
 Member
There's a lot of good information here. I missed it the first couple of times around, I've been reaming, but had a lot of nickel brass that I didn't want to cut the primer pockets on so I borrowed a Dillon 600 from a friend as sort of a test drive. It wasn't seriously faster than reaming and had a learning curve to deal with, but at least it didn't make my fingers hurt holding the brass while it's being cut. I'm no closer to buying one than I was when I started.
Detached Reflection Cannot Be Demanded in the Presence of an Uplifted Knife ~ Brown v. United States (1921)
 Senior Member
Swaging Primer Pocket Crimps With The Dillon Super Swage
In order to reload brass cases that have crimped primer pockets, the crimp must first be removed before a new primer can be seated. There are two basic methods used to achieve this; reaming or swaging.
With reaming, youre removing material from the case head. With swaging, youre simply pressing material back into its original position. Of the two methods, my personal preference is for swaging with the Dillon Super Swage 600. The Dillon Super Swage returns the primer pocket more closely to its original condition than any of the other stand-alone tools that Ive seen used to remove the primer pocket crimp.
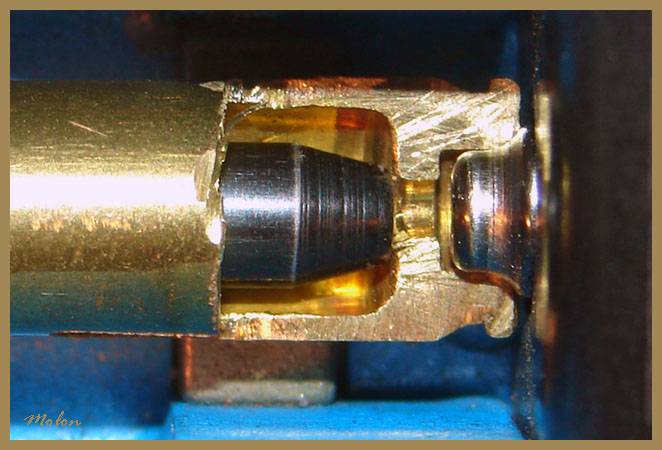
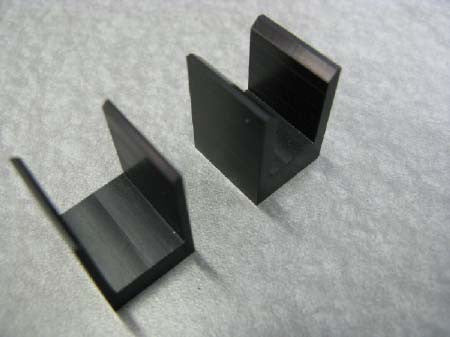
The pic below, with a cut-out 223 Remington case in the Super Swage, shows the swaging rod and the case positioning rod to give you an idea of just how the Super Swage works.
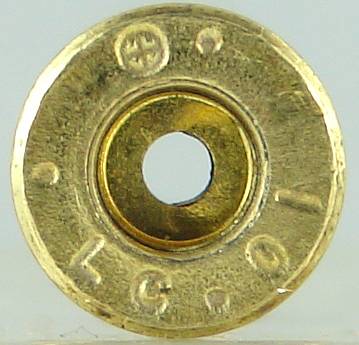
Theres no good reason for over-swaging cases. If youre swaging correctly, heres what your cases should look like.
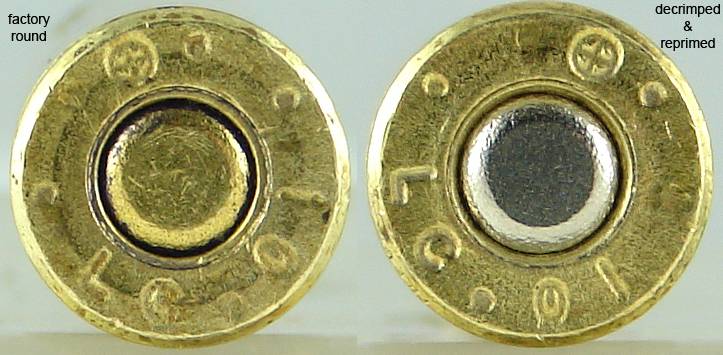
The first pic below shows the case head of a factory-loaded round that has a crimped primer.
Now, a deprimed case.
The case from the above pic that has had the primer pocket swaged with the Super Swage . . .
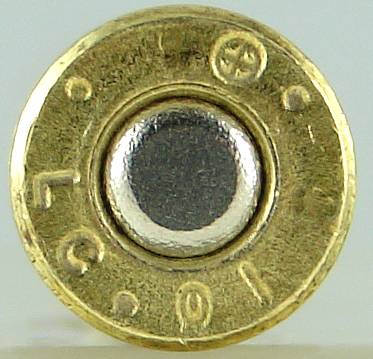
And a pic with the same case reprimed . . .
This last pic shows the factory-loaded round next to the reprimed case for easy comparison.
....
All that is necessary for trolls to flourish, is for good men to do nothing.
Senior Member
No need to sweat cutting the nickel stuff. No difference. The thing I found is that the brass that doesn't need any removal just doesn't give resistance on the cutter. I thought I could hurt the cause like I did with the Swager.Originally Posted by anachronism

But I like cutting even more now that I run every piece through that process and don't sort off/guess which ones need it.
"What would a $2,000 Geissele Super Duty do that a $500 PSA door buster on Black Friday couldn't do?" - Stopsign32v
 Subject Matter Expert
I've had my Super Swage since 1990 and haven't found anything better for processing buckets of GI 5.56 brass en masse.
I did so much brass I cracked the body, and Dillon replaced it free on warranty.
I use the In-Line Fabrication inserts to line-up cases to speed-up the process (aligns primer pockets with the swager nipple):

 Senior Member
I didn't realize inline made those, thanks for posting. Going to pick up a set for 556 and 762. I have his quick change press mount and it is solid as a rock.
I've found nothing better than the Dillon Super Swage and I have tried several other solutions.
Last edited by HKGuns; 12-23-23 at 10:26.
Member
Case alignment was a major stumbling block for me with the 600. I had to be able to see the position of the case in comparison with the primer pocket.
This particular session was a bitch anyway. I bought "processed" nickel brass on GB, the seller had run the cases through a 1050 Dillon like most do, but the pockets were undersized for CCI primers so I had to give a little slack there, but the case necks were tapered, like his sizing dies were worn, and worst of all his trimmer was dull. It did trim cases, but left the outside nickel uncut, so I had to deburr inside and out. When I started to do this I found his trimmer was so dull that it mushroomed the case mouths on many cases instead of cutting them. By this point I had already modified the cases to the point that everything was going to be my baby. So I full length sized everything and ended up doing full case processing myself anyway. My dies didn't leave the necks tapered by the way, and cleaned up the shoulder profiles a mite as well. The whole point of this exercise was to clone one of the older Speer LE loads, so I bought correct Speer LE nickel cases that were only available processed, and used them with my 64 gr TBBC. So much for the romance of "clone" loads, and also for buying pre-processed cases.
Detached Reflection Cannot Be Demanded in the Presence of an Uplifted Knife ~ Brown v. United States (1921)
Senior Member
I have a C4HD swager which does a fantastic job of tearing rims off cases until it is adjusted correctly. It is a good use for my Herters non-compound leverage press though.
Andy
Senior Member
There must be a "feel" thing to using the swager. I didn't keep mine long enough to figger that out.
My brain wanted there to be a setting and just go, and that wasn't the case for different brass types.
"What would a $2,000 Geissele Super Duty do that a $500 PSA door buster on Black Friday couldn't do?" - Stopsign32v
 Posting Permissions

 Reply With Quote
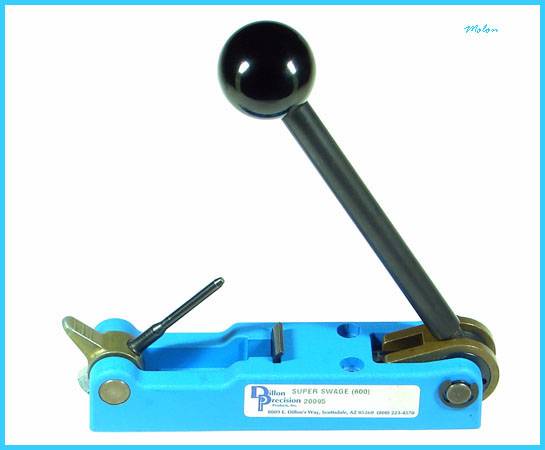


Bookmarks