Page 1 of 2 12 LastLast
Results 1 to 10 of 17

Thread: Stippling borders: tutorial

  1. #1
    Join Date
    Nov 2014
    Posts
    180
    Feedback Score
    0

    Stippling borders: tutorial

    Hey all. Been lurking here mostly for gun porn. Seen some awesome guns and some unbelievable stipple jobs. As I began stippling myself I scoured the web for how to stipple clean borders and found nothing so I will go over how I did my borders. This is a rough DIY method that I'm sure is not the best but has worked for me and given consistent results.

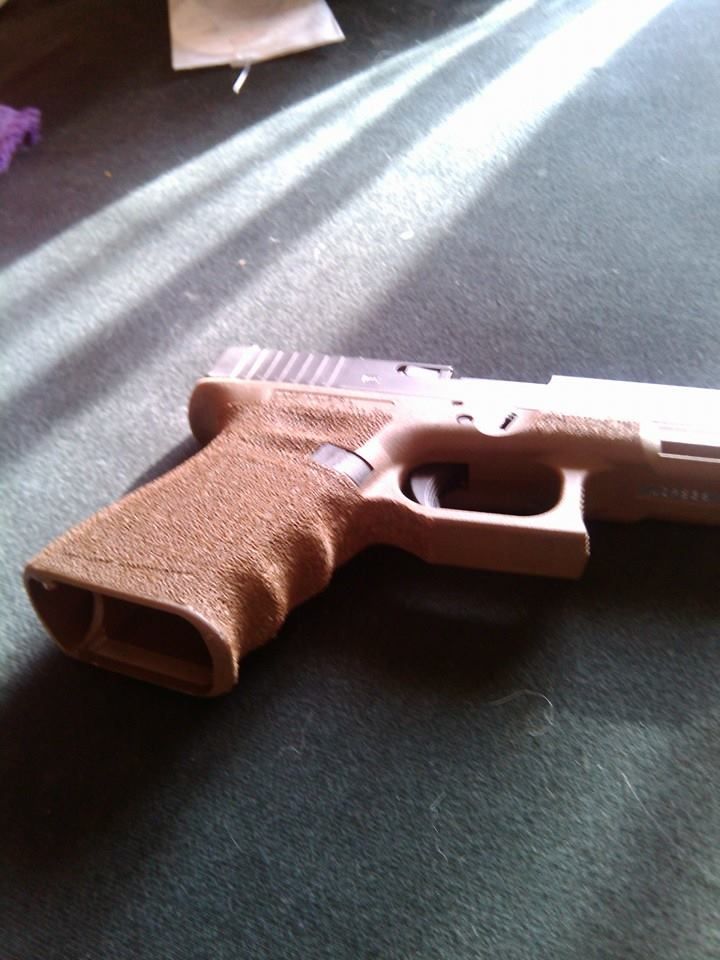
    For this decided to do a glock gen 4 backstrap (image 1)

    Next you tape off your desired border. Use multiple layers as this will also be used as a straight edge (image 2)

    Now take your wood burner, anything works really, and use a flat tip attachment and make a recess against the tape along your border. (Img 3, 10)

    Edit: the goal is to make a ledge or step that will act as the border

    Now take the same flat tip and smooth over the marks and any factory texture you plan to stipple over. Here's what you should end up with. (5,6)

    Edit: at this point you can also deepen the ledge you created to your desired depth

    Now stipple whatever texture floats your boat.
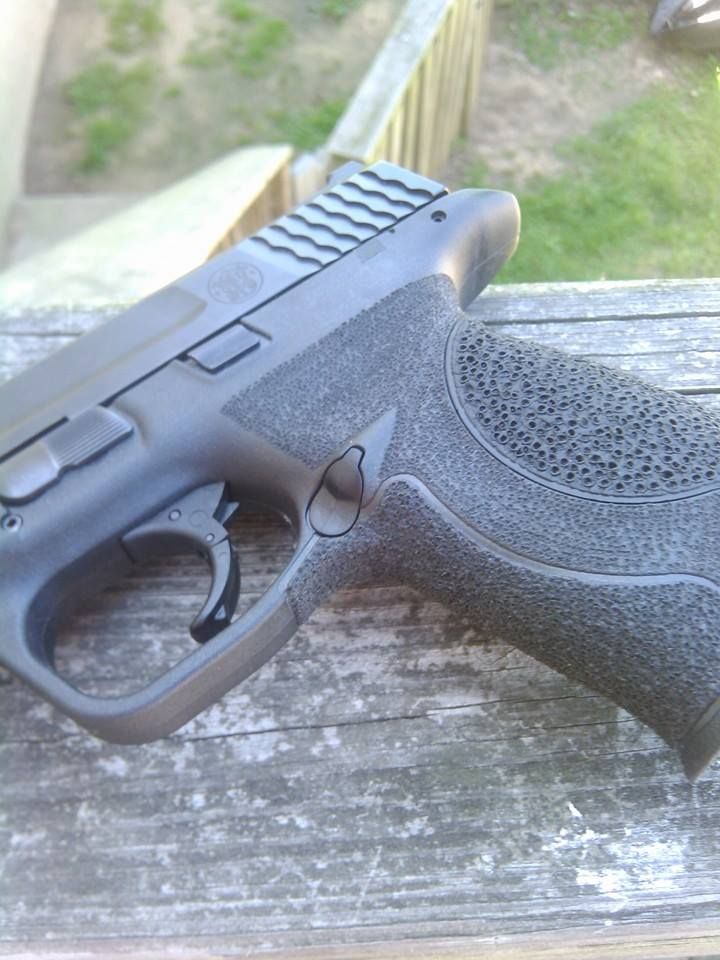
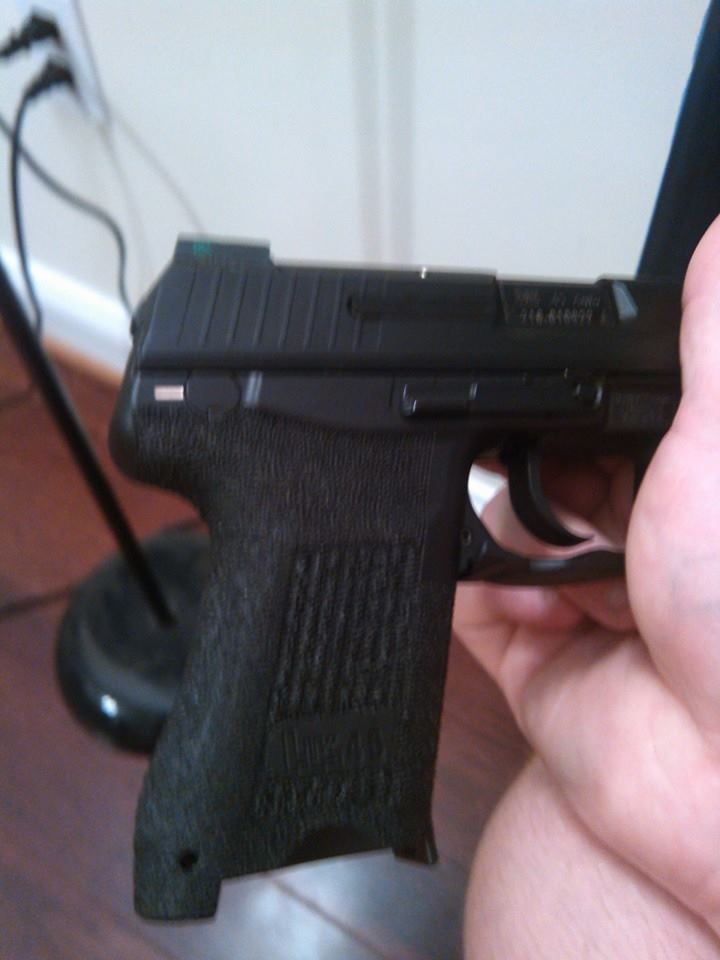
    Here's the final product. (7, 8, 9, 11)

    This is a crude DIY method that I have found gives decent and consistent results. I don't claim to be an expert. If you want your gun to look like Dakota glock guy or rattle head I suggest you send it there haha. Any other techniques, methods, or comments I would love to hear them.

    Here's what my 17 looks like using this method.

    One more view of the finished backstrap with the border extended
    Attached Images Attached Images
    Last edited by Maiden3.16; 11-28-14 at 03:30. Reason: Clarity

  2. #2
    Join Date
    Feb 2010
    Posts
    1,670
    Feedback Score
    29 (100%)
    A tip when you are doing the actual stipple: don't go in a straight line. It makes the texture look weird. If you use a random "star" or hex pattern, you get great results. Think of it like this: when you make your first burn, you are starting a pattern but you want to keep the pattern as random as possible. The first burn and second burn don't matter as long as they touch and share a common border. The third one should go in the elbow of the first two holes. The first and third holes have created a new elbow and the fourth goes into the elbow of 1 and 3. Eventually, if you go all the way around the first hole, you have approximately 5-7 individual burn holes in the material and a round star like pattern emerges. As long as you stay in the elbow of two other holes, the pattern looks uniform but random at the same time.
    Quote Originally Posted by Coal Dragger View Post
    Marines love CLP. Chow, libo, pussy.

    Beyond that everything else is a crap shoot.

  3. #3
    Join Date
    Nov 2014
    Posts
    180
    Feedback Score
    0
    Quote Originally Posted by nimdabew View Post
    A tip when you are doing the actual stipple: don't go in a straight line. It makes the texture look weird. If you use a random "star" or hex pattern, you get great results. Think of it like this: when you make your first burn, you are starting a pattern but you want to keep the pattern as random as possible. The first burn and second burn don't matter as long as they touch and share a common border. The third one should go in the elbow of the first two holes. The first and third holes have created a new elbow and the fourth goes into the elbow of 1 and 3. Eventually, if you go all the way around the first hole, you have approximately 5-7 individual burn holes in the material and a round star like pattern emerges. As long as you stay in the elbow of two other holes, the pattern looks uniform but random at the same time.
    Good stuff. I do the straight lines so I can ensure I get full coverage. However, the way you explained the star random pattern sounds like you can ensure full coverage swell without the lines I will try that next time. Any more techniques used like this from anyone please chime in

  4. #4
    Join Date
    Feb 2009
    Posts
    1,728
    Feedback Score
    7 (100%)
    Quote Originally Posted by nimdabew View Post
    A tip when you are doing the actual stipple: don't go in a straight line. It makes the texture look weird. If you use a random "star" or hex pattern, you get great results. Think of it like this: when you make your first burn, you are starting a pattern but you want to keep the pattern as random as possible. The first burn and second burn don't matter as long as they touch and share a common border. The third one should go in the elbow of the first two holes. The first and third holes have created a new elbow and the fourth goes into the elbow of 1 and 3. Eventually, if you go all the way around the first hole, you have approximately 5-7 individual burn holes in the material and a round star like pattern emerges. As long as you stay in the elbow of two other holes, the pattern looks uniform but random at the same time.
    agreed. i will typically start by stippling all around the borders and once that is completed i will begin the body of stippling in the middle somewhere and then start fanning out. then i will start in another place that is in the middle somewhere and fan out from there and join the two masses of stippling. after the masses are joined i will move them toward the borders and fill in as appropriate. randomized stipples is more pleasing to the eye for some reason.
    Last edited by trinydex; 11-28-14 at 15:47.

  5. #5
    Join Date
    Feb 2009
    Posts
    1,728
    Feedback Score
    7 (100%)
    also, very much appreciate this thread. there are a lot of stipplers on instagram that do this sort of edging, it ends up looking extremely clean. very cool tutorial.

  6. #6
    Join Date
    Nov 2014
    Posts
    180
    Feedback Score
    0
    Yeah looking at some pics I think I like the random pattern better aswell. Definitely gonna use it on my next one.

  7. #7
    Join Date
    Feb 2011
    Location
    Rapid City, SD
    Posts
    610
    Feedback Score
    0
    I don't bother with the border nonsense, just a steady hand and patience. In the end it is a tool I'm adding texture to, not a work of art.

    https://www.dropbox.com/s/quly5i9gs3...21.51.jpg?dl=0

  8. #8
    Join Date
    Nov 2014
    Posts
    180
    Feedback Score
    0
    Quote Originally Posted by JackFanToM View Post
    I don't bother with the border nonsense, just a steady hand and patience. In the end it is a tool I'm adding texture to, not a work of art.

    https://www.dropbox.com/s/quly5i9gs3...21.51.jpg?dl=0
    Why bother with patience and a steady hand it's just a tool right? Just mar that thing up real quick and go kill some bad guys!!

  9. #9
    Join Date
    Apr 2012
    Location
    Central Ohio
    Posts
    680
    Feedback Score
    3 (100%)
    Quote Originally Posted by Maiden3.16 View Post
    Why bother with patience and a steady hand it's just a tool right? Just mar that thing up real quick and go kill some bad guys!!
    This.

  10. #10
    Join Date
    Aug 2006
    Location
    MD
    Posts
    1,388
    Feedback Score
    0
    Mine turned out nice without the borders...


Page 1 of 2 12 LastLast

Bookmarks

Posting Permissions

  • You may not post new threads
  • You may not post replies
  • You may not post attachments
  • You may not edit your posts
  •