Results 1 to 6 of 6

Thread: First Milled 80% Lower

  1. #1
    Join Date
    Jan 2015
    Posts
    55
    Feedback Score
    0

    First Milled 80% Lower

    I have built an ak47 before which was way more involved then this simple aluminum lower
    But I wanted to make a ar pistol and here its a hassle to get one, but no problem making one from an 80% lower
    I have a polymer coming and once that was finished I would order an aluminum one
    but I happened to go to a store locally and saw they had them pretty cheap so picked it up

    Only used my HF drill press, Small vise and the correct drill bits
    I did find my cheap drill press does move some so its not going to be super precise
    but its only the inside no one ever see's that

    Only took 3 hrs and that was going very slow since I never done this before


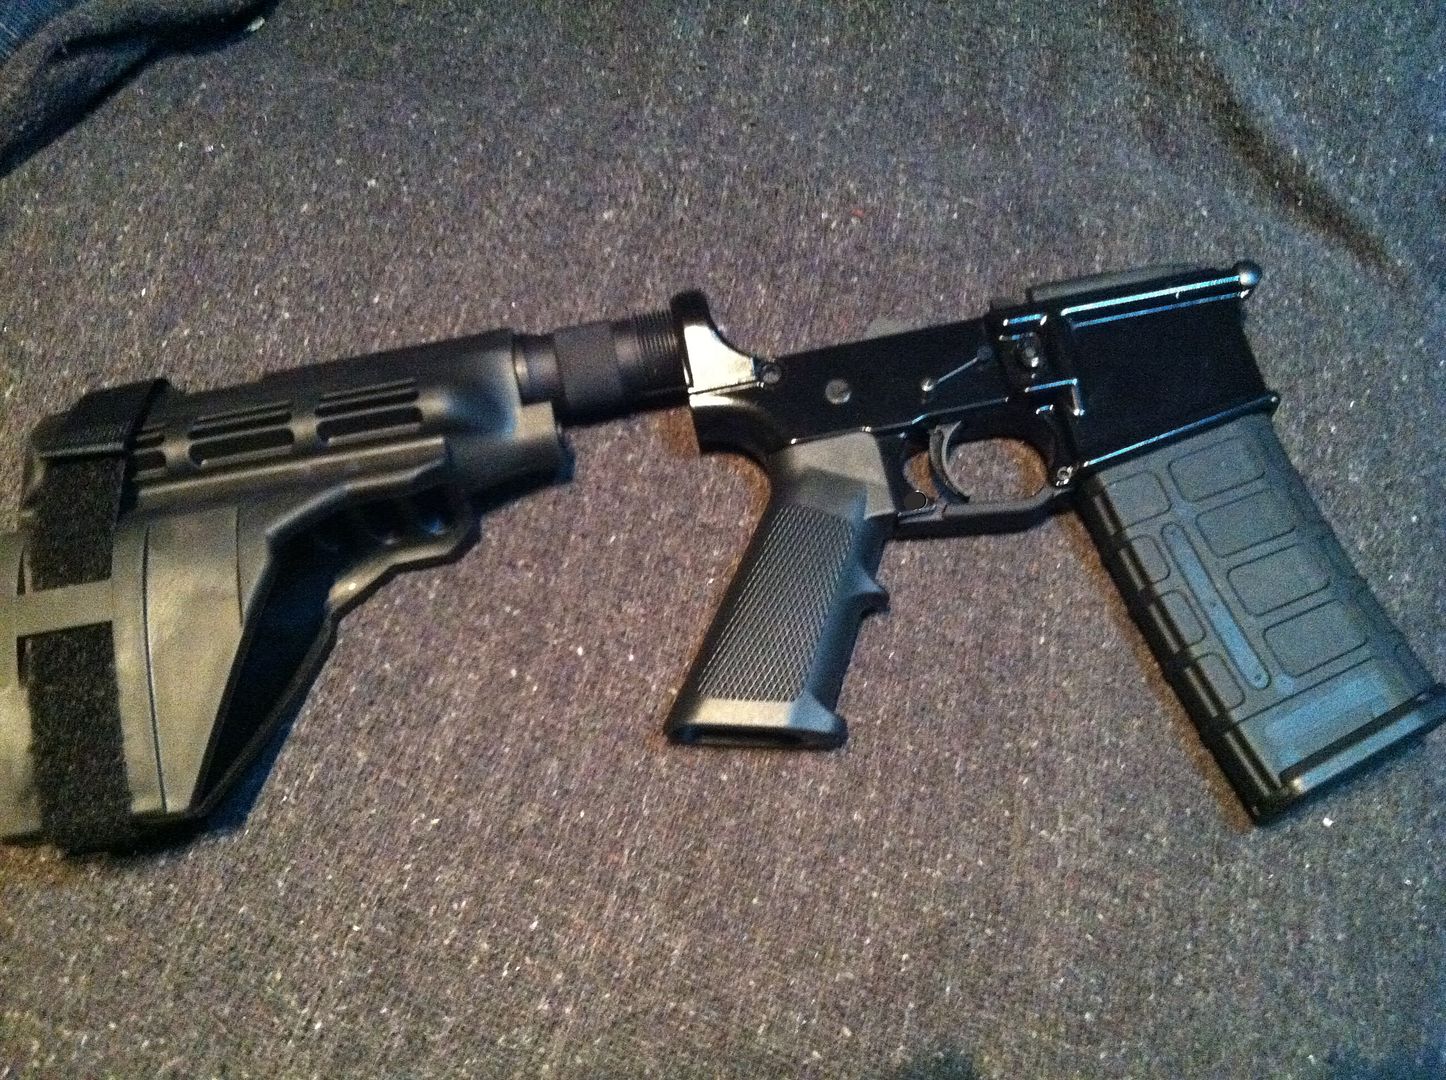
    Was pretty easy, and test fitted together great wanted to make sure the trigger and holes were correct before painting
    Ended up powdercoating it since I can do that at home matte black, well after it baked I see its glossy
    must of had glossy in the gun


    glossy chipping off on the roll pin areas, but little touch up paint will fix that
    if it chips too much I will blast it and probably use a real gun paint once I research all thats needed
    I wasnt planning on doing an aluminum lower for a while so I sort of jumped ahead

    Last edited by Chunky_Lover; 01-11-15 at 19:58.

  2. #2
    Join Date
    Jan 2015
    Posts
    55
    Feedback Score
    0
    well come to find out I did have matte black powder in the gun
    what happened was even though the oven was to temp, the aluminum must be so thick the normal 20 min bake time wasnt enough
    Because matte does turn glossy during baking but usually around the 7 min mark
    That explains why it chips so easy

    Now I need to decide to strip it all apart, strip the paint and redo the matte but let it bake much longer
    Because the upper is a nice matte color and thats why I originally wanted a matter powdercoat
    Plus ive never had problems with my powdercoat chipping like it did on this, but thats because it wasnt fully cured


    Anyways here it is assembled with the crappy powdercoat finish


    hopefully next weekend I can test it

  3. #3
    Join Date
    Jan 2015
    Posts
    55
    Feedback Score
    0
    redid the powdercoating
    let it bake almost 3 times as long
    finish is much stronger now during reassembly nothing chipped or scratched
    I did leave in the bolt release lever and trigger guard as I didnt want to fight out the roll pins
    but everything else was taken back off


    Still wanst as flat as it usually dries but maybe I needed more heat for this application
    I usually do small parts and never ran into this issue
    Almost looks like a satin color, but matches the carry handle and buffer tube color
    so I like it, but time will tell how durable it is on a weapon


    here are some close up shots of the powder coat


  4. #4
    Join Date
    Jun 2010
    Location
    columbus, oh
    Posts
    132
    Feedback Score
    0

    Thumbs up

    Awesome job dude!

  5. #5
    Join Date
    Oct 2013
    Posts
    1,587
    Feedback Score
    10 (100%)
    In the most friendliest way I can say it; I can tell you only spent 3 hours on a drill press with your lower. But, if it works who cares.

    You beat up your jig mill plate pretty good. Next time make a small pocket in center of area to be removed. Lower your end mill into pocket with depth adjusted to where the shank, or smooth part, of end mill will contact guide but flutes will contact lower. Work your way out to sides from your slot. Did the Ares instructions have you drill with your end mill? The way the floor of lower is jeweled it appears so. Next time drill it shallow and finish up last few thousandths using drill press like mill.

    Yet again, if it works who cares though. Welcome to the forum.

  6. #6
    Join Date
    Jan 2015
    Posts
    55
    Feedback Score
    0
    actuallly the top of the jig got a little scarred because my mill bit was only 1/4 inch longer then the maxium depth but that was my fault I didnt know how long of a bit to get
    and my store only had 2 mill bit options
    bottom cut and something else, I got the bottom cut but it looked exactly like the other one
    not sure if I used the right one

    no instructions with the jig, and I figure im sure I could get replacement parts for it when they get too damaged I could probably do 5 more with it before it gets too tore up

    the sides marks on the jig was actually from first using a drill bit being too close

    next time I will know I can stay away from the edges until final mill, where I had held everything in my hand and forced it against the drill to get the smooth sides similar to the router way
    Last edited by Chunky_Lover; 01-11-15 at 07:40.

Bookmarks

Posting Permissions

  • You may not post new threads
  • You may not post replies
  • You may not post attachments
  • You may not edit your posts
  •