Page 1 of 2 12 LastLast
Results 1 to 10 of 11

Thread: "See If I Could Do It" Pistol Build

  1. #1
    Join Date
    Dec 2008
    Location
    O - H - I - O
    Posts
    134
    Feedback Score
    14 (100%)

    "See If I Could Do It" Pistol Build

    In light of:

    It would be nice if you took time to explain how you came to your decision and explain your set up
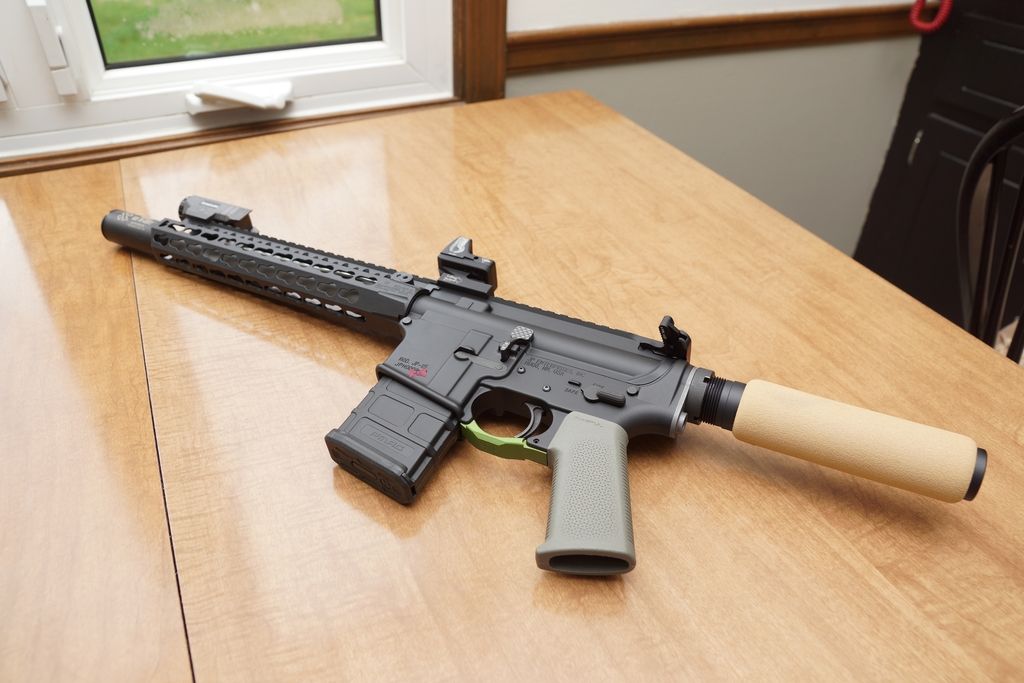
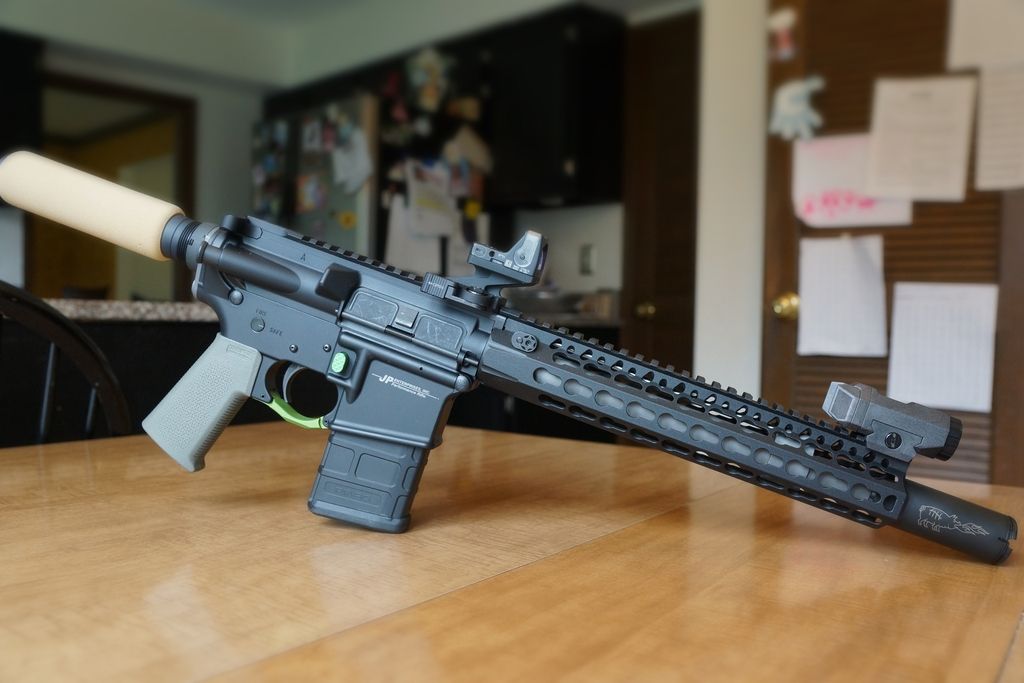
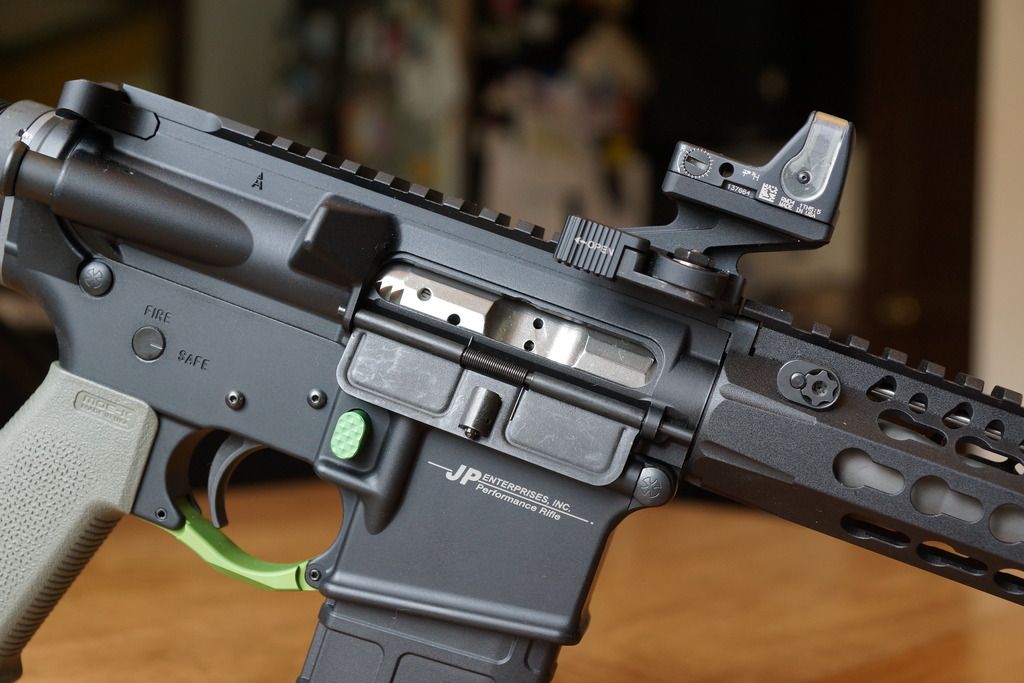
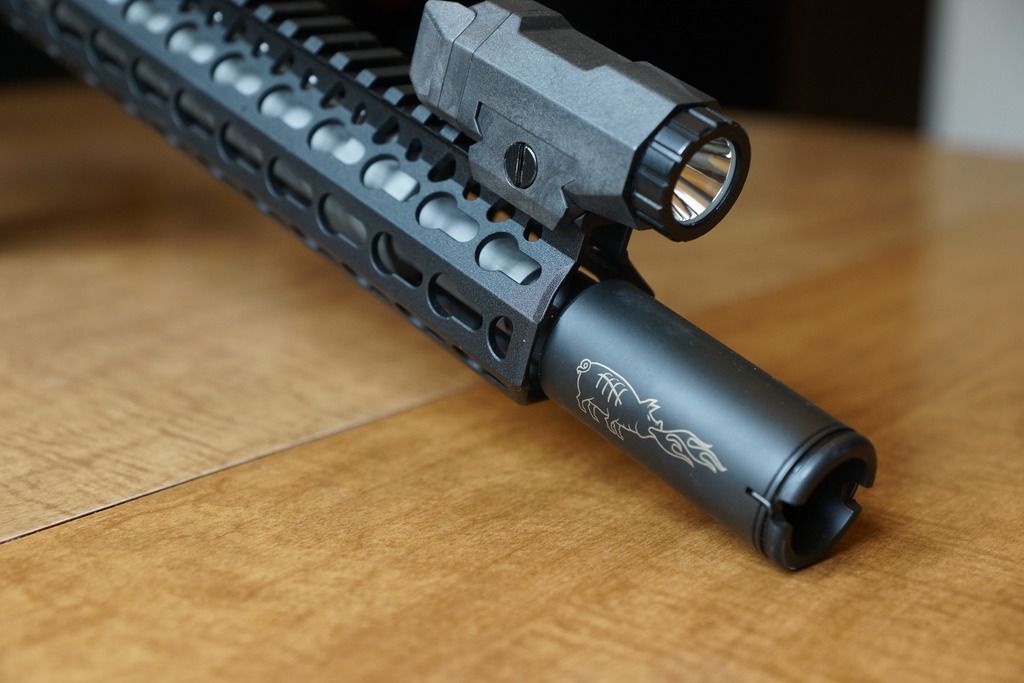
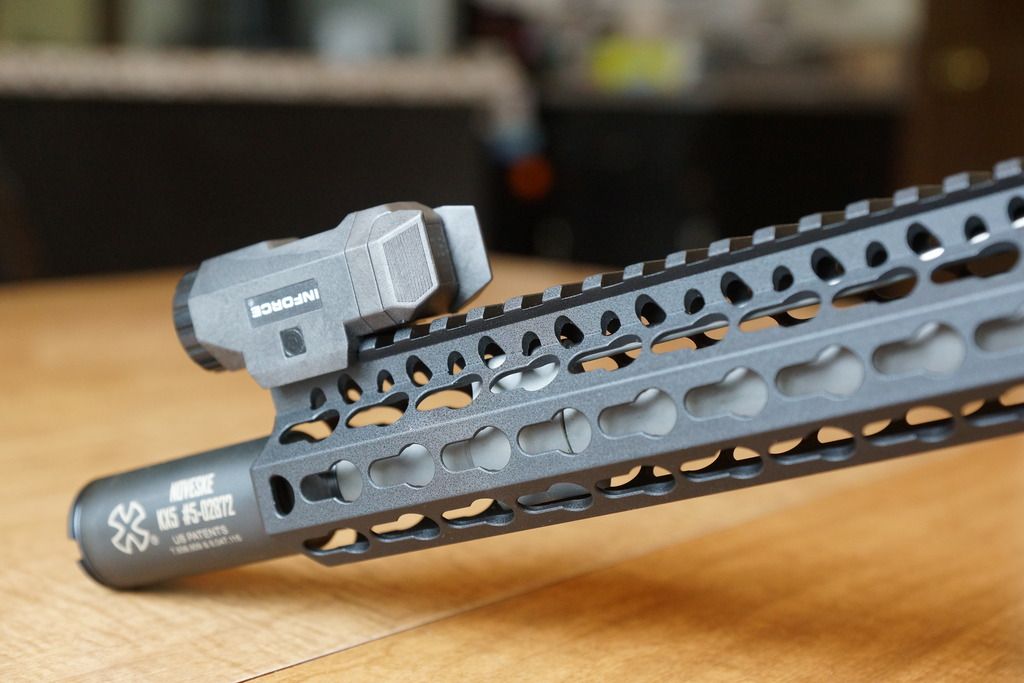
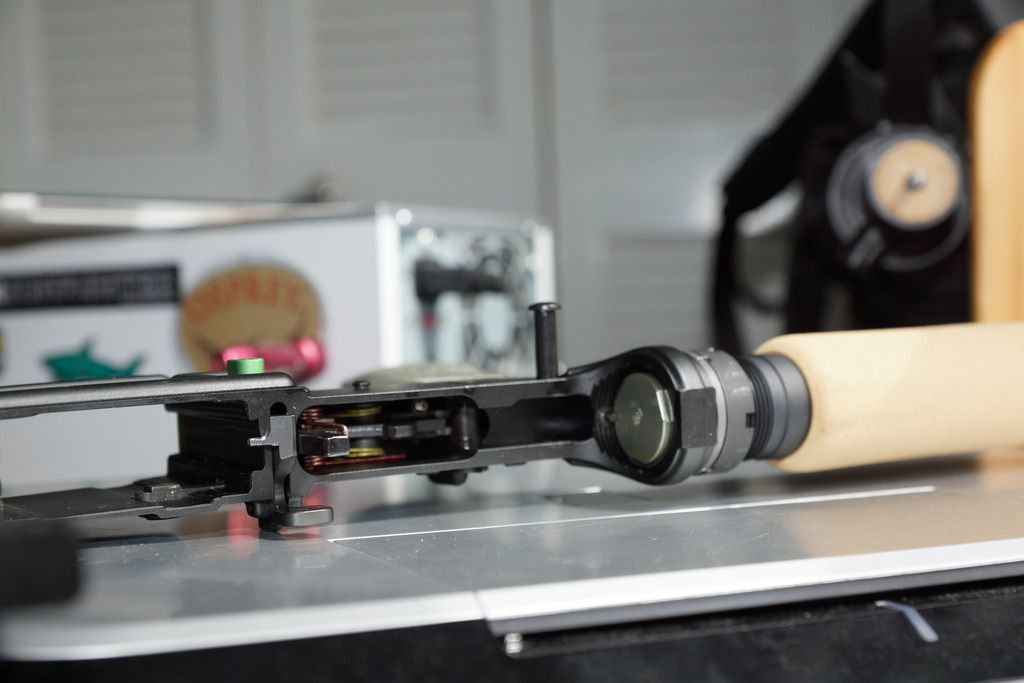
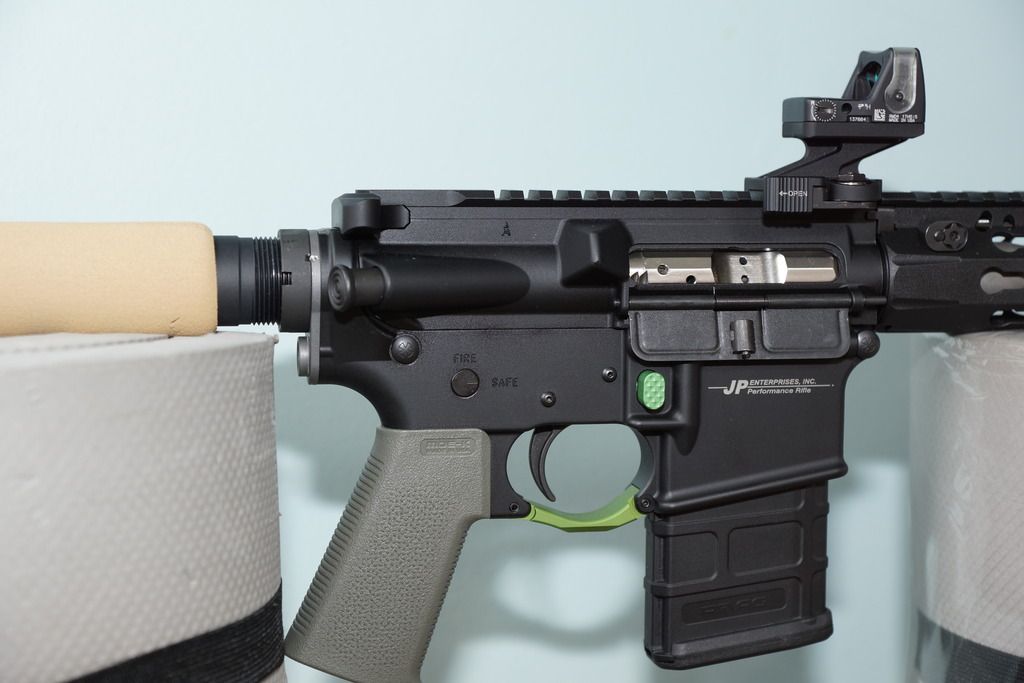
    I wanted to see if I could build a pistol.. That's pretty much it. Gun has no real purpose, but “internal home defense” is what I could claim. The decision to use the parts listed below was from lurking here for half a decade. I realize this is a place for people who have chosen or are conscripted to use these tools like I use a Bloomberg Terminal so I appreciate all of the sharing of accumulated knowledge and attitude here.

    Parts list:

    LOWER RECEIVER

    JP Enterprises, Inc.
    Lower JP-15
    Factory trigger
    Selector
    Trigger Pins
    JP Speed Hammer

    Bravo Company Manuf.
    Pistol buffer tube & spring,
    QD end plate, castle nut

    Colt Manuf.
    Buffer H2

    Seekins Precision
    Bolt catch
    Magazine release button
    Trigger guard

    DSG Arms
    Magazine catch

    CMMG
    All other pins
    All other springs

    Noveske Rifleworks
    Take down pin
    Pivot pin

    Exile Machine
    Foam pistol buffer tube cover

    Magpul
    MOE-K Pistol Grip

    UPPER RECEIVER

    JP Enterprises
    A3 upper receiver

    DSG Arms
    Forward assist
    Dust cover

    WMD Guns
    Bolt
    Bolt carrier group

    Bravo Company Manuf.
    Charging handle Mod 4
    Gas tube (carbine)
    Keymod Rail 10”

    White Oak Armament
    10.5” 1-7 SS “match” barrel
    SS gas block

    Noveske Rifleworks
    KX5 Flash Suppressor


    Attachments

    Trijicon RMR04
    Larue Tactical RMR mount LT827
    Inforce APL light

    Weapon Shield grease
    Clenzoil oil

    Excel tells me the parts above cost $1,370.65 excluding the amount spent on numerous specialty tools and the detachable accessories both that can be used for other armaments. I acquired most of the parts over nine months and putting stuff together as I received it. I followed instructions from here, TOS, random AR15 dedicated blogs, YouTube, and Brownells. Attaching the BCM KMR was the least enjoyable task. I sure hope it doesn't blow up the first time I use it. I still can't believe everything fit together and I didn't lose a single part.

    Photos to follow once I get some good natural light.

  2. #2
    Join Date
    Dec 2008
    Location
    O - H - I - O
    Posts
    134
    Feedback Score
    14 (100%)


  3. #3
    Join Date
    Feb 2013
    Posts
    1,825
    Feedback Score
    50 (100%)
    Nicely done.

  4. #4
    Join Date
    Aug 2011
    Location
    E. Tennessee
    Posts
    2,368
    Feedback Score
    6 (100%)
    What made installing the KMR "...least enjoyable"?
    ETC (SW/AW), USN (1998-2008)
    CVN-65, USS Enterprise

  5. #5
    Join Date
    Dec 2008
    Location
    O - H - I - O
    Posts
    134
    Feedback Score
    14 (100%)
    Operator error. Not having the right tool to loosen the barrel nut "at least 4 times" after tightening to 40-50 foot pounds. As a result I raised burrs that needed to be cleaned up before sliding on the rail. I should have taken pictures of that for entry into the gunsmithing hall of shame thread.

  6. #6
    Join Date
    Nov 2011
    Posts
    674
    Feedback Score
    34 (100%)
    Alright, I'm curious because I'm pretty likely to buy one soon, doesn't it come with the tool?

  7. #7
    Join Date
    Dec 2008
    Location
    O - H - I - O
    Posts
    134
    Feedback Score
    14 (100%)
    The KMR does comes with a "barrel nut wrench"

    http://www.bravocompanyusa.com/BCM-K...cm-kmr-bnw.htm

    but it is worthless by itself. In order to use it as designed you need a 1/2"torque wrench

    http://www.craftsman.com/craftsman-m...1&blockType=G1

    to tighten the nut, and you need a 1/2" breaker bar to loosen the nut after tightening it to 40-50 foot pounds. The installation instructions say to tighten and loosen the nut at least four times.

    http://t.harborfreight.com/12-in-dri....google.com%2F

    Of course there are other ways to tighten and loosen, but these are the right tools for the job. I got burrs on my nut by not using the right tool.

    Reference:
    http://www.bravocompanymfg.com/downl...structions.pdf

  8. #8
    Join Date
    Aug 2011
    Location
    USA! USA! USA!
    Posts
    1,200
    Feedback Score
    5 (100%)
    Try a Sig brace, you might like it
    Gun and Gear Reviews- www.almosttacticalreviews.com

  9. #9
    Join Date
    Nov 2011
    Posts
    674
    Feedback Score
    34 (100%)
    Quote Originally Posted by Captiva View Post
    The KMR does comes with a "barrel nut wrench"

    http://www.bravocompanyusa.com/BCM-K...cm-kmr-bnw.htm

    but it is worthless by itself. In order to use it as designed you need a 1/2"torque wrench

    http://www.craftsman.com/craftsman-m...1&blockType=G1

    to tighten the nut, and you need a 1/2" breaker bar to loosen the nut after tightening it to 40-50 foot pounds. The installation instructions say to tighten and loosen the nut at least four times.

    http://t.harborfreight.com/12-in-dri....google.com%2F

    Of course there are other ways to tighten and loosen, but these are the right tools for the job. I got burrs on my nut by not using the right tool.

    Reference:
    http://www.bravocompanymfg.com/downl...structions.pdf
    Oh, okay. I get you. I already have that stuff from a prior build so I'm good. Thanks for the clarification.

  10. #10
    Join Date
    Feb 2014
    Location
    WI
    Posts
    26
    Feedback Score
    14 (100%)
    Very straightforward, I like it.

Page 1 of 2 12 LastLast

Bookmarks

Posting Permissions

  • You may not post new threads
  • You may not post replies
  • You may not post attachments
  • You may not edit your posts
  •