On what type of target and with what optics/ sights.?Originally Posted by SingleStacker45

|
||||||||||||||||||||||||||||||||||||||

 Member
On what type of target and with what optics/ sights.?
Member
SR21 100 yard Rifle Bull
Whatever sights you shoot best with. Eotech, irons, etc.
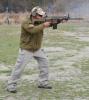
I use a weaver 1x3 scope. This drill will help you iron out your holds at varying distance.
Mule
 Member
Try this one.It is a tough one.
BASIC DRILL
Shooter will start this drill with a 5 round magazine in his weapon. He will also have a 10 round magazine loaded and on his person. Target is an 8 circle
Shooter will position himself at the 50 yard line.
On command the shooter will fire 5 rounds standing, reload as he assumes the kneeling position then fire 5 rounds, drops down to a prone position and fire the remaining 5 rounds.
Time limit is 20 seconds.
Once the shooter can keep all 15 rounds in the circle (100%) move to advanced drill.
ADVANCED DRILL
Shooter will start this drill with (2)-10 round magazines. He will have a 10 round magazine loaded in his weapon. Target will be the same 8 circle.
Shooter will position himself at the 100 yard line.
On command the shooter will have 4 seconds to fire 1 shot. This is repeated for 10 rounds
Next stage the shooter will then have 5 seconds to fire a double tap at the same target. This will be repeated 5 times for a total of 10 rounds.
A score of 80% on this drill is desired.
 Member
The following are four rifle drills that I really like.
VTAC Highsmith Rifle Drill
VTAC Zig Zag Rifle Drill
VTAC 2x2x2 Drill
VTAC 1-5 Drill
Last edited by GLOCKMASTER; 02-15-09 at 16:16.
 Member
Nice Jeff! Is Kyle doing a DVD or something?
"So have your buddy get a box of stray cats and try to get a good sight picture while he is throwing the cats at you... naked." - KLD
Get yours news at Presscheck.org!
 Member
Agreed !! I found these drills a while back an have added them to my collection of drills to do. Have also now added Viking Tactics to my list of classes to take.
Last edited by CAPT KIRK; 03-17-09 at 11:19.
"God made Cops, so Firemen could have Heroes."
"We sleep safe in our beds because rough men stand ready in the night to visit violence on those who would do us harm."
Praise be to the LORD my Rock, who trains my hands for war, my fingers for battle. Psalm 144:1
Member
Here's a drill to work on transitions and getting the gun back in the fight. This drill is done within 25yds. Primary weapon- two 30 round mags and one empty mag. Secondary weapon- loaded with a total of 40 rounds. To start, load up your secondary weapon. Then take one of the 30 rd mags and load you primary. Take that mag out and put it in your primary pouch. Insert an empty mag. Now you have 1 rd in your primary and an empty mag. Start from low ready. Get on target and attempt to fire two rounds. This is to get used to pressing the trigger until you get a click, because when the SHTF you might not notice that you ran empty from the feel of the bolt locking back. When you get a click, transition to your secondary and fire two rds. Scan, take cover (if available), holster your secondary. Now load your primary to back in the fight and fire two rds. When your done, scan and put the weapon on safe. Then simply take that mag out of you primary, replace it with the empty and repeat. For each drill you end up firing 3 rds from your primary and 2 rds from your secondary (you'll do this a total of 20 times before you run empty). There's a lot of weapons handling going on so you get some work on being familiar with your weapon systems.
 Industry Professional/Moderator
I use a modified FAST as one of the final evaluations in one of my courses. As such I recommend treating it as an evaluation, not something to to practiced repeatedly (no more than 2X per day).
Here is the setup and drill-
5 meters (not that it makes a big difference)
Target- standard IPSC
Shooter is wearing full body-armor and helmet.
Pistol is in the holster with all applicable retention features, loaded and made ready with a magazine of 2 rounds (1 in the mag, 1 in the pipe), reload pouch contains a magazine with 4 rounds.
-Holsters range from SERPA (bleah) to 6004 with my students.
Primary weapon is pointed at the target, off safe, finger on trigger
On beep, transition and shoot as per normal (in this course the primary [non-AR] must be placed "on safe" during the transition, don't ask). By "normal" I mean two shots to the head "A" zone, reload, four shots to the torso "A" zone.
Penalties- head shots outside the "A", in the "B"- add .25 seconds.
Head shot miss- add 1 sec (includes shots dropped into the body)
Body shot outside the "A", in the "C"- add .5 seconds.
Body shots outside the "C"- automatic fail.
"Gaming" the test (such as failing to drop the hammer on the primary or dropping the hammer during the transition)- automatic fail.
Pass standard- 9 seconds or less with penalties (not all that difficult).
Advanced standard- 2 runs of 6 seconds or less with penalties.
Industry Professional/Moderator
Thought I would throw some more rifle drills into the thread as it is kinda lacking, and this is M4Carbine.net after all
Offset Accountability-
Target- 2” Sighting Paster. Any 2” dot will work. Distribute the 5 dots around the target, about 12 inches apart
Distance- 5, 10, 15, 20 and 25 yards
Ammo- 5 rounds per distance, per iteration
Position- Standing Alert
Drill- Fire a single shot from the alert, ensuring that the bullet strikes the 2” dot. Conduct the drill 5X with no time pressure at each distance working on as much precision as possible, changing targets at each distance.
Once you can hit the target comfortably at all distances repeat the drill with a shot timer set on a 3 second par time. Reduce the par time in ½ second increments until you find your optimal balance of speed and accuracy at each distance. Once this time is established and recorded push yourself to get your hits faster. Do not sacrifice accuracy for speed. If you are missing more than 2 shots when you try to speed up, back it off a bit and push again. Do not expect to be making 1 second hits at 25 the first time you do it.
Purpose- Many people simply work precision at close range by working head-shots to IPSC type targets. While this will teach you how to hit the head reliably, the goal of the drill is to be able to hit a small target on demand and to be intimately aware of where the strike of round will be in relation to your aiming point at close range.
Up and Down-
Target- ½ of a 3x5 index card (3X2.5, turned lengthwise) and a 6” circle (pie plate), or whatever expedient method provides the same obvious target. Place the small target 6 to 12 inches above the 6” circle. The further away the targets are from each other the more beneficial the drill will be to perfect the skill of driving the gun, but will reduce the primary intent of the drill.
Distance- 10 yards
Ammo- 10 rounds
Position- Standing
Drill- On start signal, fire a pair to the bottom target then immediately transition to the small target and fire a pair, then back to the bottom, then up to the top, etc. For clarity’s sake it will go like this- B,T,B,T,B. It is easier to just have a mag with 10 rounds instead of trying to count rounds while doing the drill. Start out with no time limit, working on accuracy and settling the gun. Record the time needed to have no misses on either target while working quickly. Work to decrease the time as much as possible without missing more than one shot to the small target.
Purpose- We are trying to balance speed and accuracy while quickly driving the gun vertically and managing recoil. It reinforces achieving fast hits on a generous target and immediately switching gears to get precise hits by stopping the gun on the correct aim point and immediately speeding up for the large target, and so on. Be sure to vary the distance between targets frequently to avoid simply creating a skill/movement rut. Once you are comfortable with this drill, change the starting target to the small target and change it up every few runs. As this becomes easier, change the position of the small target so that it is at an angle to the large target. We want to be comfortable moving the gun quickly and precisely in any direction.
Stop and Go-
(Similar to the pistol X-Drill)
Target- ½ of a 3x5 index card (3x2.5, turned lengthwise) and a 6” circle (pie plate), or whatever expedient method provides the same obvious target. Setup two targets at least 3 yards apart each with a 6” circle and a 3x2.5 6 to 12 inches above the circle. The further away the two target stands are from each other, the more benefit the drill will have to increase transition skill.
Distance- 10 yards
Ammo- 4 rounds/8 rounds
Position- Standing Alert
Drill- On start signal engage the right 6” circle, drive to the left 6” circle, then drive to the right 3x2.5, and finish on the left 3x2.5. Change the drill up to vary the start target and direction of the flow and record times, working to cut time. When you are smooth and accurate, change the drill so that you go from the 6 to the 3x2.5 to the other 3x2.5 and finish on the final plate. When that is going well, shoot 2 rounds per target.
Purpose- The goal of the drill is ultimately to drive the gun smoothly and surely between laterally dispersed targets while appreciating accuracy needs and applying offset for multiple shots. Work on dropping the optic out of the line of sight, shifting the head and eyes to the next target, and driving the sights to the line of sight during target transitions.
The Inhaler-
Target- 6” paper plate or 6” steel plate. Steel is better so you don’t have to walk down to repair the target.
Advanced- Shotgun Clay Target
Distance- You will need 200 yards, but will only be firing 100 yards.
Ammo- 1 round
Position- Start position: Standing Alert
Firing Position: Prone
Drill- Set par time for 27 seconds. On start signal run from the 200 to the 100, assume the prone and hit the plate with a single shot. No make-up shots. If you miss, repeat until you can hit the 6” steel plate in the par time. If you hit, note your time. Catch your breath, reduce the par time to your time minus 0.5 seconds and do it again.
Purpose- To truly understand and apply breath control. When it comes to precision rifle work people tend to approach it like they are doing brain surgery. Sometimes we have to do very physical things and make a precision shot (6” ain’t all that precise as it is) as soon as we can. This drill is a stress test: physically, mentally, and technically. You better know your POA/POI at 100 and able to rapidly apply it. Breath control is not just about exhaling to the natural respiratory pause, but being able to control your body’s desire for more oxygen in order to achieve an accurate shot. When you have settled into a time that is limited by your running speed and not your ability to hit the target, reduce the target from a 6” plate to a shotgun clay target.
SAFETY NOTE- Running with a loaded firearm is inherantly DANGEROUS, especially so if you are STUPID and/or CARELESS. Obey the 4 rules of firearms safety. If you start to fall, just let the gun go. If you have any doubts if you can do this drill safely, don’t do it, or do it with an empty gun and load when you get to the 100 (you get to extend your start time to 30 seconds for being honest). This is a physical event, so if you haven’t run more than 10 yards in so many years, bring along an EMT. If you shoot yourself, someone else, have a heart-attack, or break a hip, it is your own fault. You have been warned.
Wobbly 8
Target- 2 IDPA Targets, laterally separated
Distance- 15 yards
Alt: >pistol transition distance
Ammo- 1 mag of 8 rounds
Alt: 2 mags of 4 rounds
Position- Standing, behind cover
Alt: Kneeling, behind cover
Other- Requires a piece of cover, at least as tall as the shooter, approx 3 feet wide (el cheapo interior door from Lowes works well)
Drill- Setup targets 15 yards from the piece of cover. Neither target should be visible when standing 1.5 to 2 yards behind the piece of cover, but should be positioned so that one target is visible when leaning to either side without requiring a foot shift.
On start signal engage around the strong side of cover (use it as cover, not support, barrel should not extend forward of the piece of cover) and engage the visible target with a pair, switch hands to a support-side grip/position and engage with a pair from the support side, switch back to strong side and engage with a pair, and finish up with a pair from the support side. Simply- engage from each side twice, switching from strong to support. Note time.
Once you have run this drill enough to be comfortable fully switching sides and getting timely accurate hits, work on simply placing the stock in the support side shoulder without changing grip, thereby maintaining the "normal" firing grip but from the support shoulder and firing with the support side eye. Note time.
Once you have become comfortable and effective using the support side without switching your grip, run the drill back to back, once using a full grip transition and once using only a shoulder transition. Note time difference.
Now run the drill with 2 magazines of 4 rounds. Begin the drill engaging to the strong side, forcing a reload while the gun is in the support shoulder. After the reload, reengage the support side target and finish up on the strong side. If you routinely carry a sidearm you might want to push the targets out past your transition distance to avoid improper training. Alternate running the drill by switching grip and switching shoulder alone.
Alternate: run the same drill, but from a kneeling position. Try out switching knees and two-kneed kneeling positions.
Purpose- Become smooth and fluid with bilateral shooting, using cover, and manipulating the weapon in unusual positions from the most relevant and commonly used gunfight positions. To enhance the manipulation aspect you can throw a few dummy rounds into each magazine, but be sure to add just as many live as you do dummy so that you can fire two successive shots per engagement after clearing the stoppage.
Have fun, train safe, train smart, train hard, train often.
Your life may depend on it.
Last edited by Failure2Stop; 06-08-09 at 00:17.
 Member
What I like to do to re-inforce some basics and essentials is run everything weak hand or in my case, left handed. I only run 1 shotgun, 1 pistol and one AR so I didnt have to fight too much to get proficient with all my rigs. Its alarming how many people cannot shoot weak hand...let alone draw, move and shoot, clear malfunctions and other more stressful things. I have discovered that finding weaknesses in my left side led to finding weakness and inconsistency overall...with that template I can accurately address the overall picture and not just a one sided picture.
Lots of good stuff here guys, thank you.
Take care out there...
"Everyone has been given a gift in life. Some people have a gift for science and some have a flair for art. And warriors have been given the gift of aggression. They would no more misuse this gift than a doctor would misuse his healing arts, but they yearn for the opportunity to use their gift to help others. These people, the ones who have been blessed with the gift of aggression and a love for others, are our sheepdogs. These are our warrior"
 Posting Permissions

 Reply With Quote
Bookmarks