Page 1 of 15 12311 ... LastLast
Results 1 to 10 of 149

Thread: Gas-port regulating gas-block insert install and DIY manufacture.

  1. #1
    Join Date
    Jan 2013
    Posts
    1,871
    Feedback Score
    25 (100%)

    Gas-port regulating gas-block insert install and DIY manufacture.

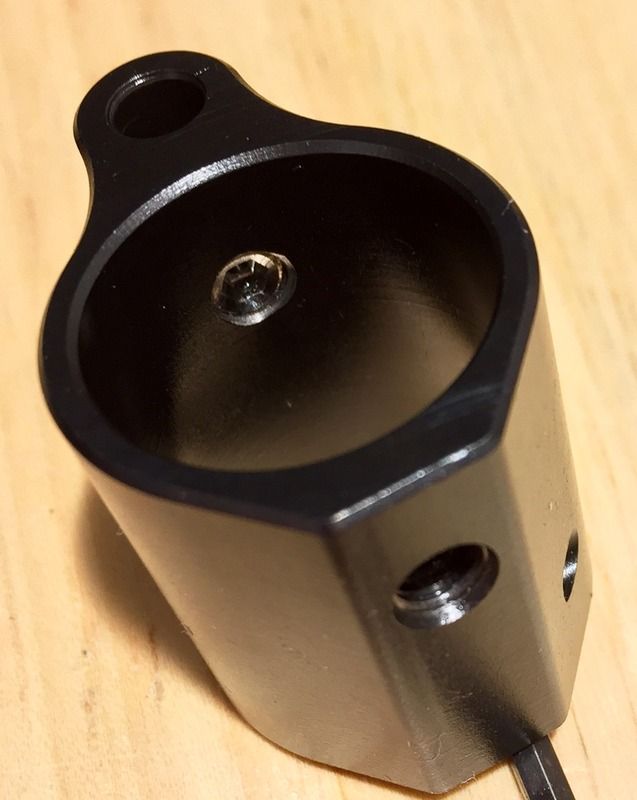
    Here I will show how to install a gas-port regulating gas-block insert like what is available from Black River Tactical CustomTune Gas Port - HD Kit .

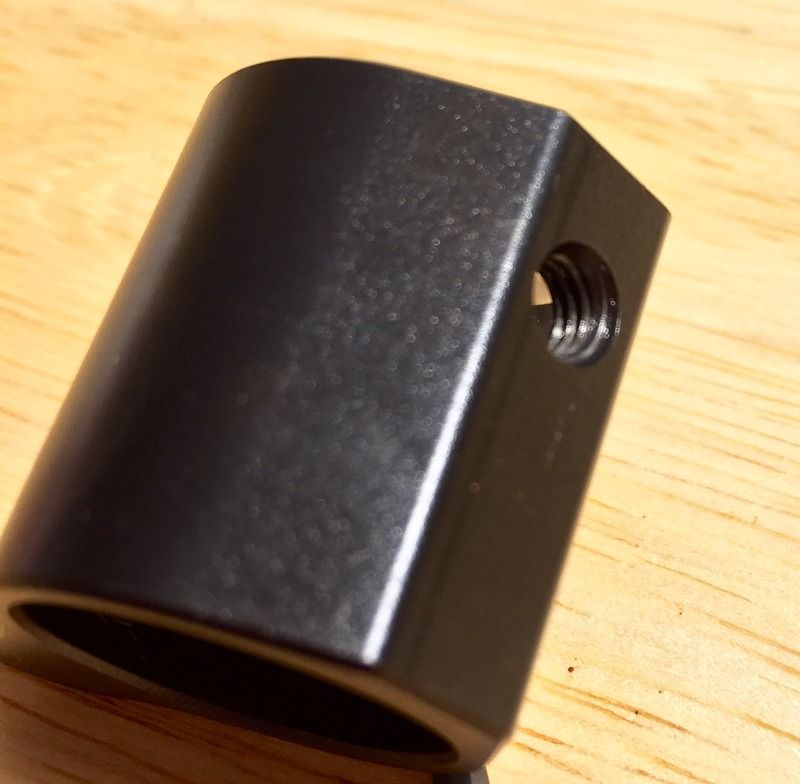
    Before this HD kit was available I ordered the regular CustomTune Gas Port now called the CustomTune Gas Port - FSB Kit. I intended to install the insert into seveveral common low-profile gas-blocks like Noveske's factory pinned on steel gas-blocks, the extra low-profile Hodge Defense/ SLR Rifleworks GB7, and V Seven Weapons and Battle Arms Development lightweight titanium lo-pro gas-blocks, only to discover it would not work. These named and most other lo-pro gas blocks use a 10-32 threaded set-screw directly underneath the gas-admission port on the gas-block. The gas-admission port hole is likely cut in the same operation that drills the hole for the rear 10-32 set-screw. Therefore the FSB only BRT insert was too small to fit into the hole because it is a 8-32 threaded set-screw and the gas-admission port hole is cut to diameter for a 10-32 set-screw. The 8-32 threaded FSB size insert would wobble inside the admission port of the lo-pro gas-blocks. Now no doubt the 8-32 threaded insert made sense because the admission port has to be tapped for threads to install it and the smaller diameter set-screw would make that easier since a 8-32 tap and companion drill-bit would fit through the 10-32 sized rear set-screw hole without interference, but the gas-block manufactures are saving machine time to drill the admission port and rear set-screw hole the same size and the same operation. Doing so also ensures perfect gas-block alignment when dimpling the barrel for the rear set-screw using BRD's or SLR Riflework's style jigs that index off the barrel's gas-port hole.

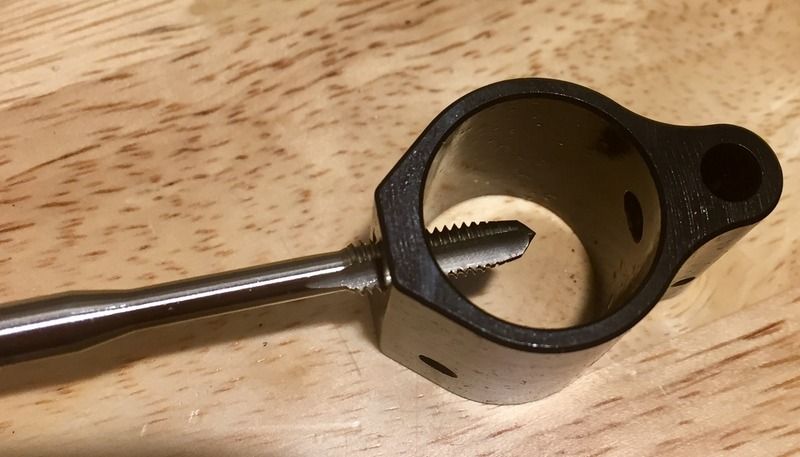
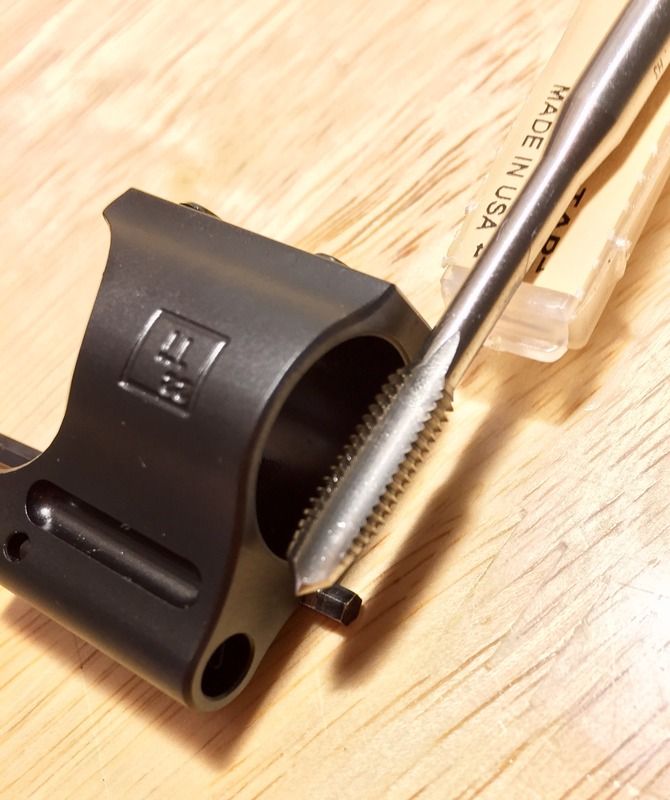
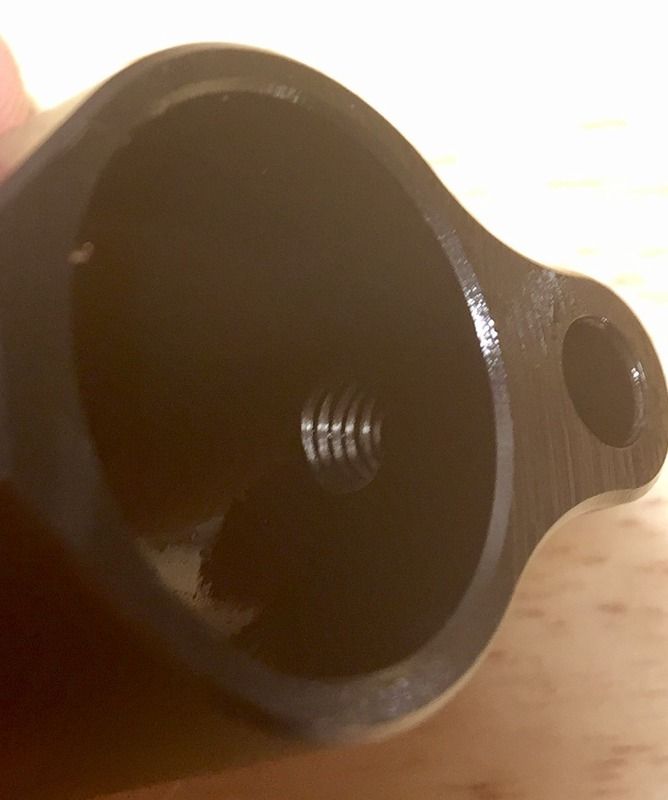
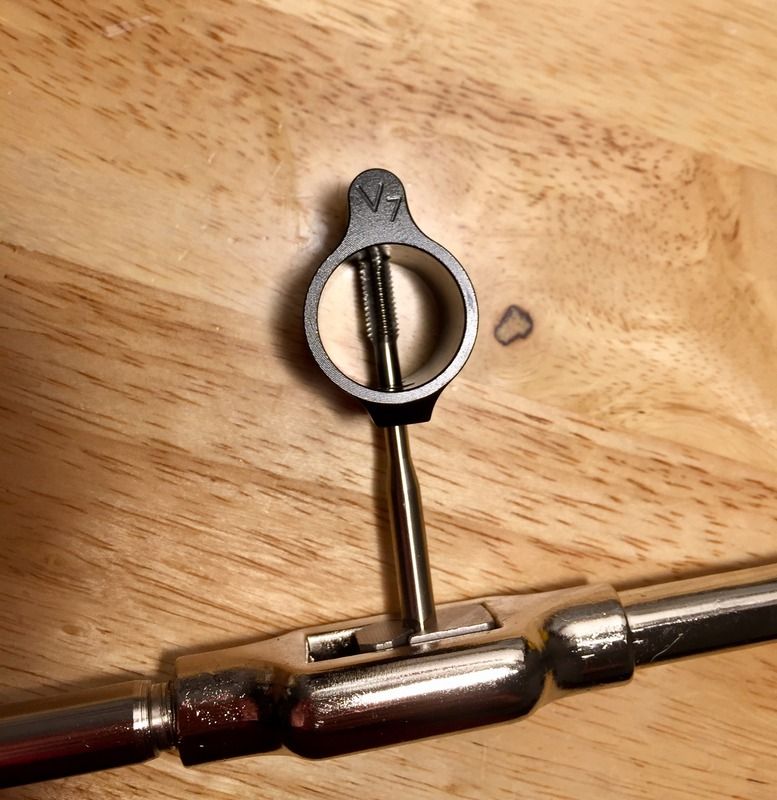
    So I set out to manufacture my own 10-32 size gas-block inserts and to figure out what tap to use to thread the gas-admission port hole without destroying the rear set-screw threads. This is the tap I found. BRT has since come out with the CustomTune Gas Port HD kit that has a 10-32 sized insert and includes the same 10-32 tap I found is short enough to tap the gas-admission port hole independently after carefully working it through the 10-32 rear set-screw threads. It will only slightly open up the factory set-screw threads when working it through but will not destroy them, use red-loctite and proper torque (25 INCH/lbs) with knurled cup point set-screws, it will be fine. If you are worried about it then pin the gas-block after installation or use a 3 set-screw securement design like V Seven Weapons currently offers . The length of the cutting teeth on the tap is short enough to work with .625" diameter gas-blocks and is strong enough to tap titanium (even though it is not in the description) for at least a couple of uses. The good news is the gas-admission port holes on these lo-pro gas-blocks are already the correct diameter for tapping 10-32 threads and don't first need to be drilled open.

    Install is pretty simple:
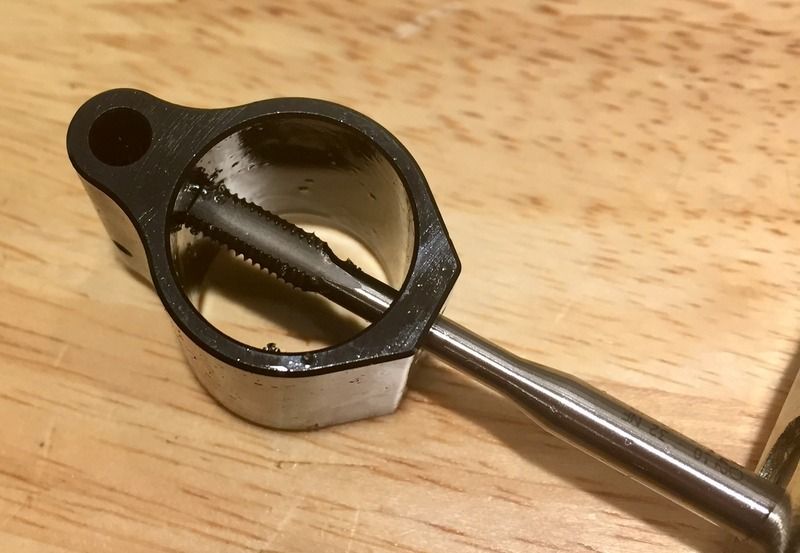
    Take the included tap, oil it up and carefully work it through the rear set-screw threads until it is freely inside the gas-block bore.


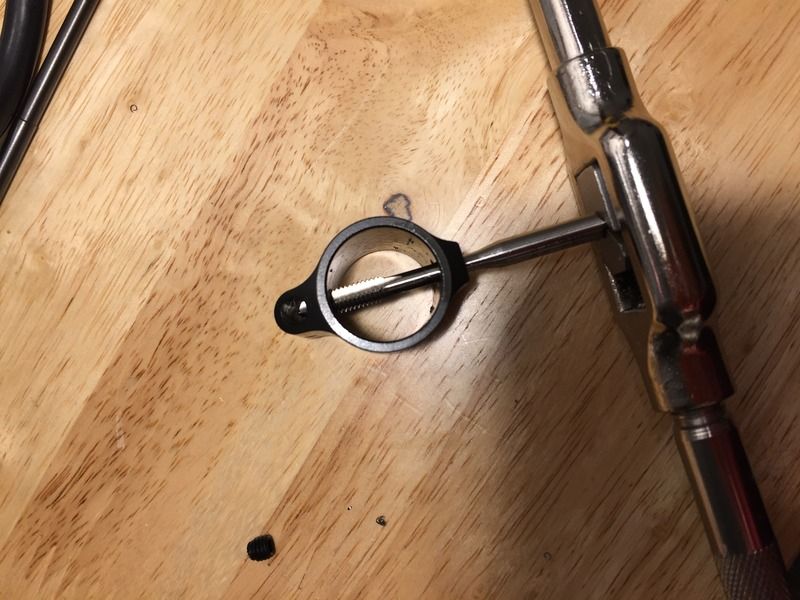
    Second, carefully line up the tap into the gas-admission port hole and, using plenty of oil or cutting fluid, slowly twist cloackwise with slight downward pressure. You will feel it cut. It is important to get the depth right the first time. You do not want to have to work the tap in and out of the rear set screw threads more than once. Don't tap all the way through to the gas-tube channel either. The height of the 10-32 insert is about .156". Put enough threads into the hole that the insert will clear the inner bore diameter of the gas-block. The tap is tapered and the threads will become shallower at the top, it is best to get the thread depth deep enough for the insert to clear the inner bore of the gas-block but short enough the insert will seize tight at the top of the threads before making contact with gas-tube. You want to be able to remove your gas-tube in the future without interference from the insert should the gas-tube need replacement. There is plenty of room for the insert even with scaled down .625" gas-blocks, but if you you are going to error, error on the slightly shallow side since you can always shorten the bottom side of the insert with a file if needed. Do not file down the top side of the insert, as that is where your restricting hole is and you will be removing supporting material. Before working the tap back out of the rear set-screw threads, brush off the metal shavings from the tap so they don't marr the rear set-screw threads.


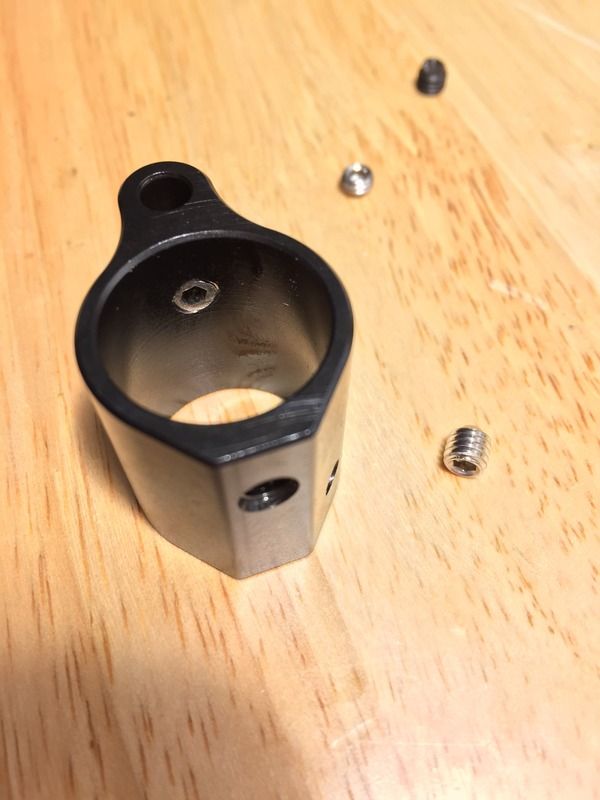
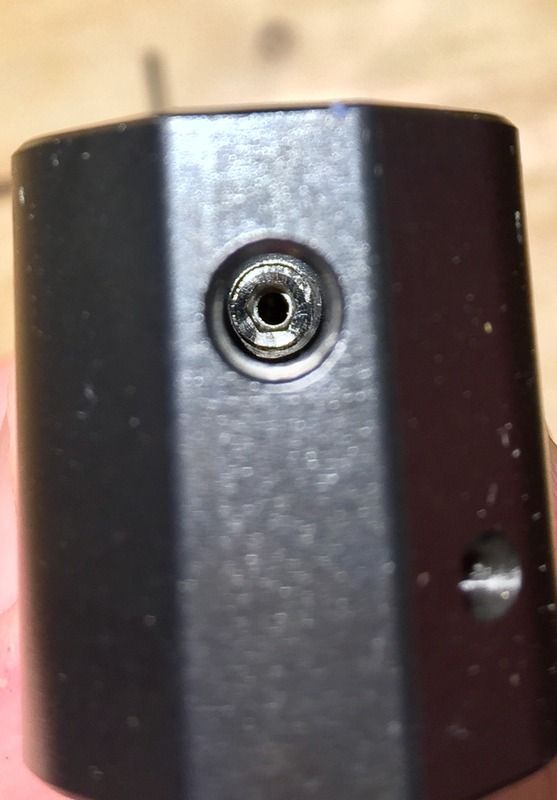
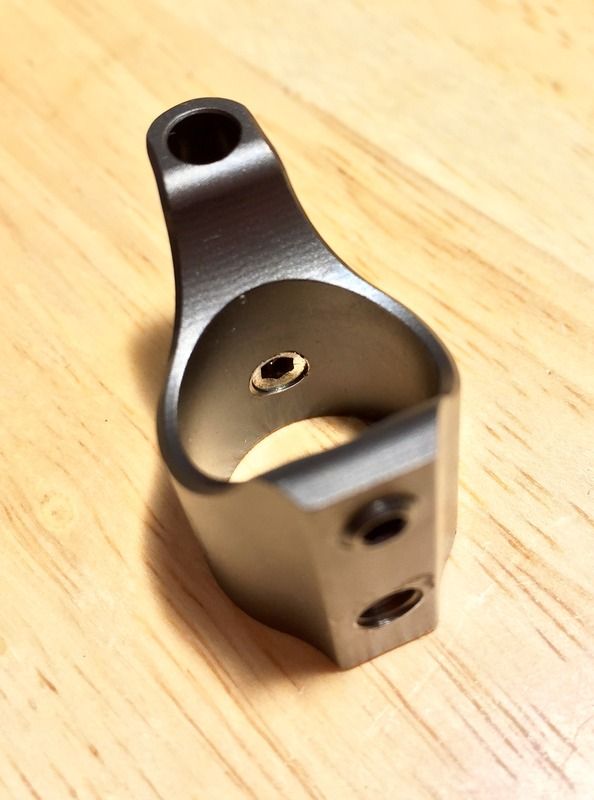
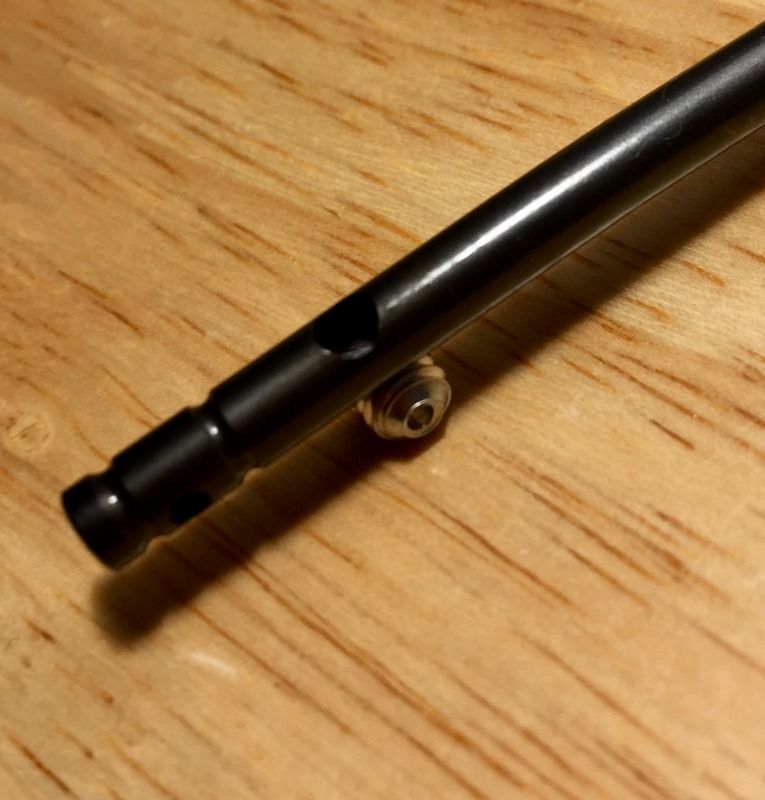
    Clean out all the metal shavings from the gas-block (don't forget to wear eye protection). Using your 3/32 Allen wrench thread the insert through the rear set-screw threads and then into the newly threaded gas-admission port until it it is snug, final install should include oil. Check clearance of your gas-tube, it should move like normal in and out of the gas-tube hole, and check clearance of the insert with the inner bore of the gas-block. Ideally the insert should sit a hair below the edge of the gas-admission port edge to allow for slightly less than perfectly aligned gas-blocks with the gas-port hole in the barrel. Note the 3/32" Allen hole is a about .093" wide so if your barrel's gas-port is gappingly large or you are not sure if you gas-block is perfectly lined up with your barrel's gas-port, you will want some counter sinking effect of the insert sitting slightly lower than the edge of the gas-admission port hole. Keep in mind gas-port holes in barrels are not always in perfect vertical line with the indexing pin on the barrel extentsion either. The gas-admission port in a gas-block is big enough to account for this and seating the insert slightly lower in the hole leaves this margin intact. If the insert does not clear the bore diameter of the gas-block file it down on the bottom until it does, make sure to clean up the edges of the threads so as to remove burrs and any extra thin threads still barely hanging on that could later break lose after install and seize in your BCG gas rings.


    After install test function rifle with all desired ammo types in all operating conditions (esp. cold weather, dirty). This is a semi permenant job since after many rounds the insert may be carbon fouled and seized inside the gas-block gas-admission port.
    You are done. Enjoy the lightest and most robust gas regulating method available. I was not able to measure the weight difference of the titanium gas-blocks with the insert installed. These inserts are made of stainless steel just like the gas-tube is and have no springs or or details to fail. The gas-port inside of the barrel takes the brunt of the powder particulate blast resulting in corrosion, the pressure and blast the insert is then subject to is already significantly lower than to port hole inside the barrel.

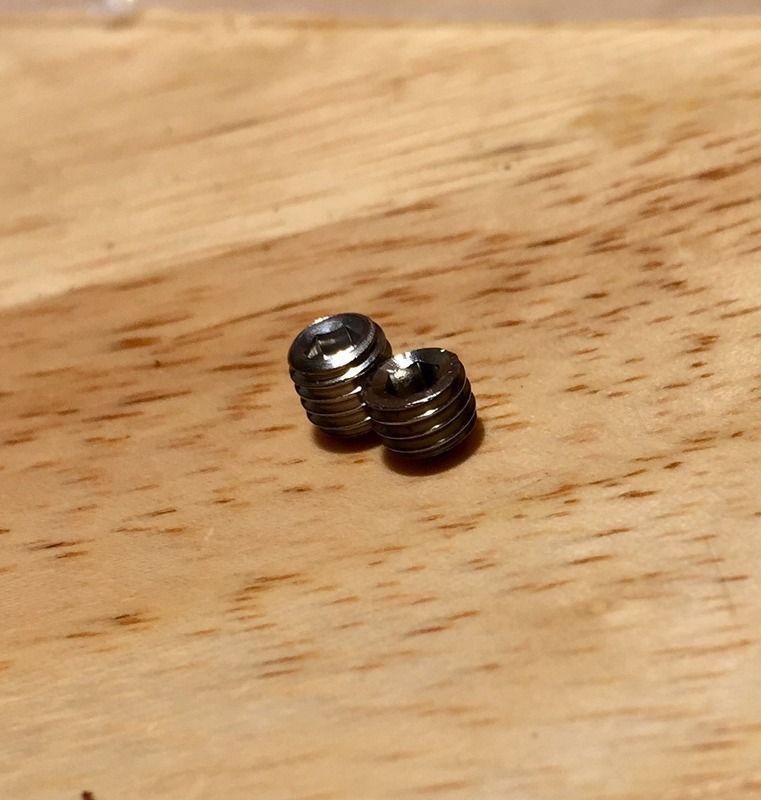
    Up next is how to make your own, If you need to always tinker with something or have a fleet of rifles in need of this modification or maybe both. Note the inserts in the photos above are of my own making, but the install process is the same as BRTs CustomTune Gas Port inserts.
    Last edited by jerrysimons; 02-14-17 at 17:15.

  2. #2
    Join Date
    Jan 2013
    Posts
    1,871
    Feedback Score
    25 (100%)
    Rolling your own:
    At the time BRT didn't make a 10-32 sized insert that would work with most lo-pro gas blocks so I set out to make my own. Now there is not much of a reason to not buy his stuff, except maybe to make a .065" hole insert (which he could probably do on request).

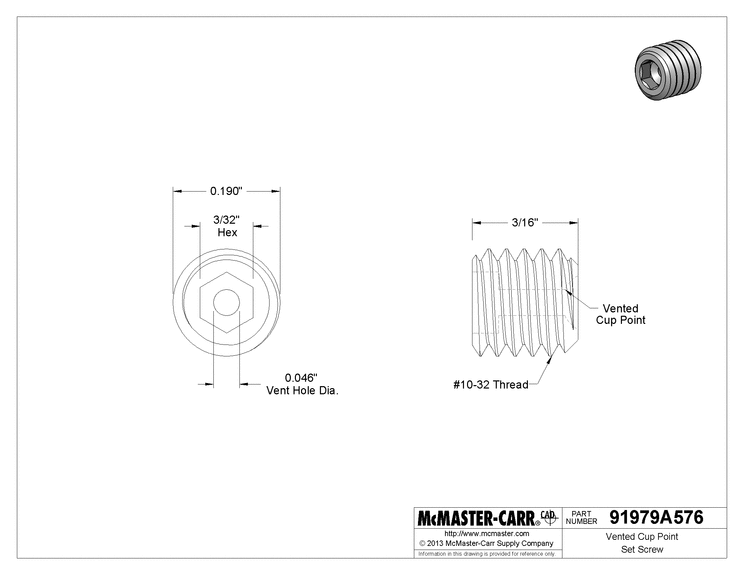
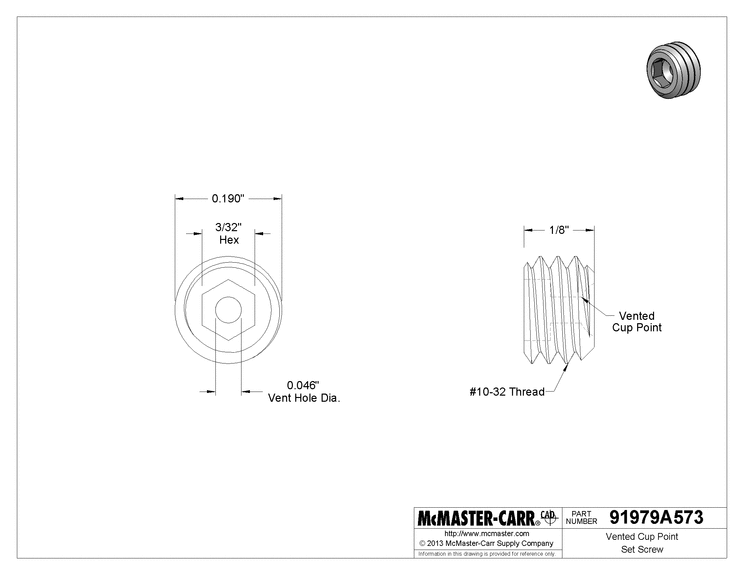
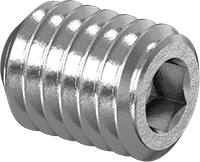
    I poked around on McMaster Carr for a while and found 10-32 threaded 18-8 stainless steel vented cup point set screws 3/16" long. The vent hole at the tip is already .046" diameter and would serve as a great pilot hole for the tiny drill bits needed to dial in the desired size to restrict gas flow.


    Now 3/16 or .190" tall is a little long so the screws would have to be shortened to about .140-.150" tall to fit well in a gas-block, but that was doable since I would need a drill press or mill to successfully drill the desired regulating hole size anyway. They do make this set-screw in 1/8" or .125" tall but I am not sure if there is the same amount of material in the tip as the 3/16" tall set-screw. I tried to section a few to see but it was hard to tell. The bigger the regulating hole the more supporting material on the sides since the tip is dish shaped/cup point. I didn't have a way to section the screw precise enough to see so I defaulted to shortening the longer screw (also because BRT inserts are .156" long). If the 1/8" set-screw has the same amount of material supporting the regulating hole then one would not need to tap the gas-block as deep or shorten the screw, only to drill the regulating hole.

    Anyway I ordered a bunch of drill bits in standard fractional and wire gague sizes and to fill the gap between .0625" and .067" a metric 1.65mm / .065" bit.

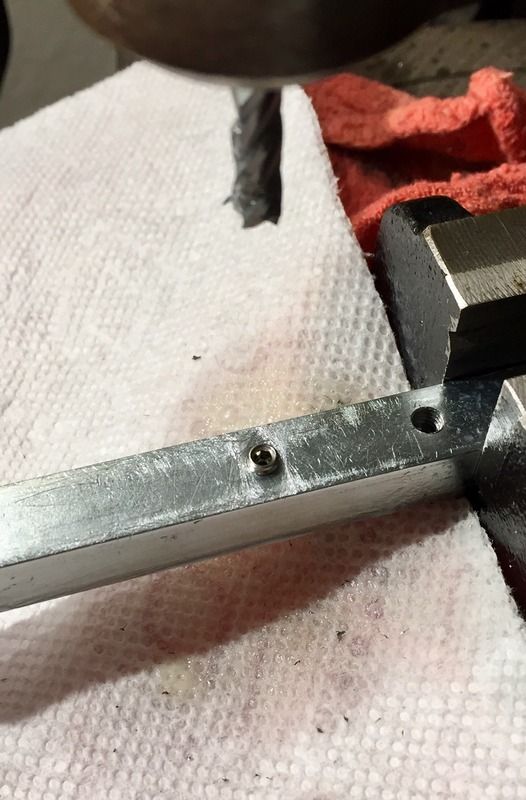
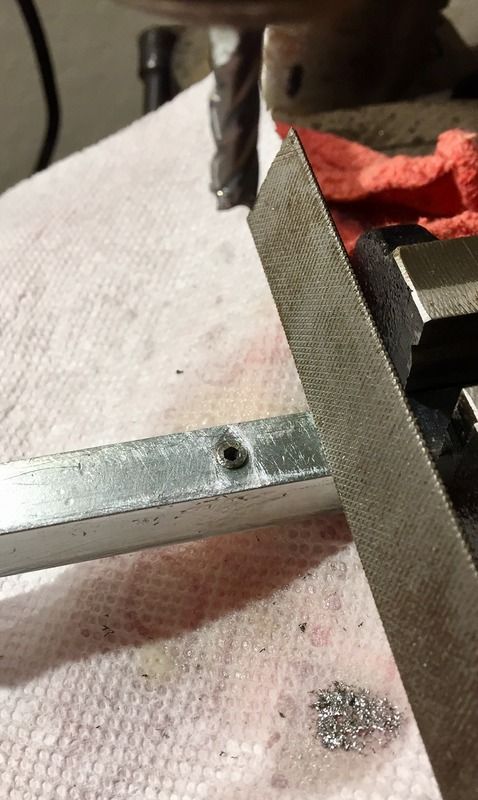
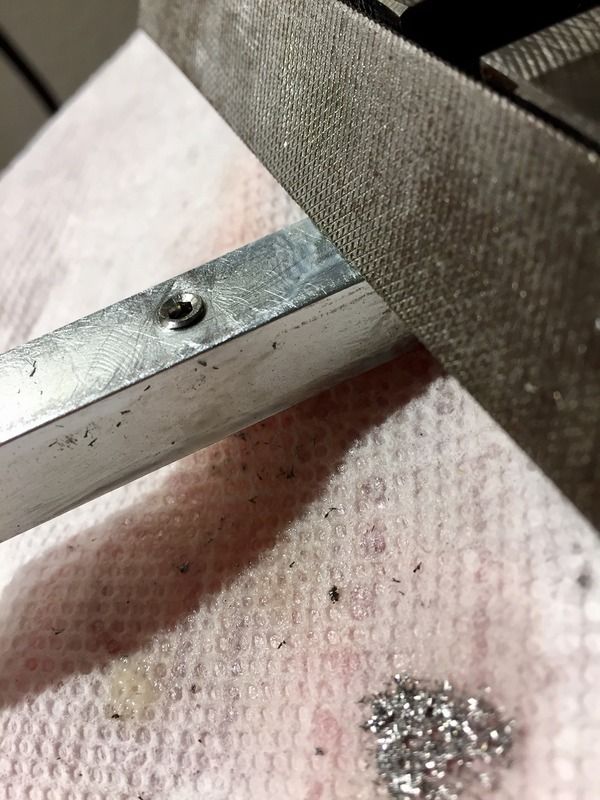
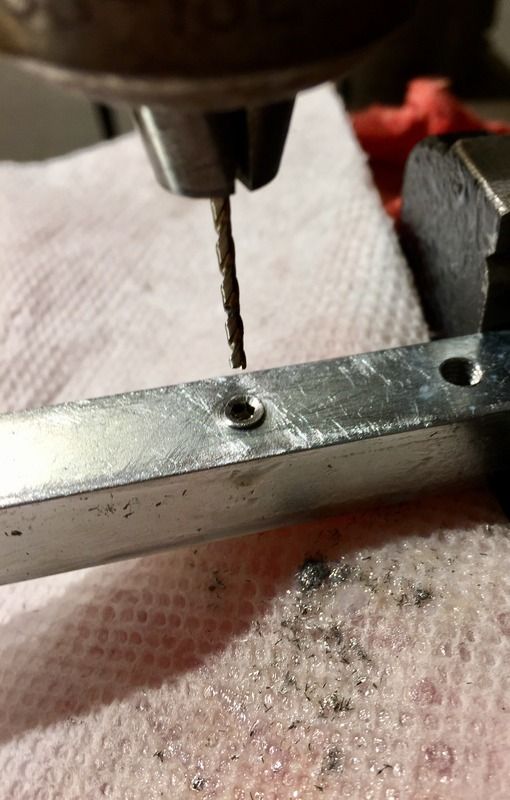
    Next I went about finding a drill press to discover that they all suck. One really should use a mill. But that was cost-prohibitive and a friend of mine gave me his older Taiwanese made JET stand-up drill press that was decent and free. After making a jig out of bar stock with a tapped hole to hold the set-screw steady at the appropriate depth while shortening it with a center cutting carbide end-mill bit and for holding it while drilling out the vent hole, I tested the set-ups ability to hold a tolerance by drilling a .0625" hole in the set-screw and then trying to fit a .0635 inch drill bit through. It would not fit after several repeats so I considered that good enough and expensive mills and rheamer bits not necessary. After shortening the set-screws I decided to also bevel the edges of the set-screw with a wide 135* split point drill bit just because it looks good and is similar to how they come. It is not really necessary since you can just seat the insert a little bit past the gas-block gas-admission port hole but it looks good. After shortening and beveling the set-screw insert, the threads on the end need to be cleaned up with a file as they get very thin and flimsy at the end due to being shortened. The jig has a hole going all the way through but the threads are not as deep so it stops the screw short enough to where .150" tall leaves enough thread exposed to clean up with a file.

    Pretty simple really. An important safety point is in addition to wearing safety glasses (obviously) also use a lot of cutting oil because the chips and shavings will stick to it and don't fly away, it also makes clean up easier.


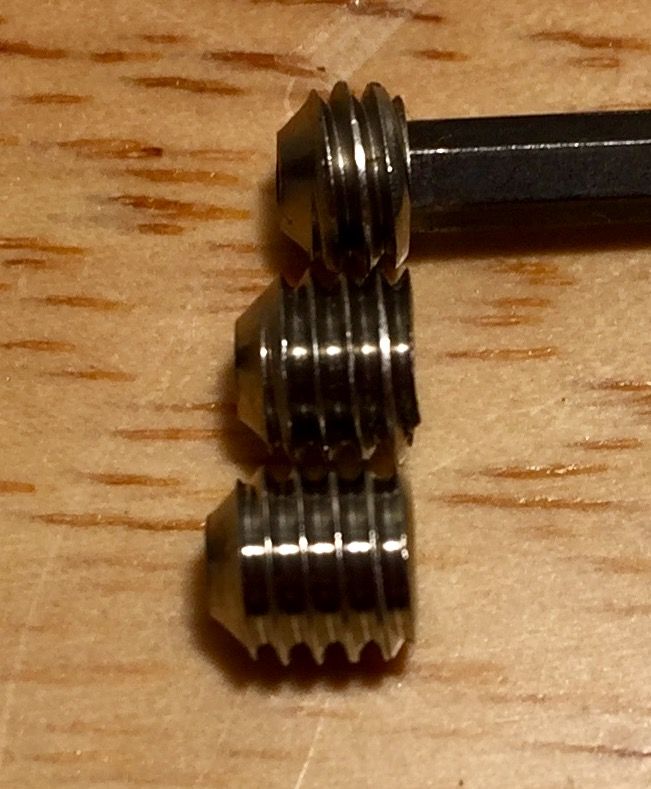
    Before and after


    The one in the middle is shortened but not yet cleaned up the threads from cutting. The top one is 1/8", bottom 3/16"
    Last edited by jerrysimons; 02-19-17 at 13:00.

  3. #3
    Join Date
    Dec 2008
    Location
    Las Cruces, NM
    Posts
    50
    Feedback Score
    1 (100%)
    Thank you for sharing. Good info here.

  4. #4
    Join Date
    Apr 2009
    Location
    Texas
    Posts
    4,364
    Feedback Score
    17 (100%)
    Jerry, simply an out-f*cking-standing post! Thank you for contributing to the knowledge base!

    I've also used the BRT inserts with great success. They are, indeed, bomb proof.
    "That thing looks about as enjoyable as a bowl of exploding dicks." - Magic_Salad0892

    "The body cannot go where the mind has not already been."

  5. #5
    Join Date
    Jan 2013
    Posts
    1,871
    Feedback Score
    25 (100%)
    Quote Originally Posted by BufordTJustice View Post
    Jerry, simply an out-f*cking-standing post! Thank you for contributing to the knowledge base!

    I've also used the BRT inserts with great success. They are, indeed, bomb proof.
    Thanks BTJ! It really is a great, duty-grade way to correct overgassing. I especially like it because I can use my preferred barrels without fretting over gas-port size. Also it is versatile with gas-block selection. Novekse's barrels have big gas-ports and come with a pinned-on GB, so it is definitely the best option there! Also it is the lightest gas-regulating method available. I have some of SLR Rifleworks titanium Sentry 6&7 series adjustable gas-blocks (that I paid extra to cerakote black!) and they are still a few tenths of an ounce heavier than V Seven Weapons non-adjustable titanium GB and all most a half ounce heavier than Battle Arms Development .625" titanium GB when the inserts are installed.

  6. #6
    Join Date
    Apr 2013
    Posts
    140
    Feedback Score
    0
    I think with this setup, gas block install position would be critical for correct gas port alignment, because the flow restrictor has taken away all of your margin for error.

    Do you have a method (other than eyeballing it) to ensure gas port alignment?

    I suppose you could plug the crown, pressurize the chamber and flow the gas tube like we do with cylinder heads. Youd likely have to design and build your own flow setup. Ive never heard of anybody that sells a flowmeter for AR gas tubes.

  7. #7
    Join Date
    Apr 2009
    Location
    Texas
    Posts
    4,364
    Feedback Score
    17 (100%)
    Quote Originally Posted by BFS View Post
    I think with this setup, gas block install position would be critical for correct gas port alignment, because the flow restrictor has taken away all of your margin for error.

    Do you have a method (other than eyeballing it) to ensure gas port alignment?

    I suppose you could plug the crown, pressurize the chamber and flow the gas tube like we do with cylinder heads. Youd likely have to design and build your own flow setup. Ive never heard of anybody that sells a flowmeter for AR gas tubes.
    Various companies make jigs. It makes alignment perfect every time.
    "That thing looks about as enjoyable as a bowl of exploding dicks." - Magic_Salad0892

    "The body cannot go where the mind has not already been."

  8. #8
    Join Date
    Jan 2013
    Posts
    1,871
    Feedback Score
    25 (100%)
    Quote Originally Posted by BFS View Post
    I think with this setup, gas block install position would be critical for correct gas port alignment, because the flow restrictor has taken away all of your margin for error.

    Do you have a method (other than eyeballing it) to ensure gas port alignment?

    I suppose you could plug the crown, pressurize the chamber and flow the gas tube like we do with cylinder heads. Youd likely have to design and build your own flow setup. Ive never heard of anybody that sells a flowmeter for AR gas tubes.
    Well it is not that hard to eye ball or use other methods of measure but I prefer the Black Rifle Disease Engineering dimpling jig. Dimple the rear set-screw only, it is directly underneath the gas-port. These jigs index off the gas-port hole in the barrel which is not always drilled exactly vertical with the indexing pin on the barrel extentsion. If this is the case the gas-block will align with the dimple (use a split-point drill-bit and cup-point set-screws to get the funneling effect of alignment) and the hump on the gas-block might not be exactly in line with the upper receiver. This is fine as long as it is not too much off, the bend and play in the gas-tube has the ability to compensate. The gas-tube might need to be tweaked some inside the upper for bind-free alignment, which is not unheard of.

    Even still the 3/32" Allen hole is .093", so if the insert sits flush you still have a little room depending on the gas-port size of the barrel you are staring with. But your point is why I recommend seating the BRT CustomTune insert a little below flush with the gas-block bore and is also why I beveled the edges of the opening on my DIY inserts. Some lo-pro gas blocks may have been seated against the barrel shoulder and the GP location might be different on some barrels in the case of a gas-block that came pre-installed or pinned and you are preforming this mod. You want to keep the margin of offset the gas-admission port allows intact.
    Last edited by jerrysimons; 02-18-17 at 12:58.

  9. #9
    Join Date
    Mar 2014
    Posts
    1,864
    Feedback Score
    3 (100%)

    Thumbs up

    Fantastic post! Thank you for the time, effort and expense that you put into this. I'm sure it will help many deal with an over gassed system.

    This needs to be pinned.
    “I predict future happiness for Americans, if they can prevent the government from wasting the labors of the people under the pretense of taking care of them.”
    Thomas Jefferson

  10. #10
    Join Date
    Jan 2013
    Posts
    1,871
    Feedback Score
    25 (100%)
    Update:
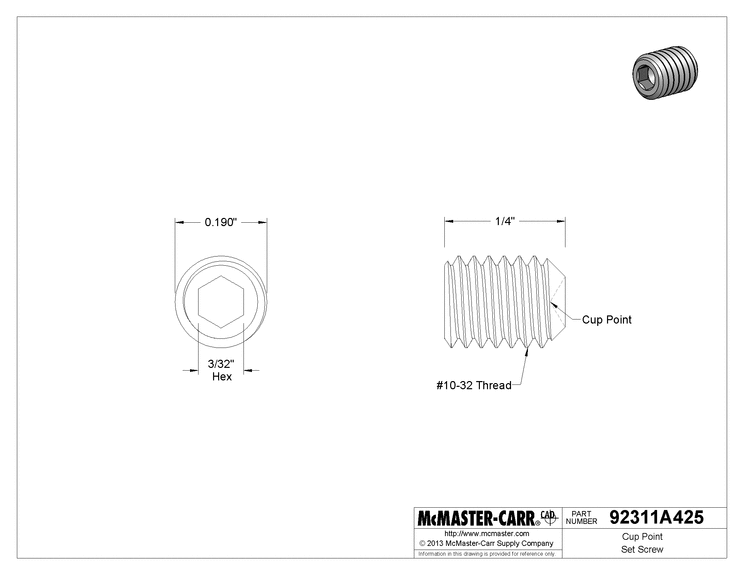
    I found 1/4" long 10-32 threaded cup-point 18-8 stainless set-screws make a great insert.


    The depth of the regulating hole is significantly deeper with the 1/4" set-screw than with both the 1/8" and 3/16" cup-point or vented cup-point set-screws. There is much more material inside the threads to support a regulating hole with the longer screw (I have not yet received the vented 1/4" set-screws to see if the same is true for the vented version, which doesn't eat up bits as fast as the non-vented). The longer 1/4" set-screws must be shortened on both ends to get down to about .156 inch from .250 inch and still have enough depth in the Allen hole to still work with the 3/32" Allen key.


    First I threaded the 1/4" cup-point set-screw up side down into the jig and used the cupped tip as a centering guide to drill the regulating hole.

    Then I shaved the tip off the cup-point end down to the beginning of the threads (BRT's inserts look similar)

    Once done with the pointed side I shaved down the Allen key side until the screw was about .150 inch tall and then cleaned up the thin edges around the threads with a file. I did not bevel the inlet edge because there was not much left of the Allen key hole after shortening.

    Having a deeper regulating hole should in theory make the insert more resistant to heat and erosion while maintaining the desired regulation, though it does take more time to shorten and to drill (especially with the non-vented screws).

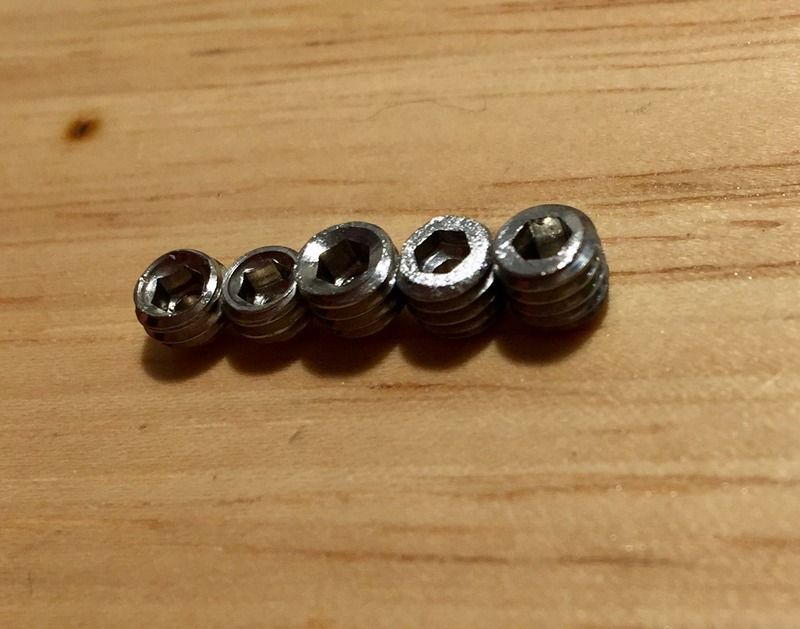
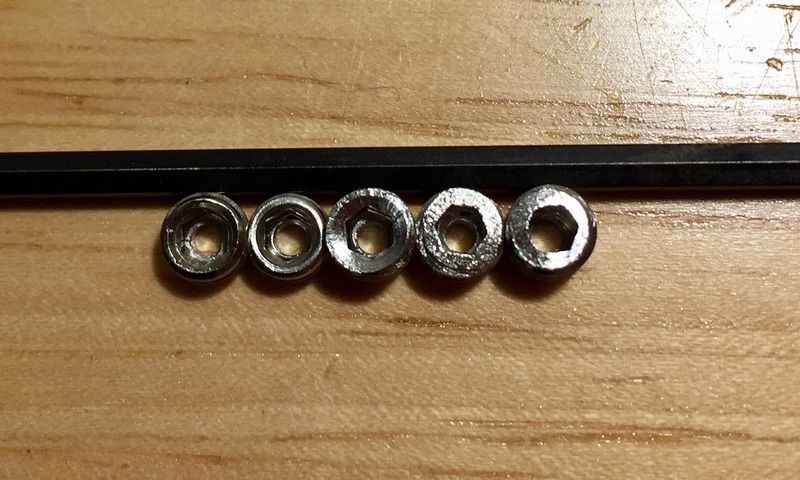
    Left to right:
    1/8" non-vented and vented cup points, 3/16" vented cup point shortened and beveled, 1/4" non-vented cup point shortened on both ends, BRT CustomTune HD insert (10-32 threaded .156" tall)


Page 1 of 15 12311 ... LastLast

Bookmarks

Posting Permissions

  • You may not post new threads
  • You may not post replies
  • You may not post attachments
  • You may not edit your posts
  •