Page 3 of 3 FirstFirst 123
Results 21 to 26 of 26

Thread: My "jack of all trades" build

  1. #21
    Join Date
    Jun 2007
    Location
    Northern VA
    Posts
    1,157
    Feedback Score
    247 (100%)
    Spyderman,

    Great post and thanks for stepping up to the plate even going the extra mile showing how you have the XTM manuals installed. Was checking out if it was an option with my Mega upper/rail and no dice - preset screw holes not lined up with the Magpul gods...
    Glocks are functional tools and nothing else, hence they have no soul - Rob S.

  2. #22
    Join Date
    Aug 2010
    Location
    TX
    Posts
    166
    Feedback Score
    2 (100%)
    Love it! Thanks for taking the to
    explain everything.

  3. #23
    Join Date
    Jun 2009
    Location
    Fairfax, VA
    Posts
    25
    Feedback Score
    0
    Your build is awesome. You are giving me the itch to modify my gun now and add a Battlecomp, A5 extension tube, and STR stock.

    How is the center of gravity balance with your setup and the STR stock? How do you like the STR stock?

  4. #24
    Join Date
    May 2009
    Location
    Pittsburgh, PA
    Posts
    280
    Feedback Score
    1 (100%)
    Quote Originally Posted by davidjinks View Post
    OP

    I didn't see it mentioned in the thread...

    You have a SD-C trigger but those pins don't look like standard Geissle pins. All of my SD-C pins are dimpled.

    Solid build and great walk through about the XTM panels.
    That's interesting about the pins. I definitely used the ones that came with the trigger, so I really don't have any idea


    Quote Originally Posted by wellnerde View Post
    Your build is awesome. You are giving me the itch to modify my gun now and add a Battlecomp, A5 extension tube, and STR stock.

    How is the center of gravity balance with your setup and the STR stock? How do you like the STR stock?
    Honestly, there were two major inspirations for using the parts I did. The first, I built a lightweight rifle for my wife (which was inspired by many other threads and lightweight builds- that led to the LW barrel, chopped FSB, and Troy handguard). The second inspiration was a post I came across (I believe when reading about battle comps), I saw someone say something along the lines of "a Geissele trigger, Battle Comp, and A5 system would be one of the nicest shooting guns out there." That post was followed by a lot of positive responses. That caused me to research each part extensively, and here I am. Moral of the story is, getting the itch for building the best firearms possible is quite contagious at this forum


    The center of gravity is pretty much perfect... or at least as good as I'm gonna get it! With or without a magazine, it seems to balance between the pivot pin and the rear edge of the handguard. A huge improvement over my last setup, with was very front heavy. So as for saving weight and moving the center of gravity more toward the center, it's mission accomplished.

    As for the STR- As stated, initially the battery storage was actually a big part of the reason for the purchase, and the nice cheekweld was a bonus. Upon receiving it I was a little unsure about it. I've been spoiled with several CTR stocks and they lock up as tight as you can imagine. While it makes no difference for function, I personally like the feel of as solid of a gun as I can get. The STR has a little bit of play (very very slight back and forth, and a little more side to side). After reading a number of reviews, I came to find it's quite common (which was actually a let down- I was hoping if it was just me I could exchange for a new one that locked up really tight- oh well). It's still tighter than stocks without a locking lever.

    After having used it a bit over the last couple weeks (both dry and live), I love it. The battery storage is practically an afterthought (though it's still a nice feature), and I don't notice any play during actual use. The reason I love it is the cheekweld. It definitely is nicer than CTRs (what I have the most experience with) and similar shaped stocks. It's not really an issue with red dots, but with the 1-4, even on 1 I have to have a pretty consistent cheek weld. It's not that it was hard to get with the CTR, but the STR is just more natural.

    I hope this helps.

  5. #25
    Join Date
    Feb 2012
    Posts
    846
    Feedback Score
    1 (100%)
    Thanks for explaining about the XTM panels. I will have to try that for my Alpha rail.

  6. #26
    Join Date
    May 2009
    Location
    Pittsburgh, PA
    Posts
    280
    Feedback Score
    1 (100%)
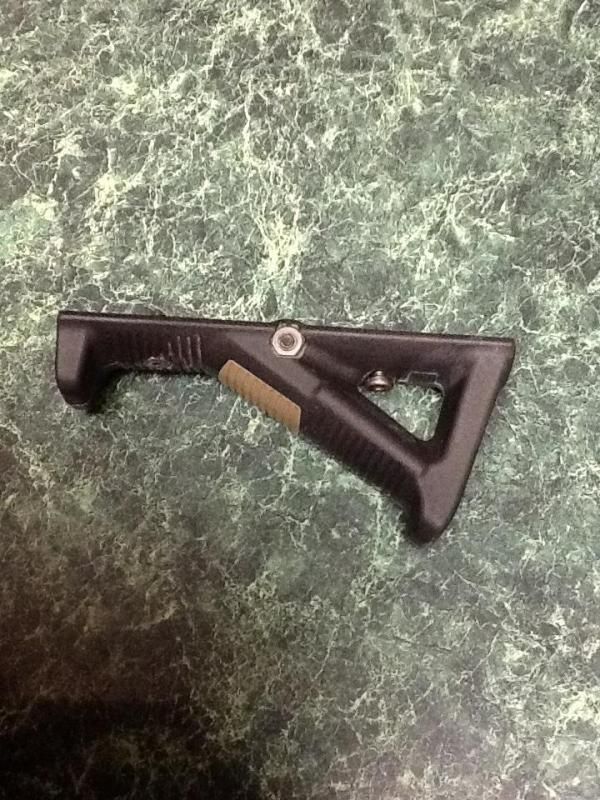
    I recently got a PM asking me to explain a little better how I attached the AFG, so I figured I'd just post it in here for all to see. I have to apologize because all I have is my finished product. It would be much easier to explain and to understand if I had step by step photos, but I will do my best to explain. (Sorry for the crappy gritty pictures)

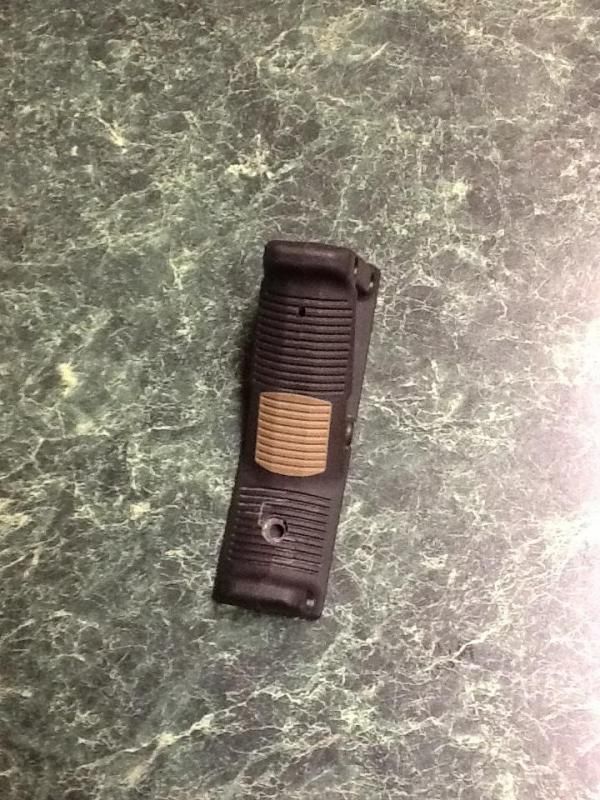
    First I cut the wings off just like I did on the rail covers so it can sit much tighter. Next, I drilled 2 holes to mount it to the long back plate that came with the rail.


    I put the first (front) hole in the center of the front part that locks together. The back hole goes wherever the backing plate dictates.


    Drill both from the rail side. Be careful with the second hole and don't drill too deep (you don't want to hit the angled part if you can avoid it). I can't remember what diameter of bit I used (maybe I posted earlier in the thread? Whatever will just allow the threaded portion of the 10/32 screw).

    You will then need to use a MUCH smaller bit to drill a hole in the angled portion, whatever bit size will allow your allen wrench to pass through.


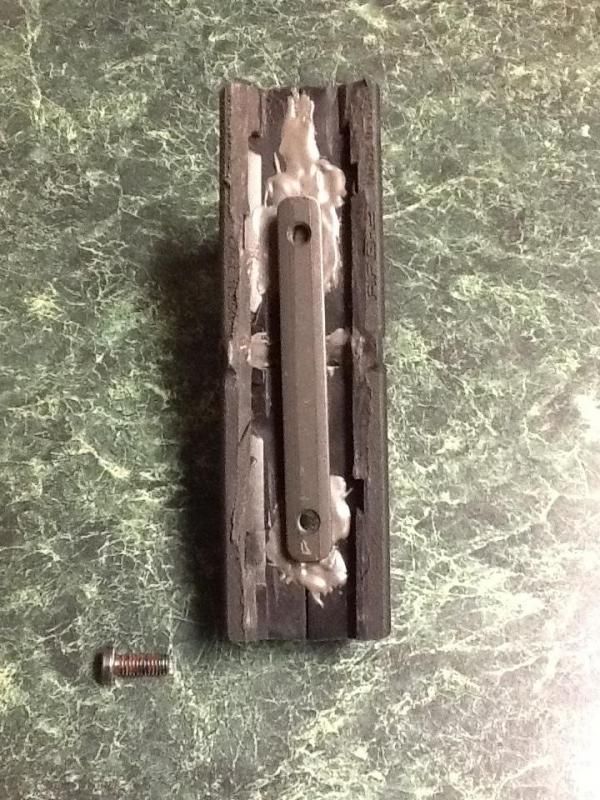
    Now for the most tedious part. Take the halves apart. Because there is no way to countersink the back hole with a bit, the only way I've come up with is to dremel out enough from each half for the head of the screw to sit down into. Because your hand doesn't come in contact with it, it doesn't need to be completely flush, but it does need to sit in a little bit so you have enough threads exposed for mounting. Make sure you are happy with how it fits, because after the next step there's no going back. This is also a good time to be sure whether you want to have the bump or have the flat part installed, because you won't be able to change it.

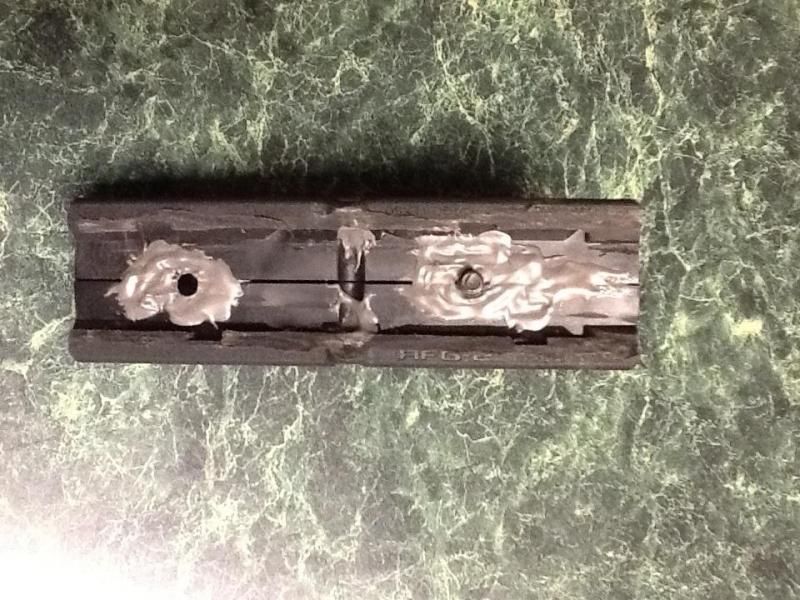
    Because there's a lot of drilling into thinner areas, I basically fill everything with JB weld and make it one solid piece, and eventually add JB weld to the rail side to reinforce everything. The tricky part is once it is one solid piece, there is no way to get the back screw in, so we need to make sure it is in place BEFORE we JB weld it all together.

    While the two halves are apart, place the screw in the back hole, then put the halves together (don't forget to put in the bump or the flat insert). If you are happy with how it fits, JB weld it all together, just avoid the holes (especially the back hole where the screw is. Add some JB weld around the holes on the rail side for reinforcement.


    Once it sets, countersink the front hole (again, a drill press is highly recommended. I'm not even sure if it can be done decently with just a hand drill). Just go a little at a time until the head of the screw sits flush. If you go to deep you'll really weaken it and potentially ruin it.

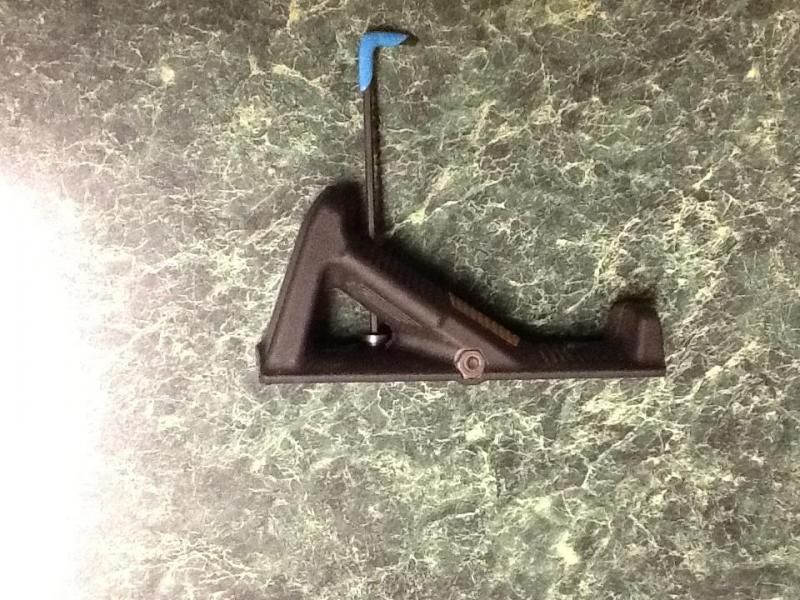
    Note: The screw that goes through the whole grip that sits into rail slots will get in the way. To keep it clean looking, I cut the head off the screw and JB welded it into place, along with the nut on the other side.

    And the finished product


    If any of it wasn't clear or anyone has any questions, just let me know!

Page 3 of 3 FirstFirst 123

Bookmarks

Posting Permissions

  • You may not post new threads
  • You may not post replies
  • You may not post attachments
  • You may not edit your posts
  •