First off, this is for HAM radios, not your typical “Cobra two way radios” so if you are looking for something like that, this headset is not compatible nor do I know what parts you would need or how to do it. If you are looking for something like that, maybe this DIY will inspire you to figure something out or give you an idea or direction of what to do. You do need to get your license to operate a HAM radio. It’s not too bad, not expensive, and good skill to have for SHTF.
DISCLAIMER: I am not responsible for any damages done, if you shock yourself, or getting your dick caught in a ceiling fan because you didn’t understand.
So you want if you want:
Enhanced hearing
Ear protection
Comms
You’ve come to the right place! I have looked around online and I didn’t like what I was finding. I didn’t want to spend a ton of money on Peltor’s and be strapped to only using the Motorola radio so I decided to figure out something myself. Luckily, it came out to just under $95 to do the entire headset. This was my first “build” and this thing turned out AMAZING, but I know there are a lot of smarter guys out there than I am so if anyone else tries making this and finds a better way to do it, PLEASE share with everyone else on here!
PARTS LIST:
Howard Leight Headset $40 (Amazon) http://www.amazon.com/Honeywell-Ampl...1&sr=8-1-spell
Industrial strength Velcro -$4 (Walmart)
U.S Tactical Sewing Headset Cover $23 (Amazon) http://www.amazon.com/Advanced-Modul...actical+sewing
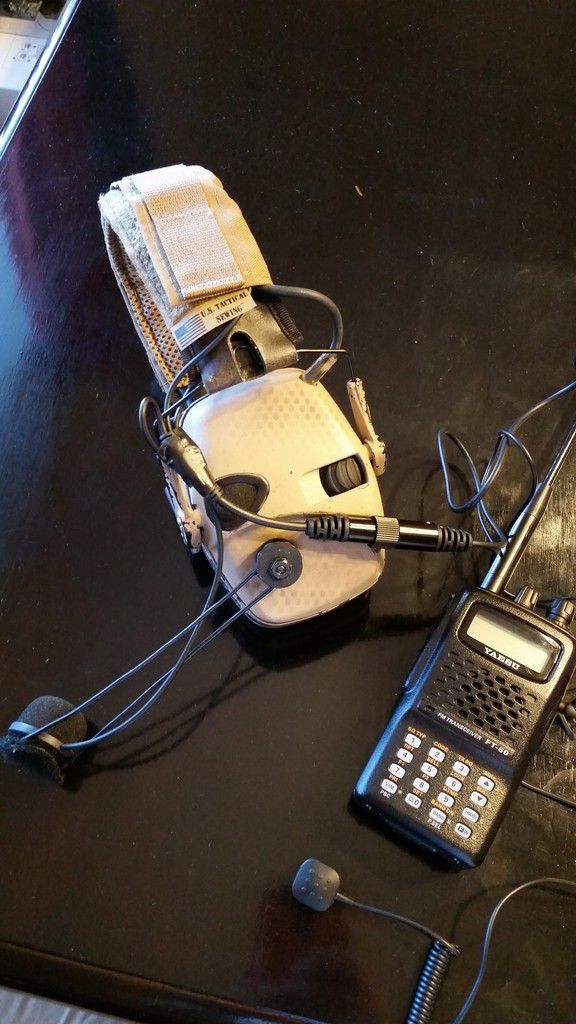
PTT Helmet Headset $22 (This one is for Yeasu Radio’s ONLY you will need to find one of these that will have a compatible connector for your radio) My radio is an Yeasu FT-60R.
https://www.argentdata.com/catalog/p...products_id=97
(3) ½ inch Neoprene Faucet Washers- $1.20 (Ace Hardware)
1 Mini Neoprene 5/32 washer 4 pack -.30 cents (Ace Hardware/Home depot)
1 Metal Washer -.10 cents (My garage/Ace Hardware)
(1) 6-32 x 3/4 Screw and hex nut .35 cents (Ace Hardware)
Gorilla Epoxy 5 min set (My garage/Walmart)
Epoxy Coated Wire (My garage/Home Depot, Lowes, etc)
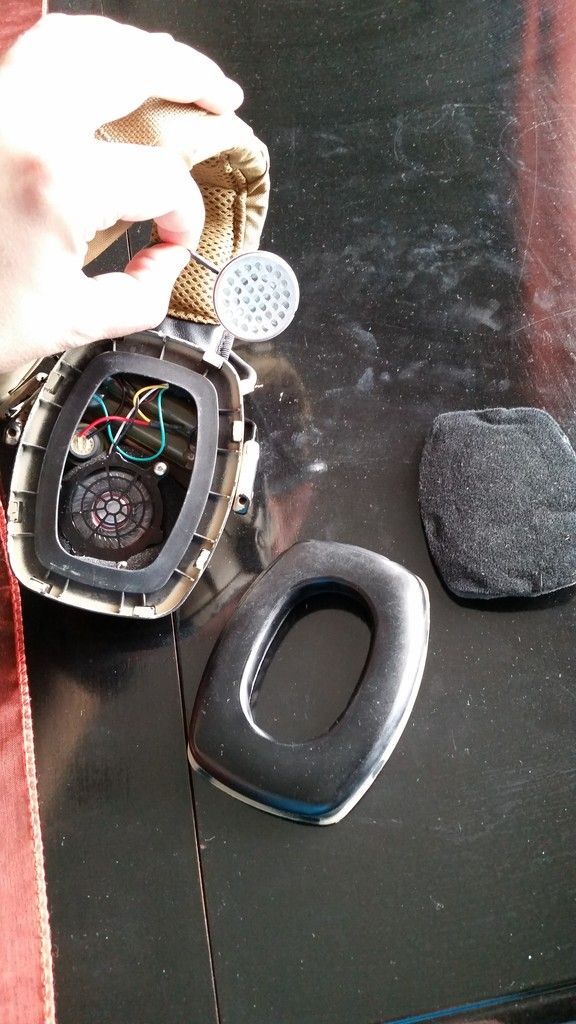
First step is to take the “foam covers” off the PTT Helmet headset until you get just the metal speaker part (it is the silver disc like part in the pic). You will then take the rubber hearing seals off your HL headset and carefully tug at the foam inserts that are in your HL headset revealing the wires and stuff inside. (You may have to slightly pull the foam inserts a bit to get them out. I noticed that one of them came out as if it was just placed in there and on the other side most of it came out, but it seemed like there was a tad bit of glue on the corner making it a little tougher pulling straight out)
Now this part is optional, but I did it so the wires from the PTT Helmet headset would fit a little better. I ended up taking a dremel and VERY carefully made one groove on the top ear piece so the wires wouldn’t be pinched.
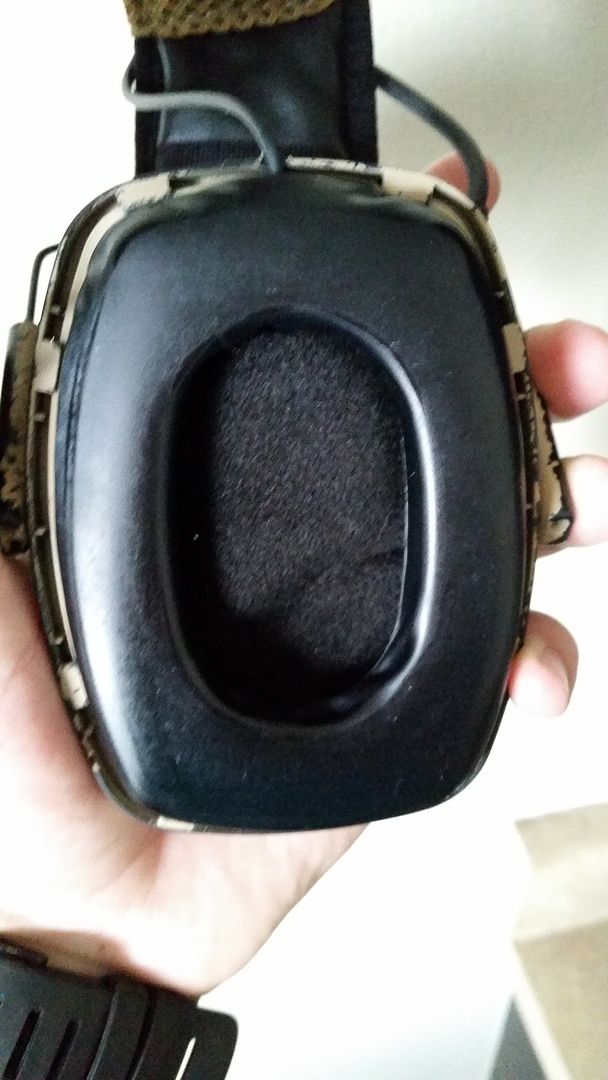
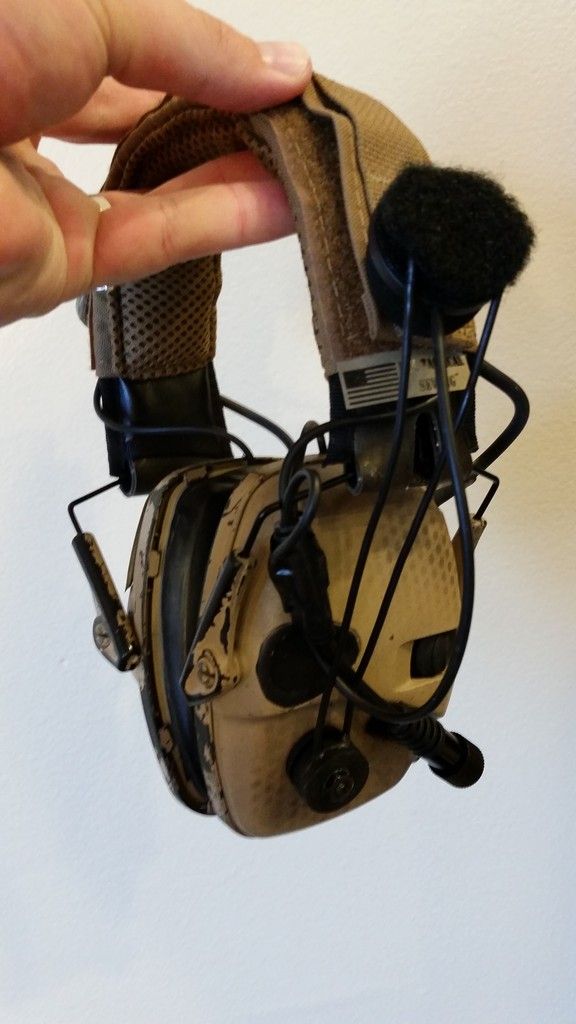
You will then put the speaker inside and put the foam insert back and tuck all the edges in and then put the rubber seal piece back. This side is done. I put the speaker near the top so I would get a better seal on the lower half of my ear. It will bulge a little, but you should be ok.
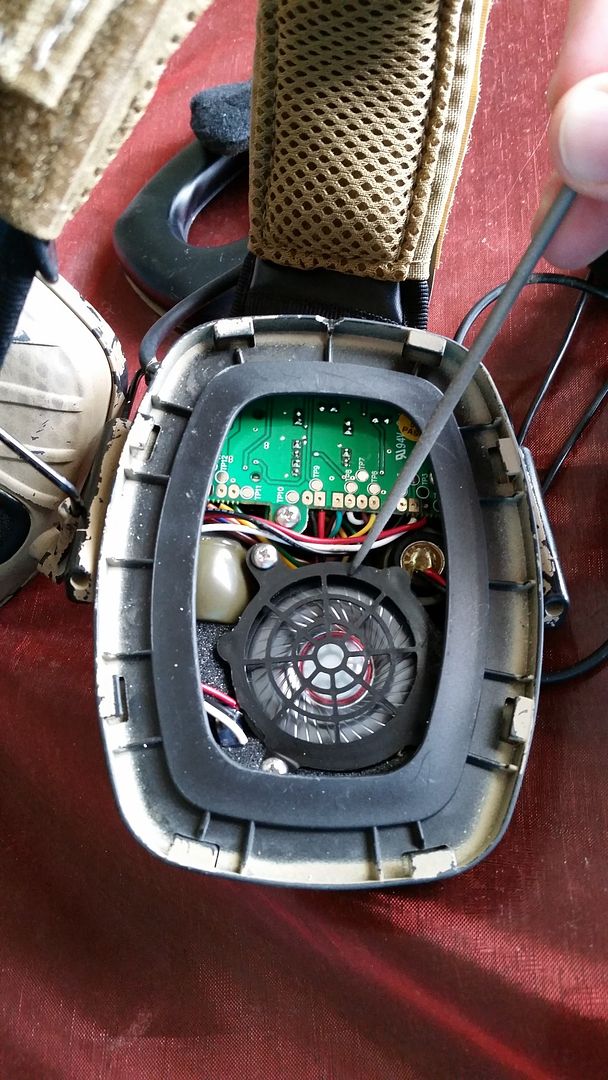
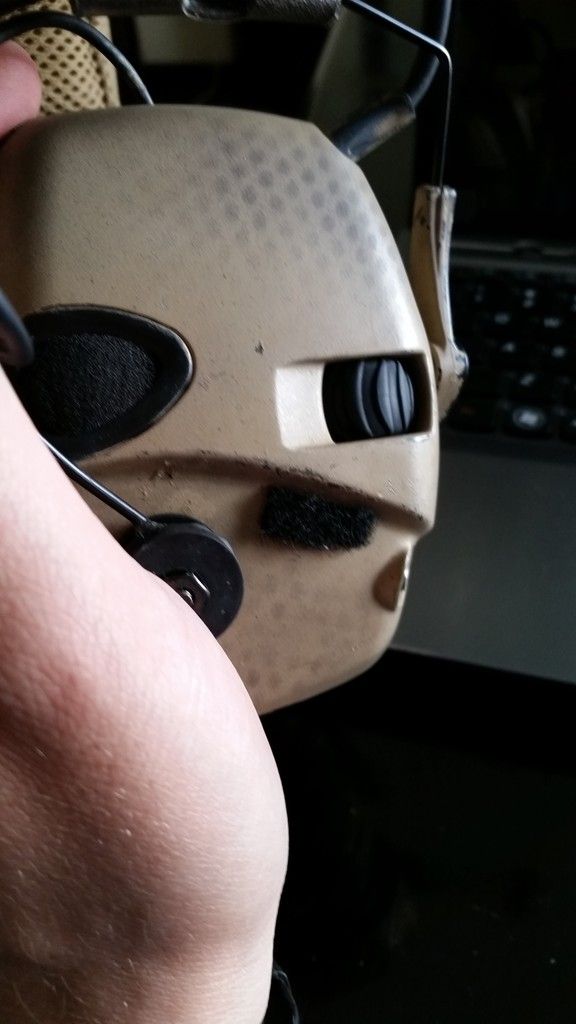
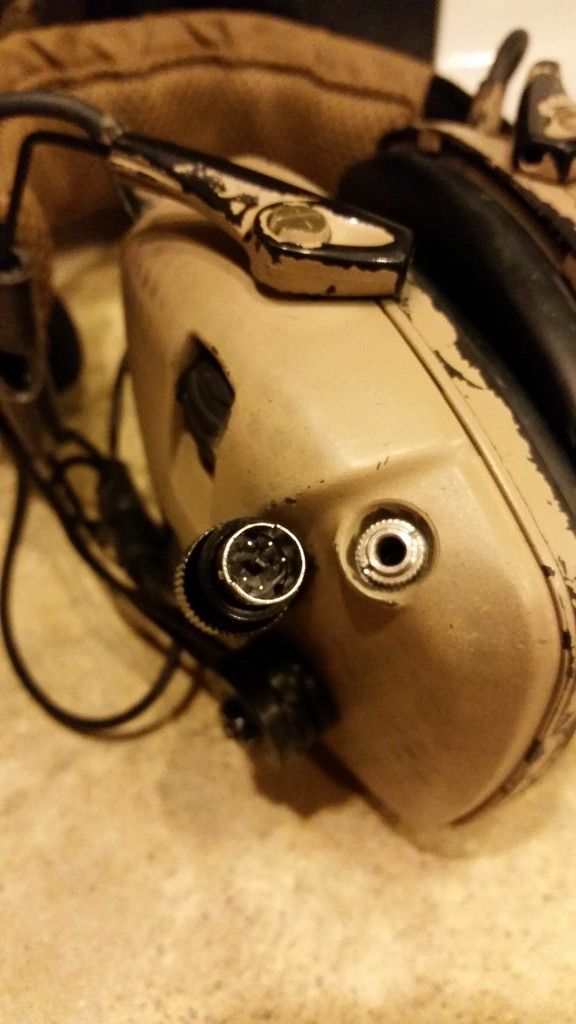
Now, you will go on the other side and take it apart and do the same thing you just did on the other side. Now, I put my mic on the volume control side (you can put the mic on whichever side you want. On this side when you take it apart, you will notice the audio speaker and that it is attached by three screws. Take out the first two screw on the left The screw on the right is tucked away under the lip and is REALLY tough to get to. I used a pair of needle nose pliers to kind “wrench it” most of the way out. *Not completely out, but a ways out*
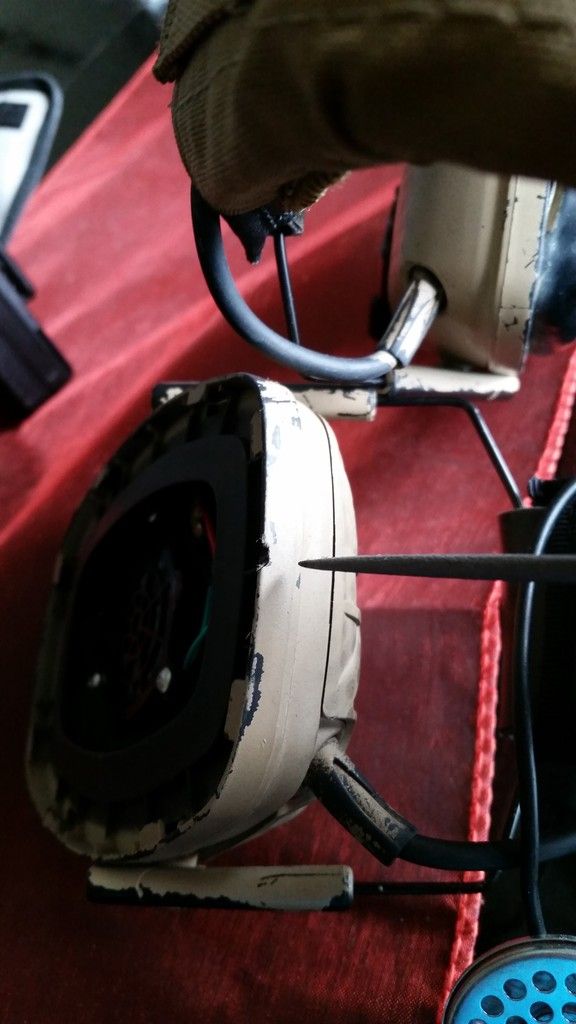
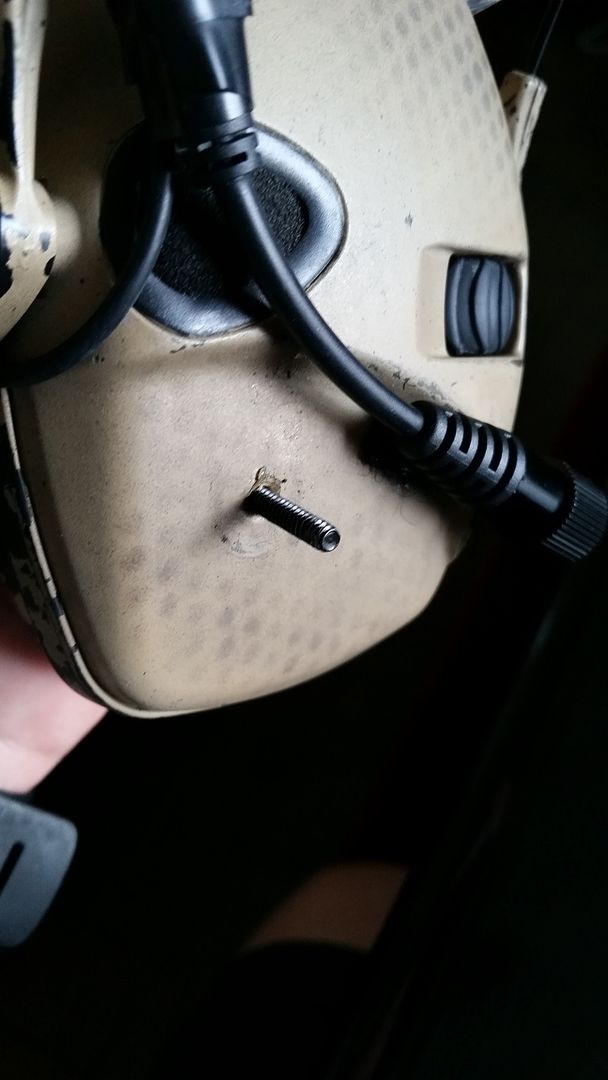
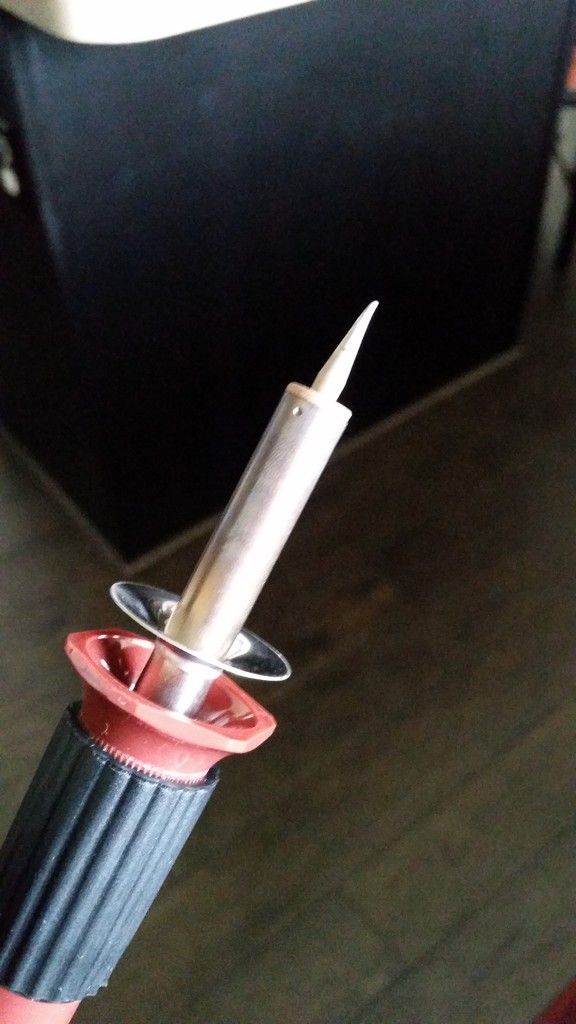
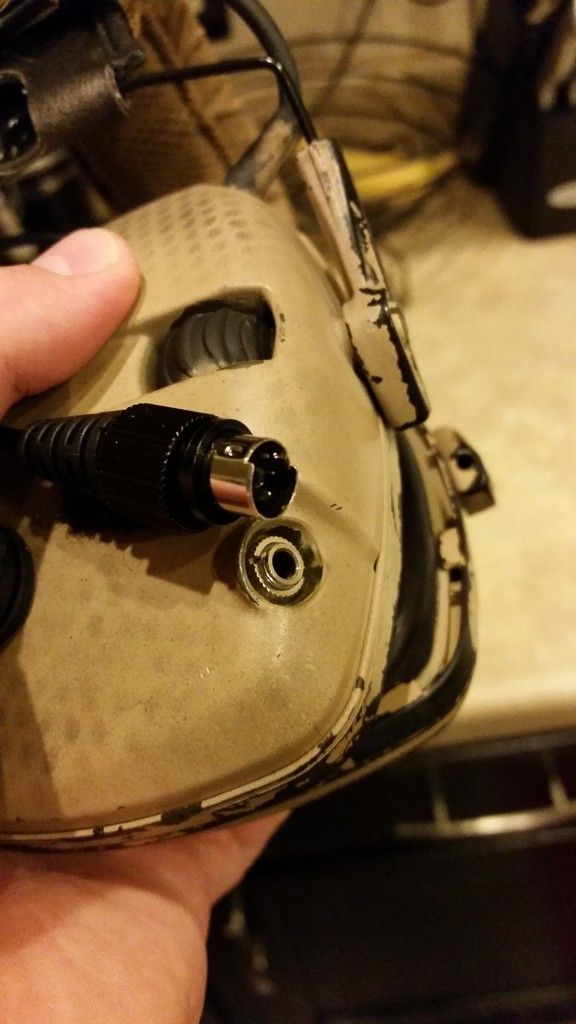
At this point you should be able to CAREFULLY lift up and bend this piece back revealing the plastic walls of the headset. I decided to use my soldering iron with the needle tip instead of drilling a hole to prevent fracturing the walls. You will turn your headset with the volume scroll facing towards you. Pick your spot of where you want your boom to fit (and remember to give enough room for the rubber washers to be flush on that side) and you will VERY CAREFULLY push in your soldering iron in and melt a hole just barely the size of your screw where there is a clear space on the inside of your headset. Once you have the hole melted, put the mini neoprene 5/32 washer on the screw and put the screw in the hole. The screw bar should be sticking out of our headset wall.
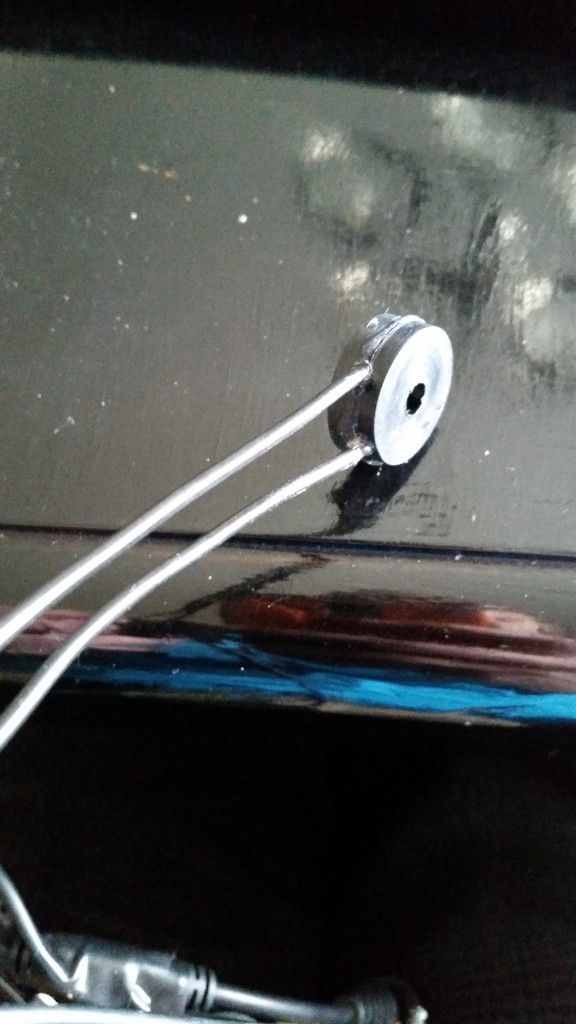
Put this side back together and repeating what you did on the previous side. At this point, you should have both speakers in each side and covered. You will then take two of the three rubber washers, rough them up a bit with sandpaper or something rough and put a light coat of Gorilla Epoxy on each and sandwich them together in a vice or clamp and leave them be for at least 2 hours. Once the two washers are glued you will take your smallest drill bit and drill two holes in the middle of them on the side. Make sure these holes are away from the middle so the screw will still fit.
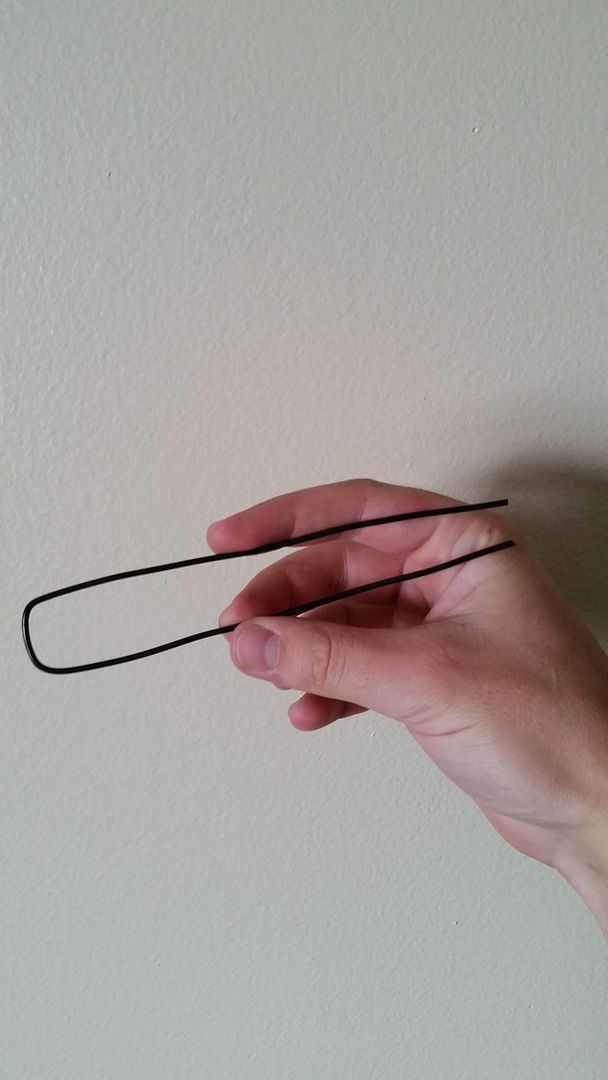
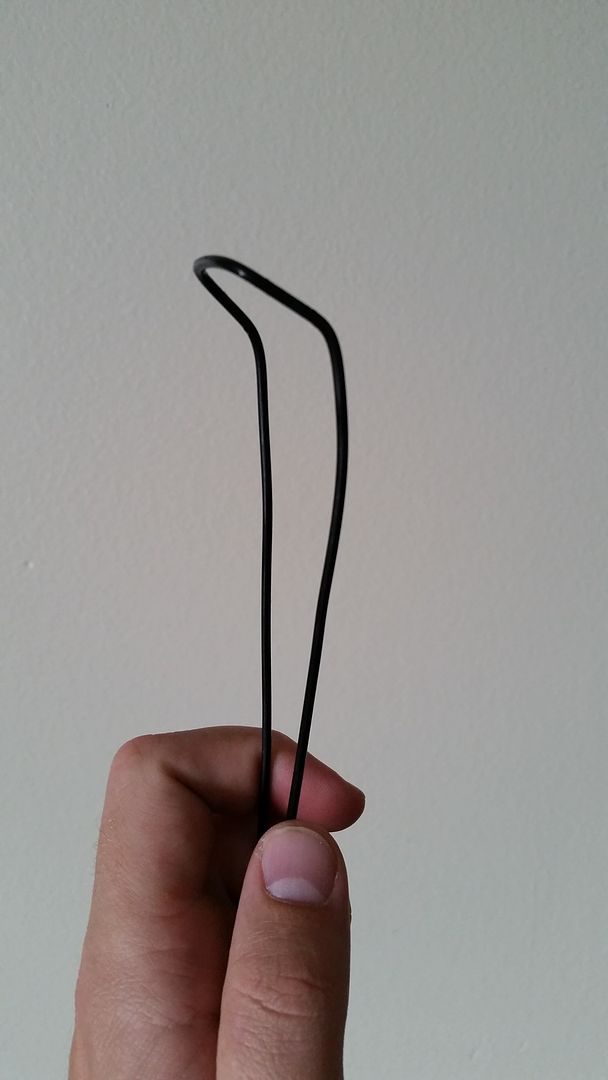
You will then take a piece of the Epoxy wire and bend it in half so it looks like this. (Length will be up to you. I did mine at about 13 inches long) Once you have done that, bend the end where the mic will be attached just a bit
Then, dab the ends of the epoxied wire with some of the Gorilla Epoxy and shove them in the holes that you just drilled out and let that sit for at least 30 min.
Now, take your remaining rubber washer and put it on the screw that is sticking out of the wall. Place the metal washer on top of that (so that the boom will move a little smoother instead of having rubber rub on rubber) Then put you wire boom you just made onto the screw and dab the end of the screw with a little bit of blue lock tight.
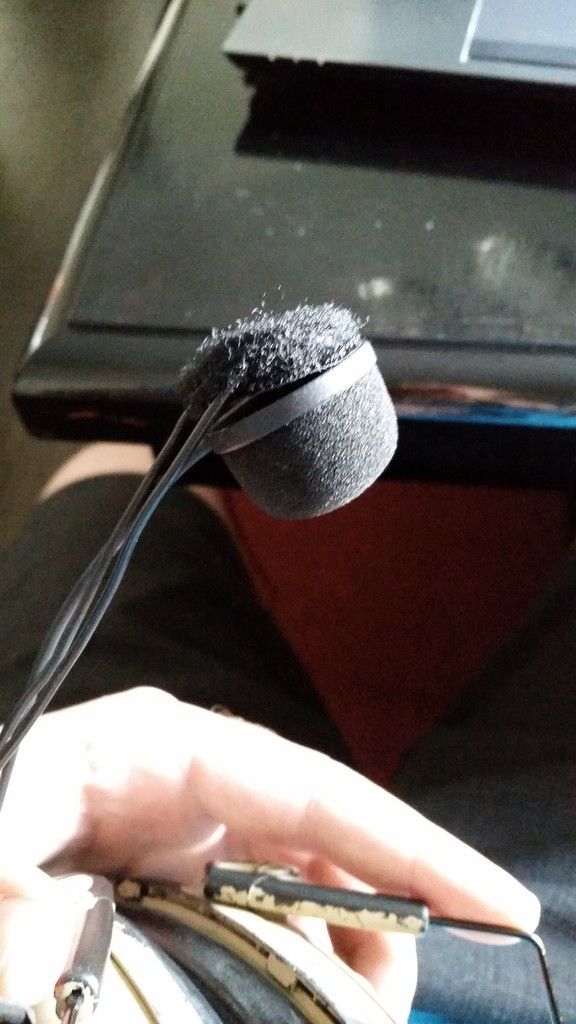
Now take some Velcro and cut a circle that is the size of your mic’s back. Sandwich your wire boom in between the mic’s back and the Velcro. I added another piece of the fuzzy side of the Velcro on stuck it sticky side to sticky side to make the back of the mic look a little better than it did.
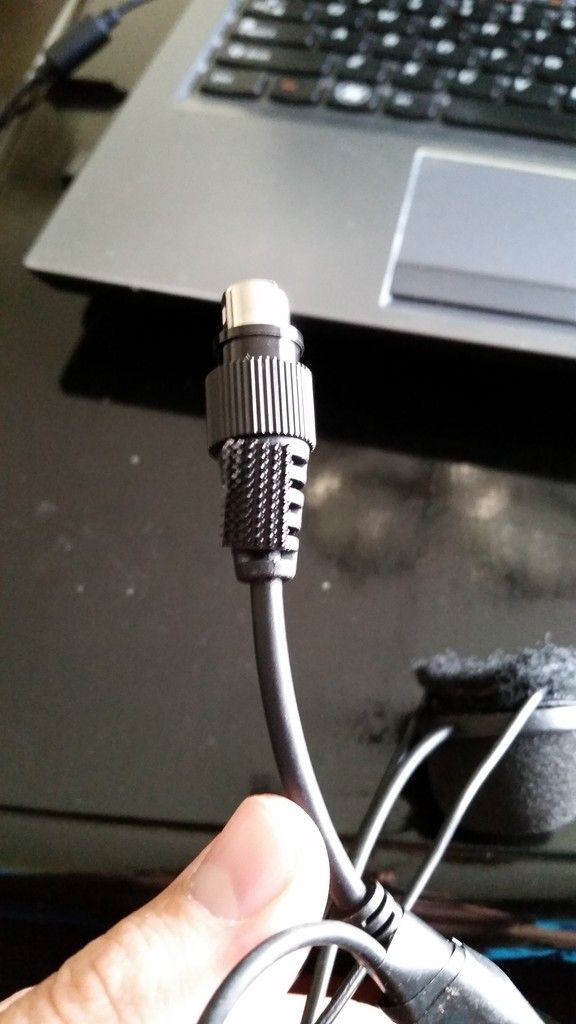
Now take a small piece of Velcro and super glue it on the adapter wire and put the opposite Velcro on the ear piece so that way it isn’t swinging everywhere. I took some electrical tape and taped up the mic wire too the speaker wire close where they meet just to keep them from bending out and getting snagged on something.
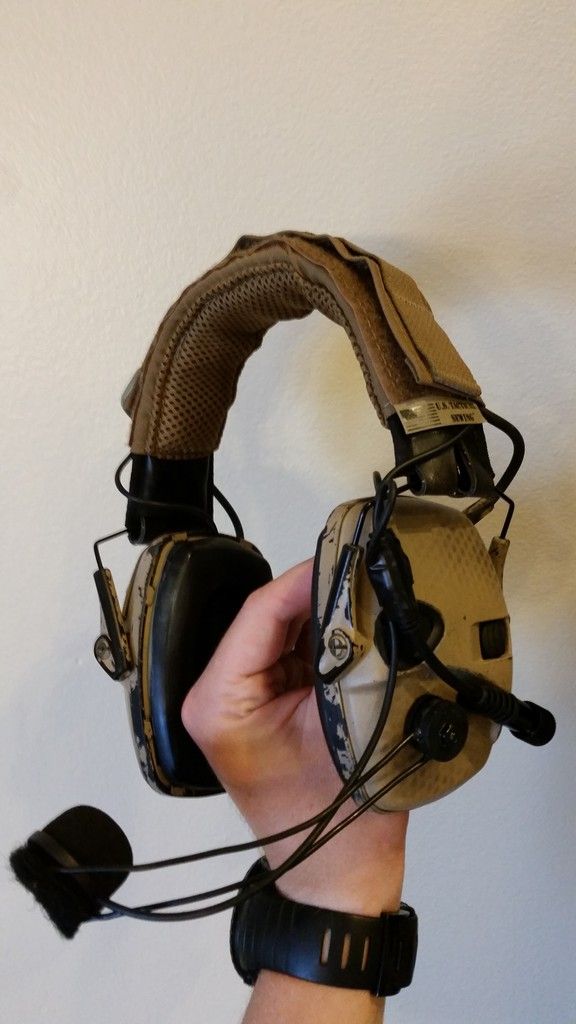
Now for the last step, take your Headset wrap and wrap it over the speaker wires so everything looks clean.
And there you go. FINISHED!!
PROS:
-There is a quick detach on this so when you are not using your radio, you can flip up your mic and detach the lower portion of the wire
-Cheap
-This model will work with many radios (as they make many PTT Helmet Headsets with different connectors)
-Enhanced Hearing
-Hearing Protection
-Comms
-Mic Boom can be rotated out of the way when not in use
CONS:
-Depending on your ear size, it may not be as good of a “seal” on your ears since the speakers kinda bulge out ever so slightly. I went and tested it out and I still had great protection, but again if you have really big ears, you might want to add ear plugs but YMMV of course.
-The wire leading to the radio is just a couple of inches to short for me. I’m 6ft tall. This setup will not allow me to clip on my radio at the waist/battle belt so it will have to go on my plate carrier (which I planned on anyway) but others may not like that idea. It is long enough if you were to put it in the top portion of your pack so that is an option.
-I wish the mic wasn’t so big. It’s not a huge deal, but I would have liked it to be a bit smaller.
-I also wish the PTT button was bigger for gross motor skills. I have yet to do a stress test run n gun that I like to do to test out my gear to see what works and what doesn’t. We will see if this will be a problem for me. I don’t think it will, but you never know until you actually get your heart rate going and build that stress.



 Reply With Quote



Bookmarks