Page 1 of 2 12 LastLast
Results 1 to 10 of 24

Thread: How to Paint Your Rifle Multicam(-ish)

Hybrid View

Previous Post Previous Post   Next Post Next Post
  1. #1
    Join Date
    May 2010
    Location
    Tucson, AZ
    Posts
    1,675
    Feedback Score
    0

    How to Paint Your Rifle Multicam(-ish)

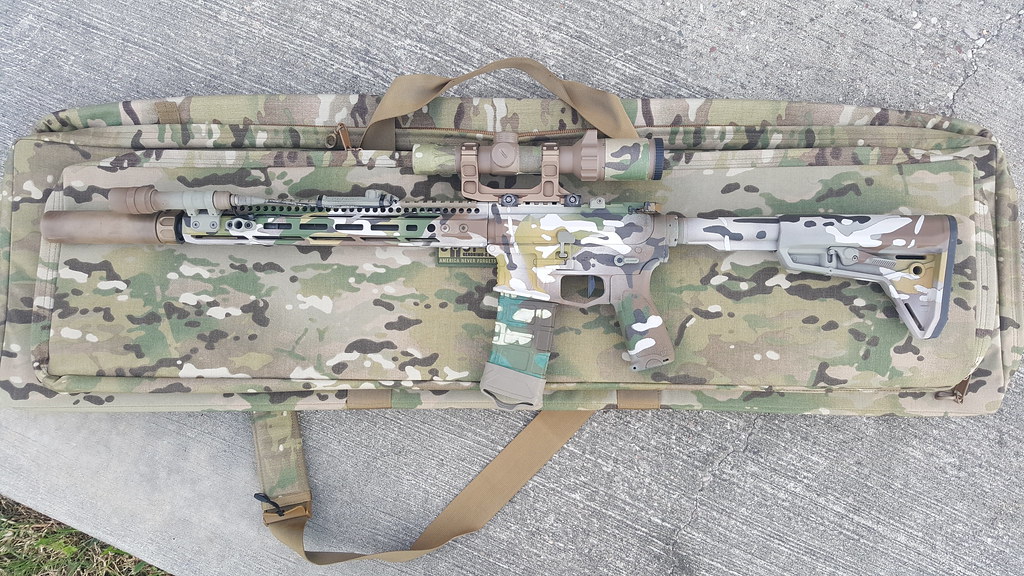
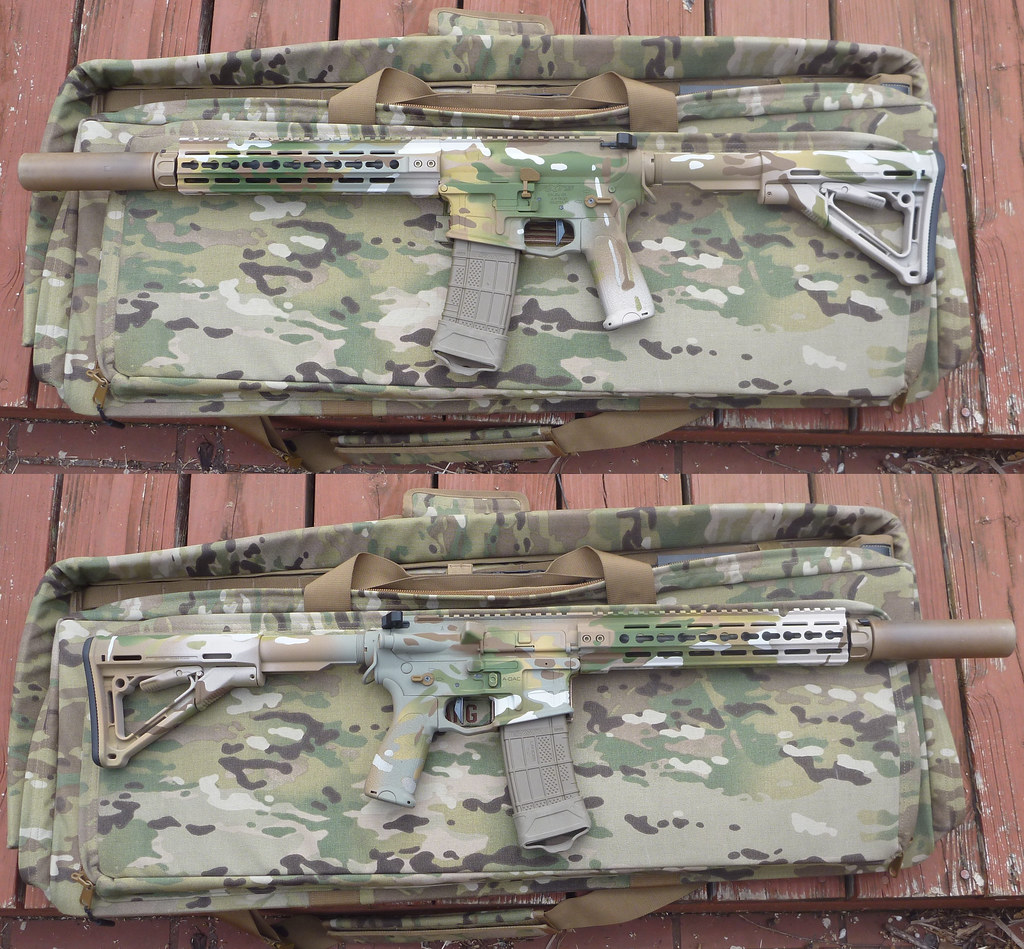
    I have gotten several questions about how I paint my Multicam-esque pattern on my rifles, so I've decided to go a bit more in-depth on how I do it.

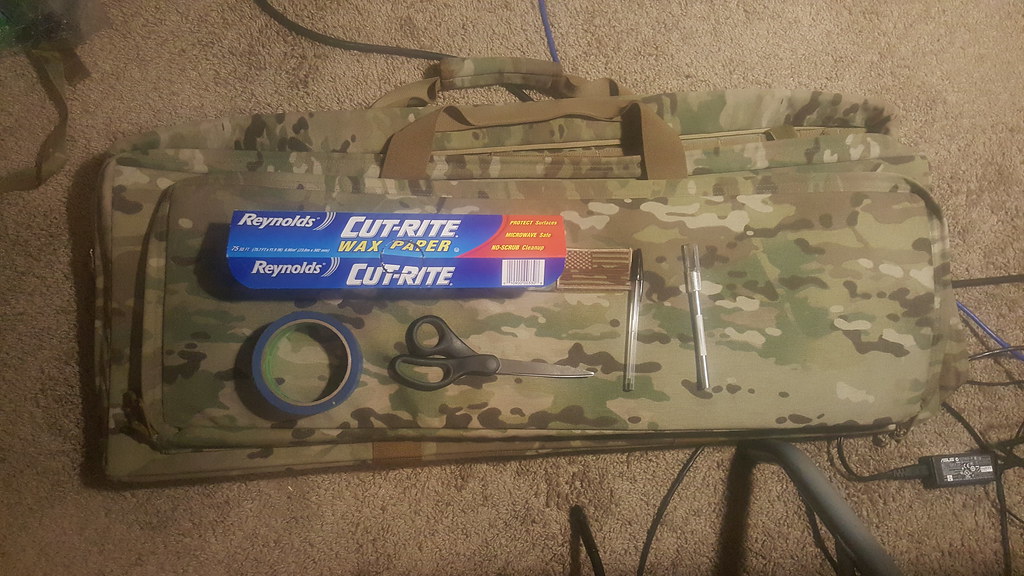
    Here is what I used:
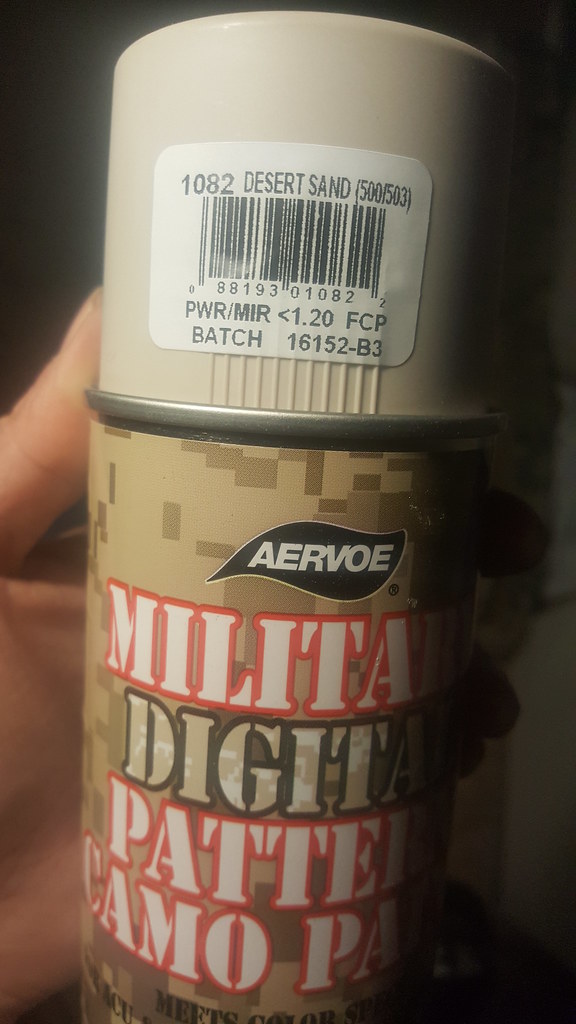
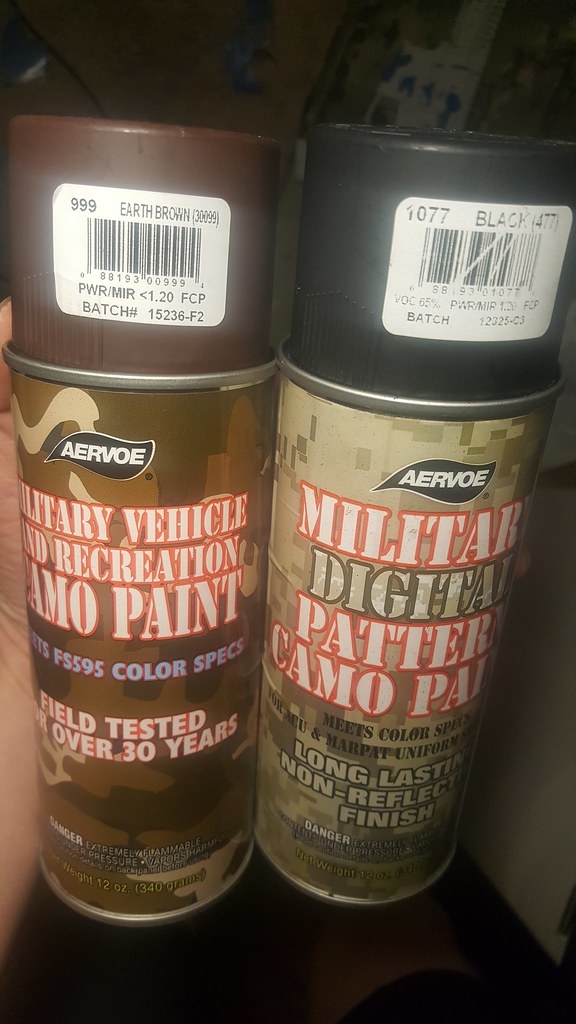
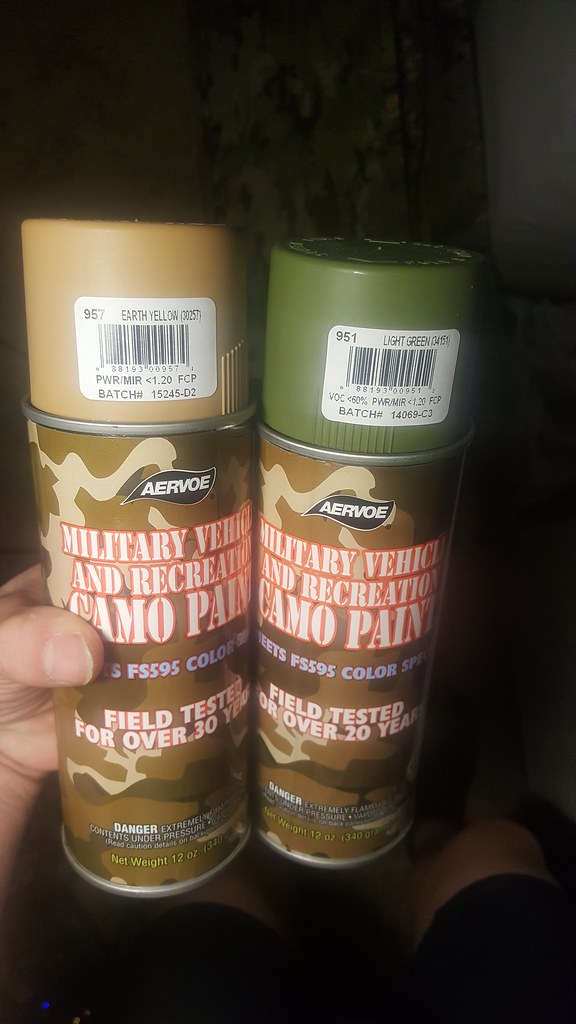
    • Aervoe Desert Sand
    • Aervoe Black
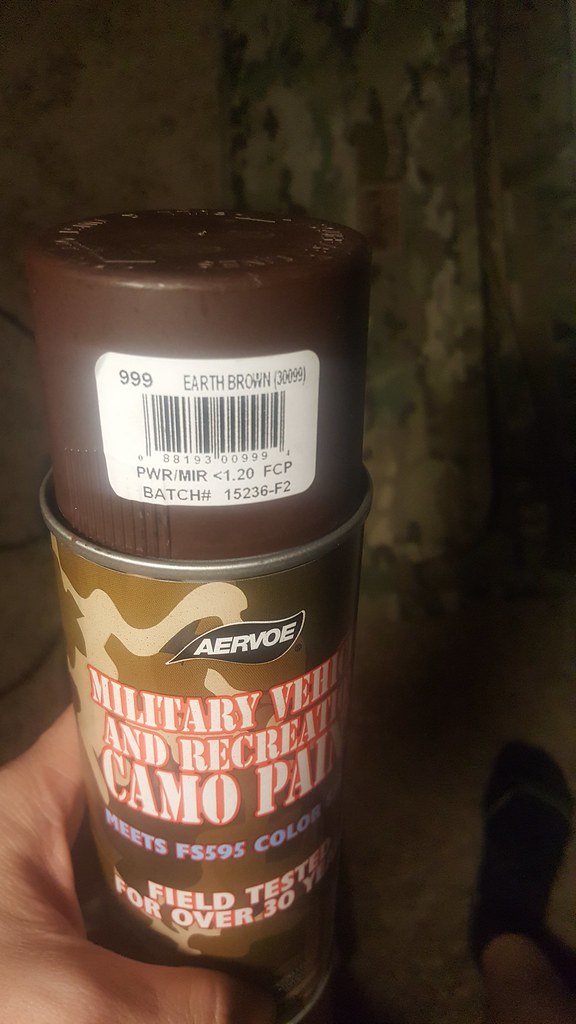
    • Aervoe Earth Brown
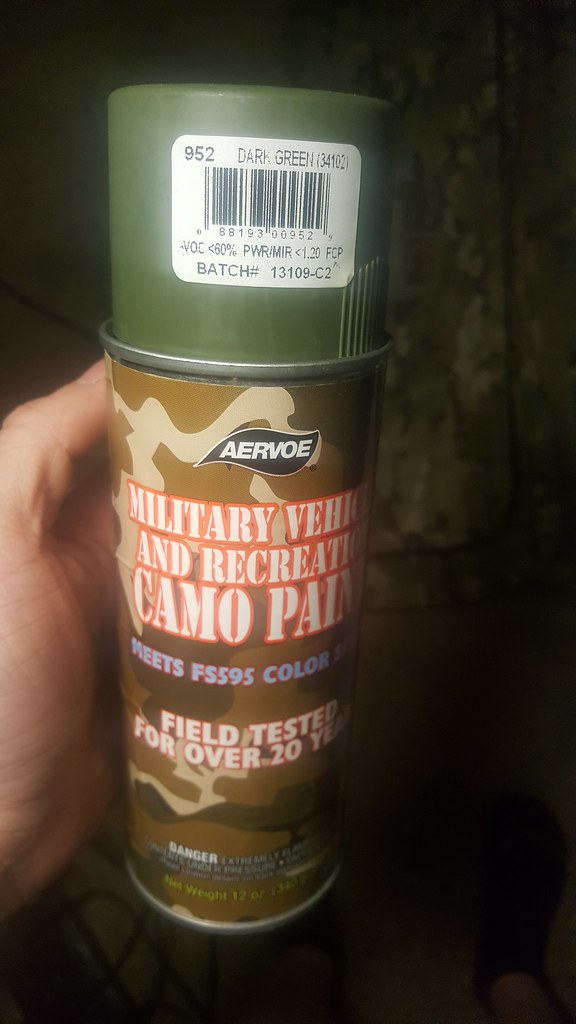
    • Aervoe Dark Green
    • Aervoe Light Gren
    • Aervoe Earth Yellow
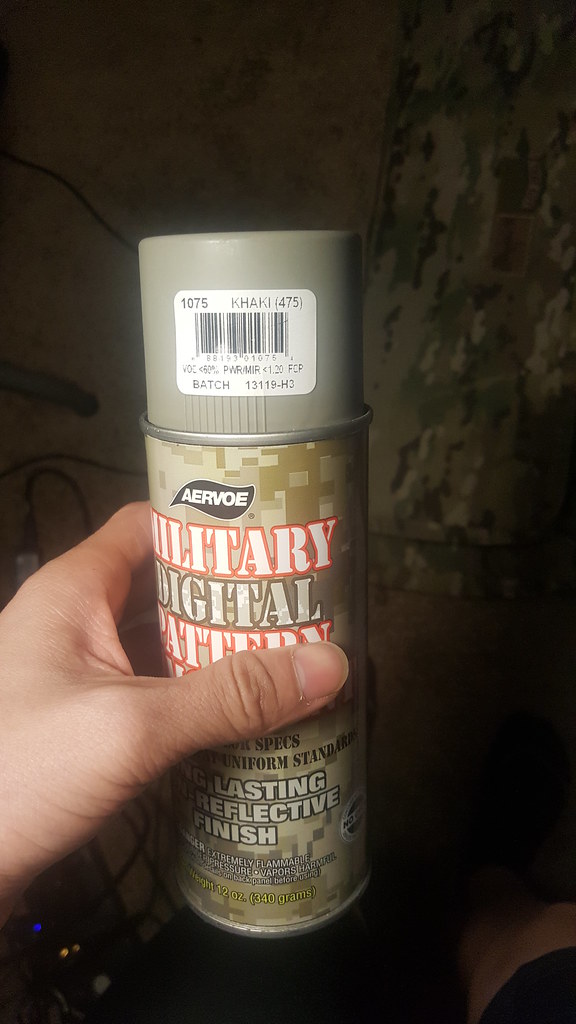
    • Aervoe Khaki
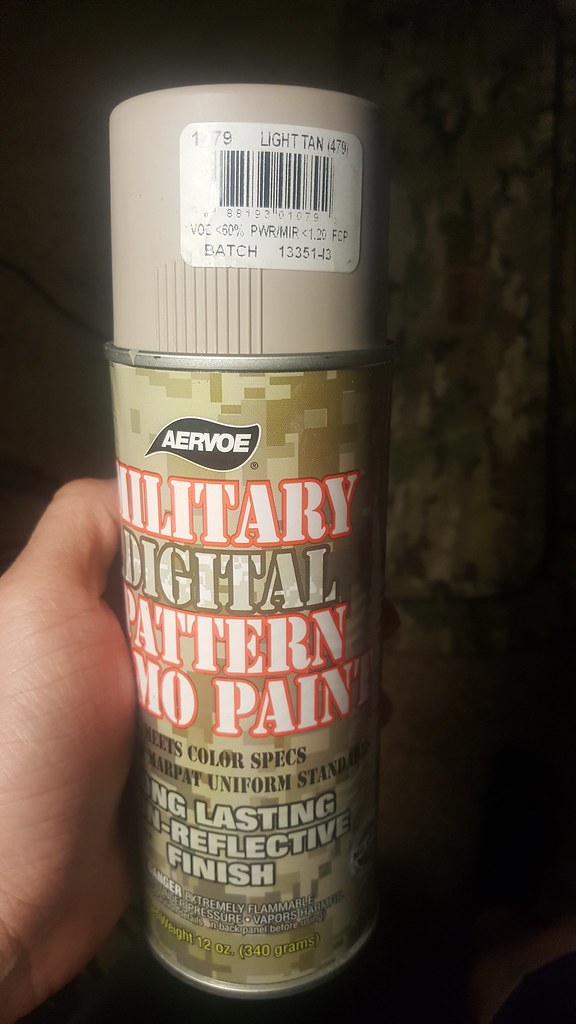
    • Aervoe Light Tan
    • 3M ScotchBlue Painter's Tape, Multi-use
    • Xacto razor
    • Reynolds Cut-Rite wax paper
    • Scissors
    • Ballpoint pen
    • SERT TCC Multicam rifle case


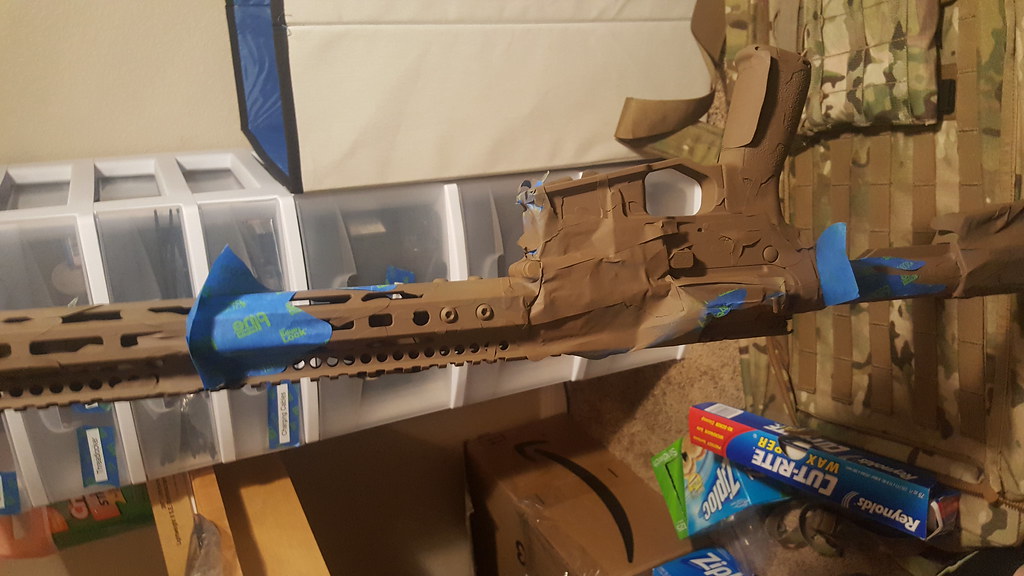
    First, disassemble and tape off the parts of the rifle you don't want painted. Personally, I tape up the barrel, muzzle device, and the buttstock pad, while I remove the bolt catch, trigger, and safety. I also plug up the trigger pin holes, safety selector hole, and the magwell. I leave the stock on, but extended at the maximum length, though I also shoot with it in that position. I usually string the rifle up, and paint with it free hanging and also let it dry that way.

    Second, I lay down a base layer of paint. I personally used Khaki, but only because I have a case of that. I then let it sit for 3 days, as Aervoe advises a 72 hour total cure time.

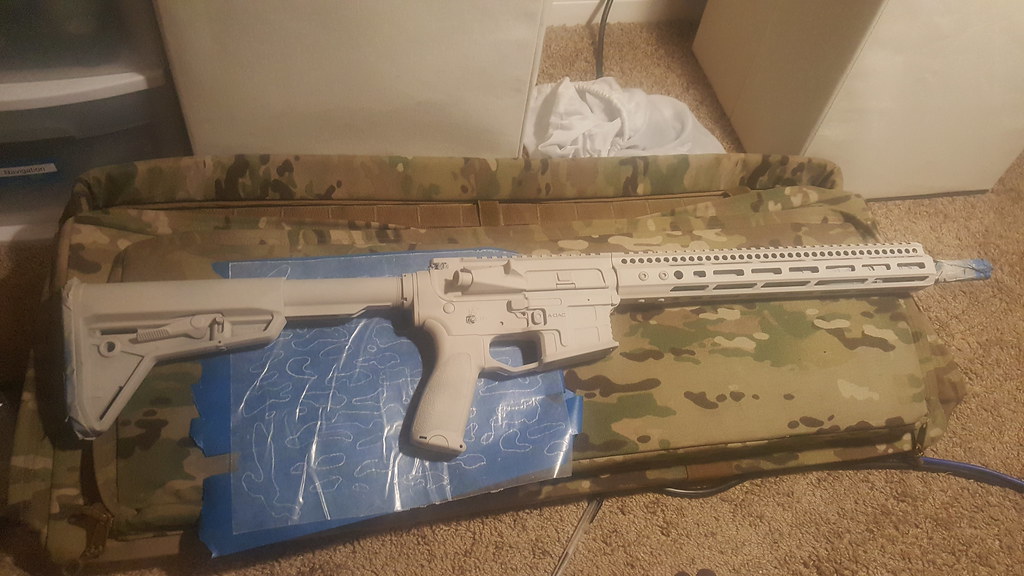
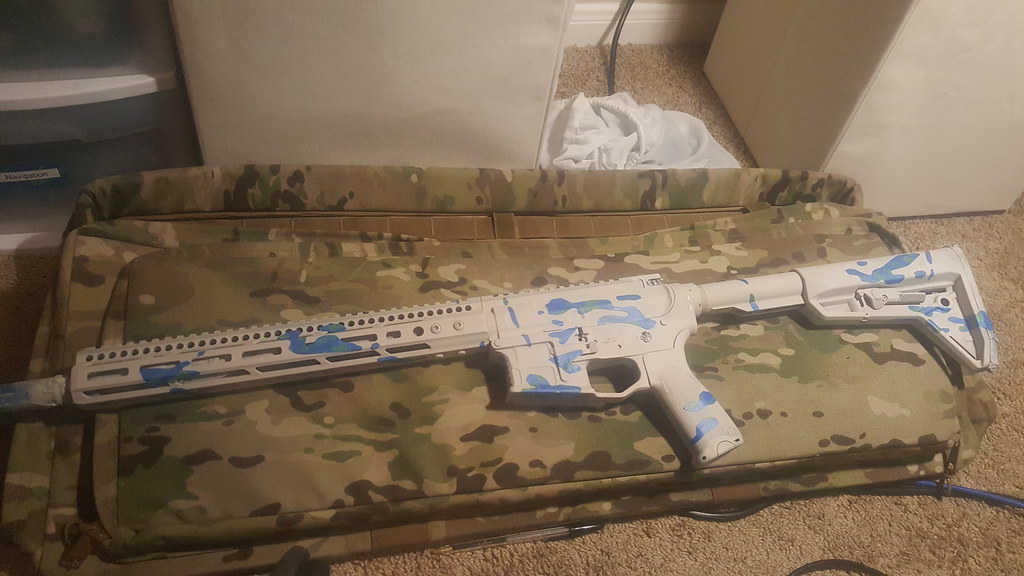
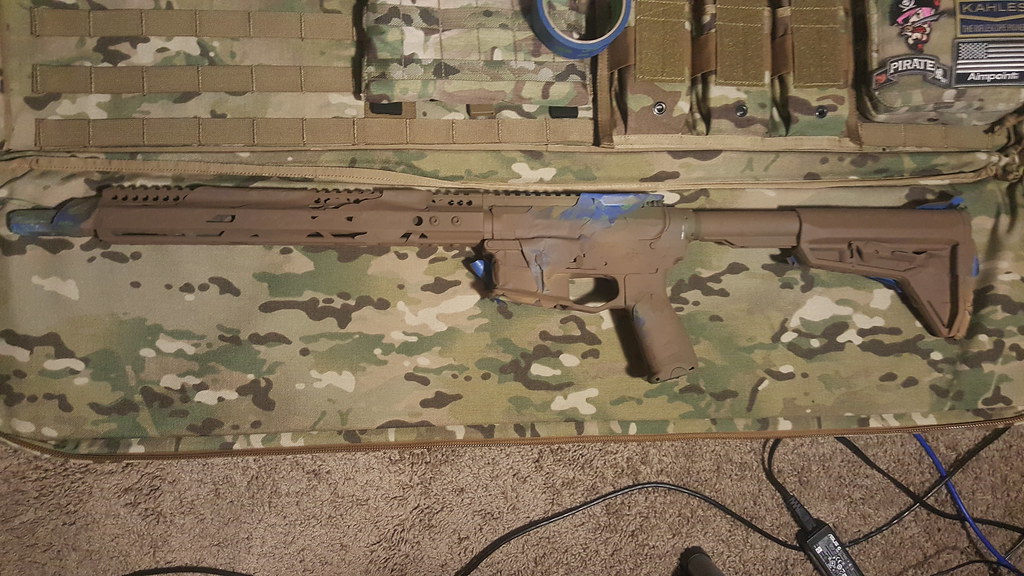
    Third, I cover the entire rifle with the first visible color, with the Desert Sand. Once again, let it sit for 3 days.


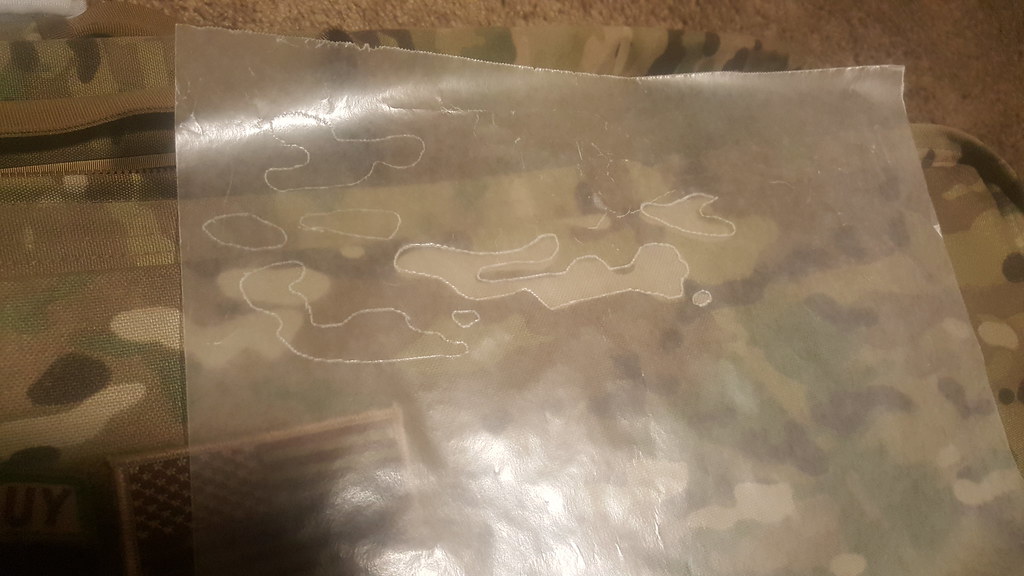
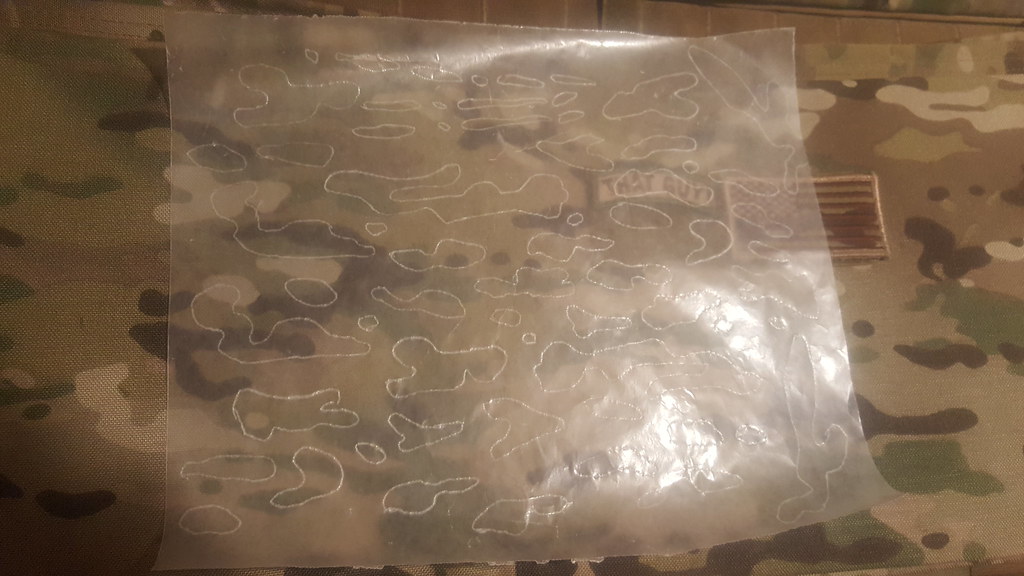
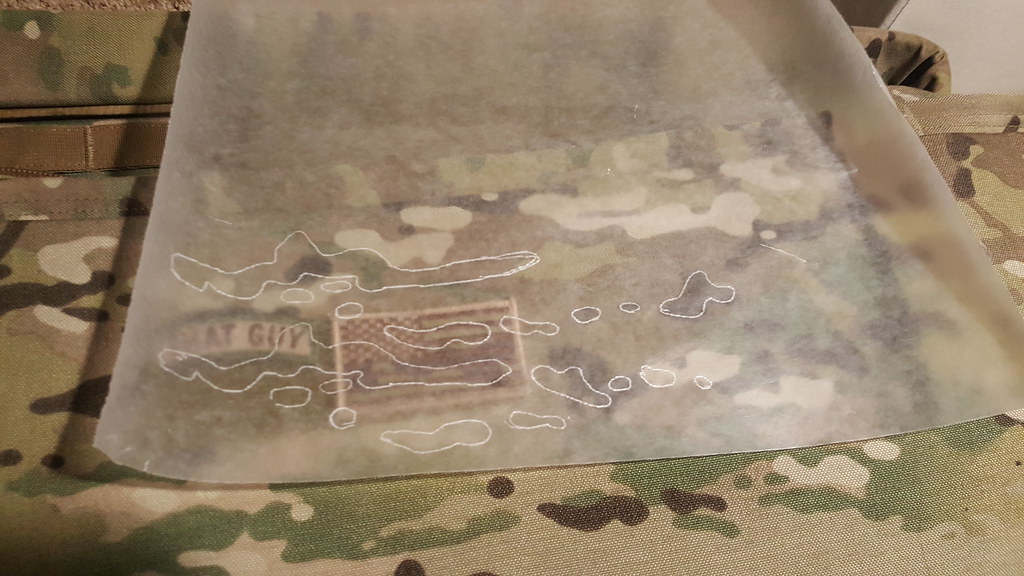
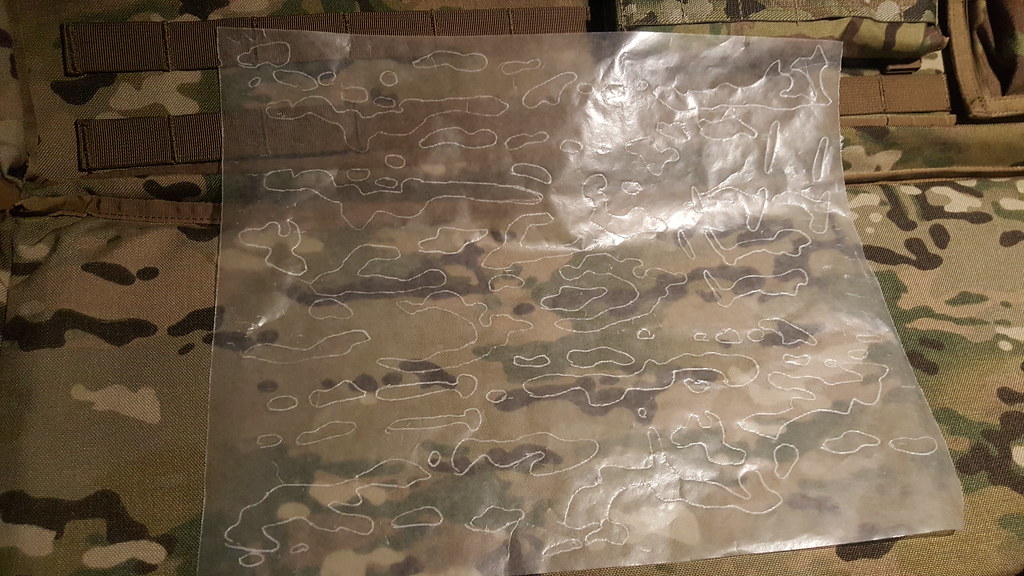
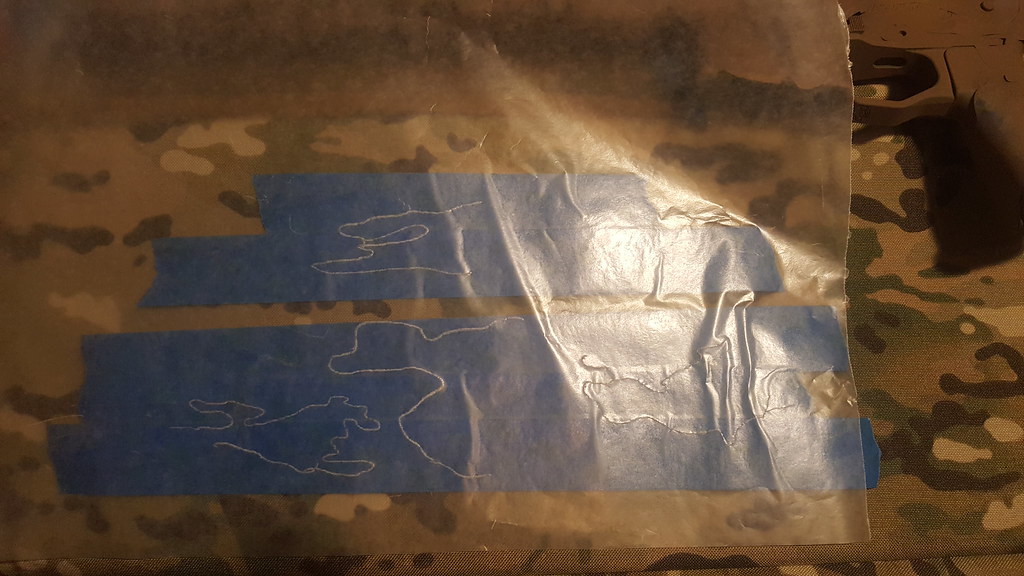
    After the paint cures, I then start tracing out the shapes off of the rifle case, using a big sheet of wax paper, and using the ballpoint pen. Note that the pen doesn't really need to lay down any ink, just need to scratch the wax paper to make the tracing noticeable.


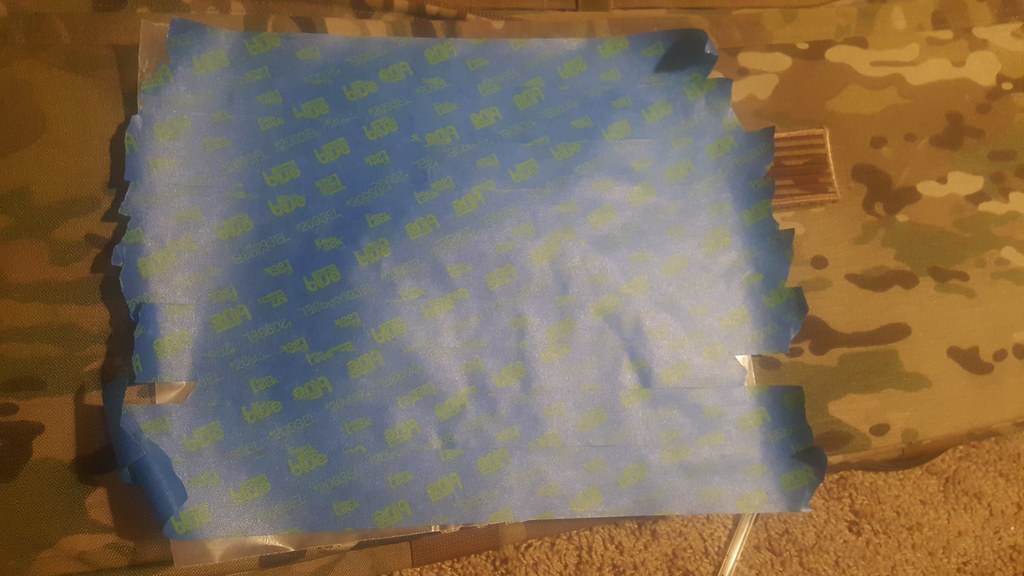
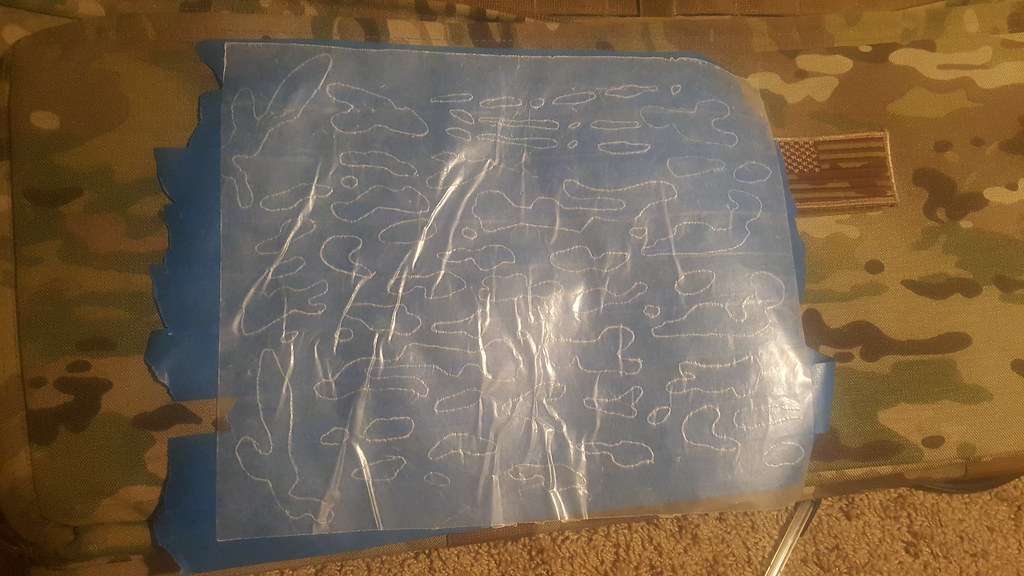
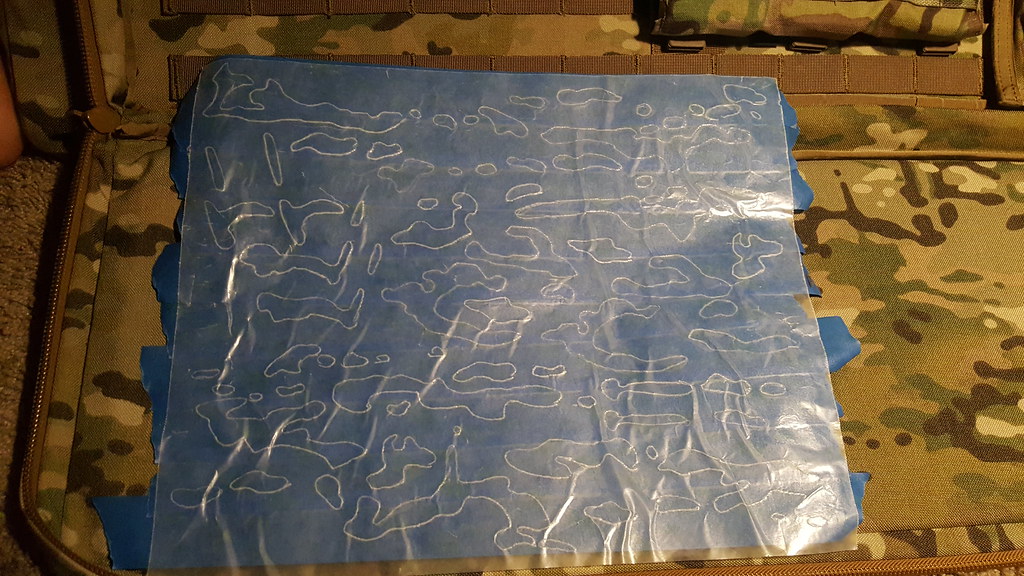
    Next, cover one side of the wax paper with the painter's tape.


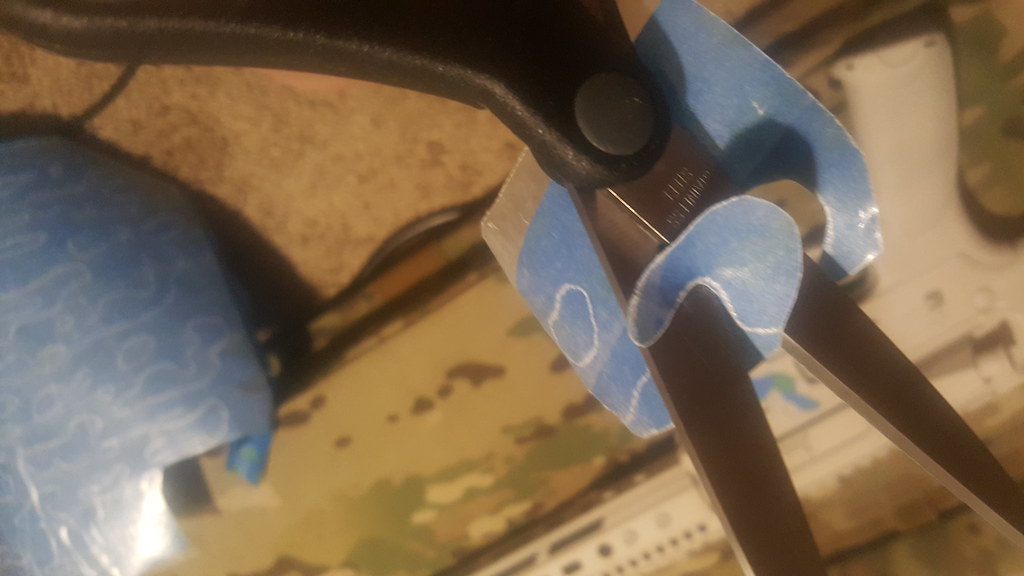
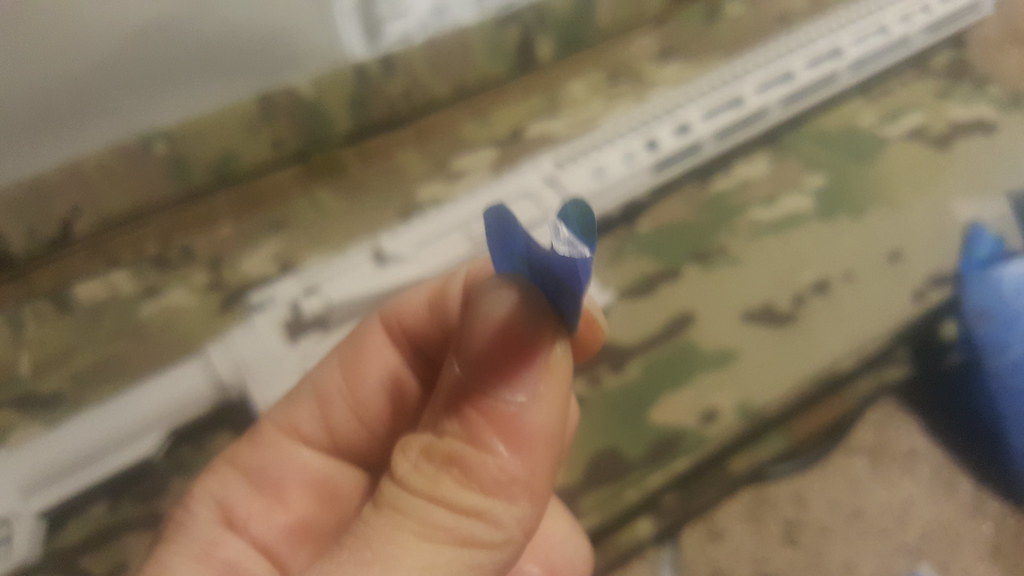
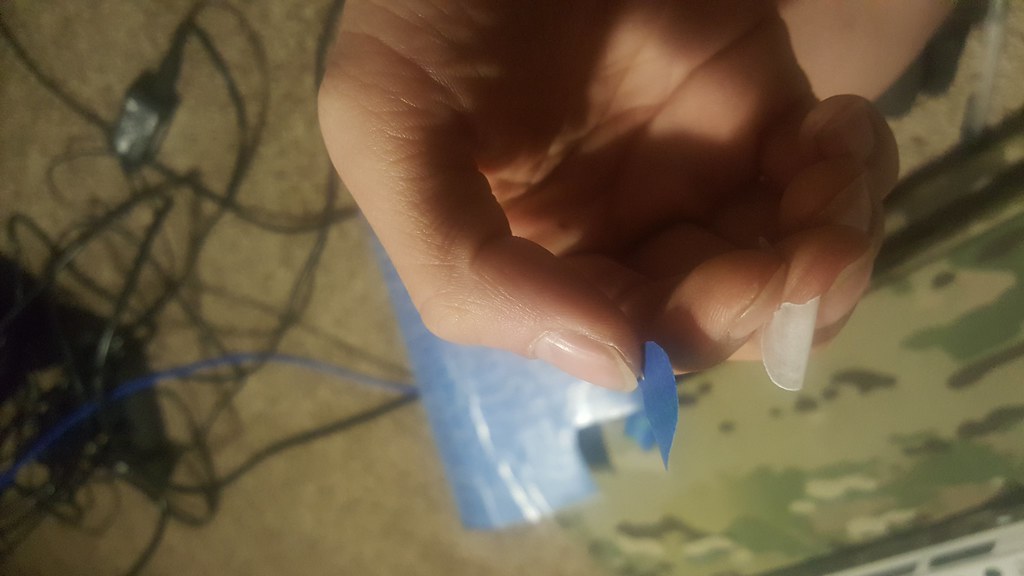
    Next, start cutting out the stencils, and apply it to the rifle. I like to cut out chunks of the paper, so that it's a smaller piece and easier to manage.

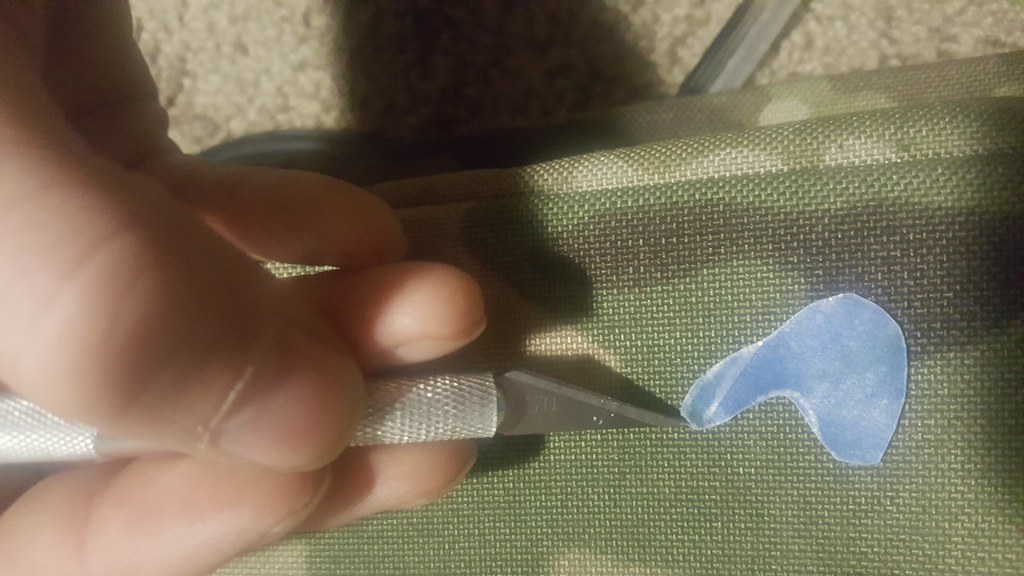
    After it's an individual piece, I then use the Xacto razor to pick the wax paper off, and peel it off by hand once I get enough of it off.


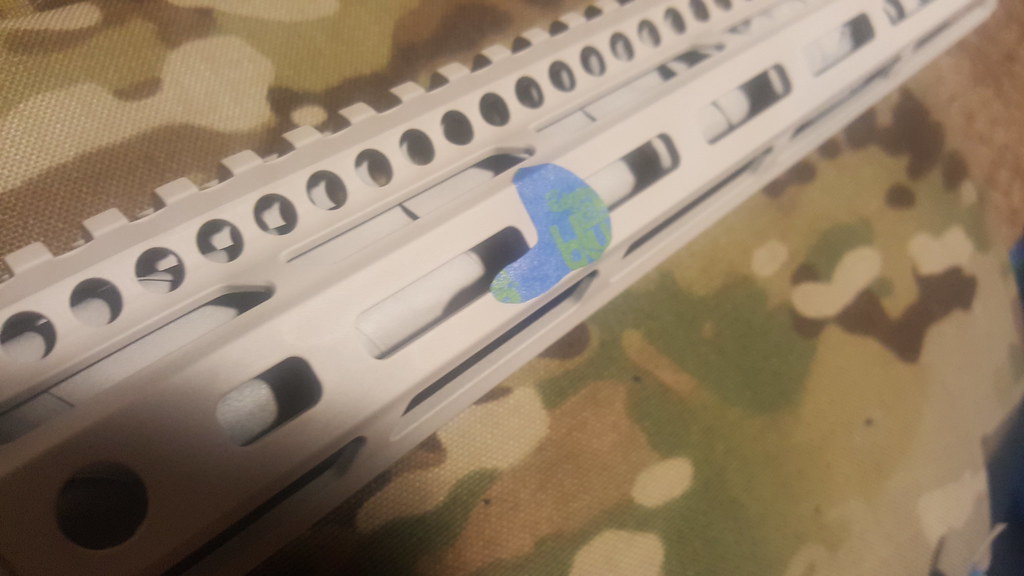
    Then, apply the stencil to the rifle, making sure to put it down nice and smooth, applying even pressure to maximize adhesion.

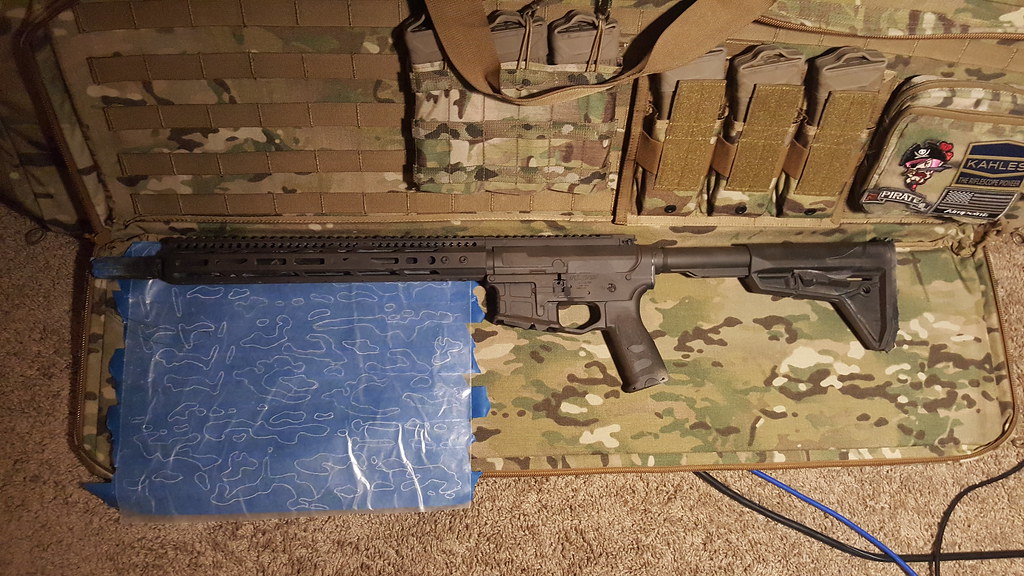
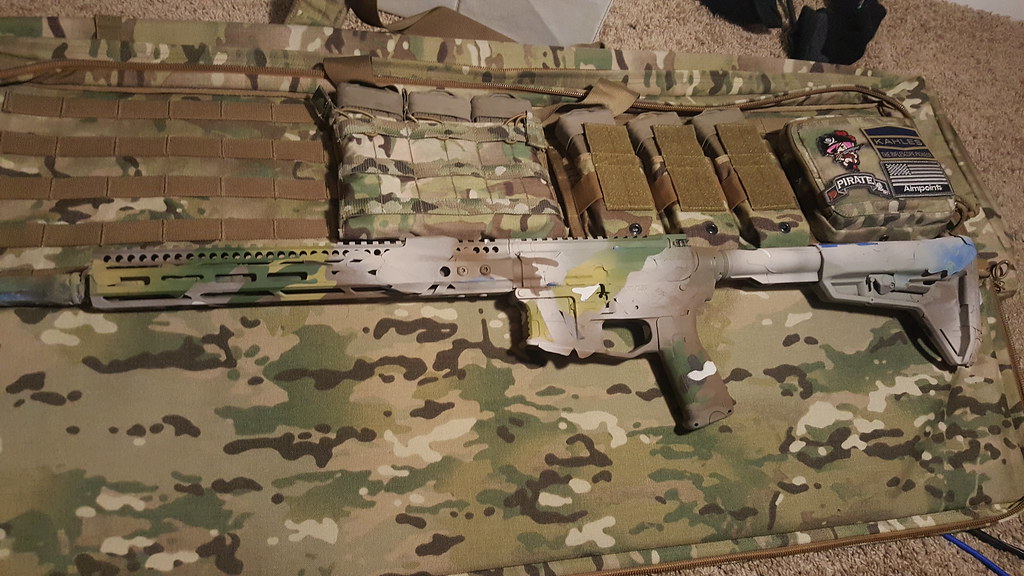
    At the end, you'll end up a completely taped off rifle on the first layer.


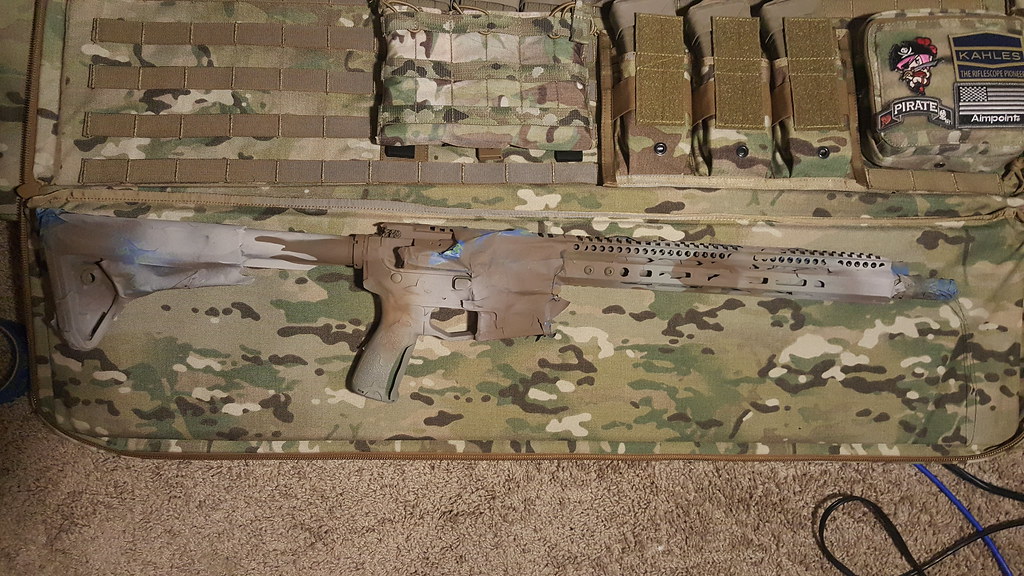
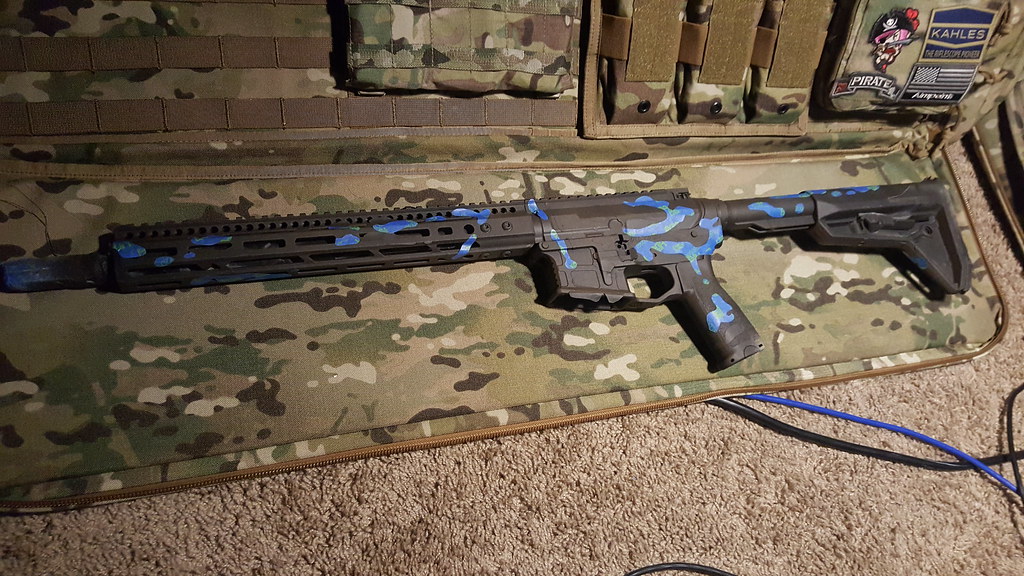
    Fourth, I cover the entire rifle with Black and mist it with Dark Brown, to generate a very dark chocolate color.


    Again, after the paint cures, trace the rifle bag for stenciling.


    Then, the painter's tape over the wax paper.

    Cut out the stencils and apply to the rifle. Remember to press down hard for maximized adhesion, and press down on any of the stencils that might have come a little unstuck on the first layer.
    Plus ça change, plus c'est la même chose.

    老僧三十年前未參禪時、見山是山、見水是水、及至後夾親見知識、有箇入處、見山不是山、見水不是水、而今得箇體歇處、依然見山秪是山、見水秪是水。

    https://www.instagram.com/defaultmp3/

  2. #2
    Join Date
    May 2010
    Location
    Tucson, AZ
    Posts
    1,675
    Feedback Score
    0
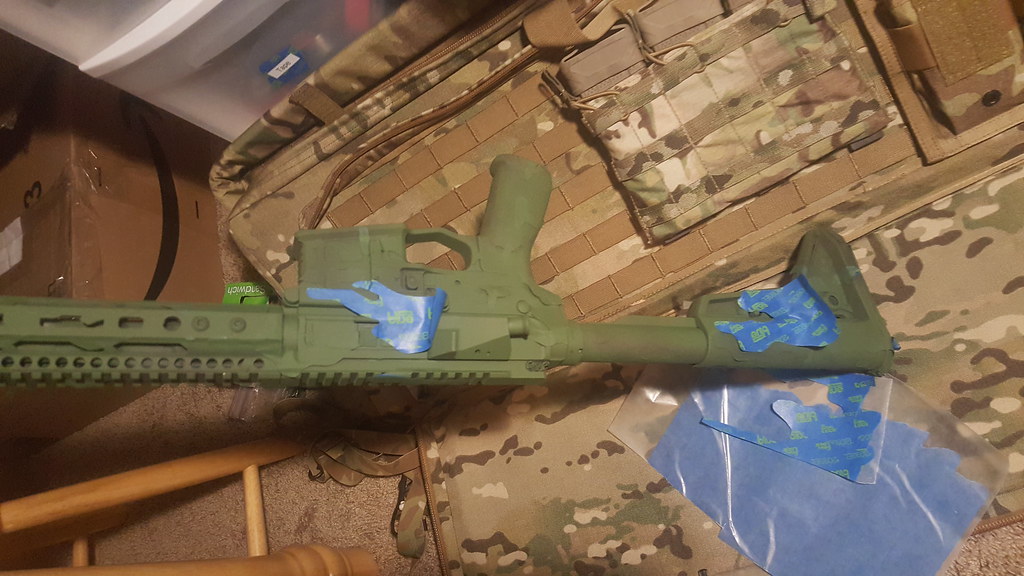
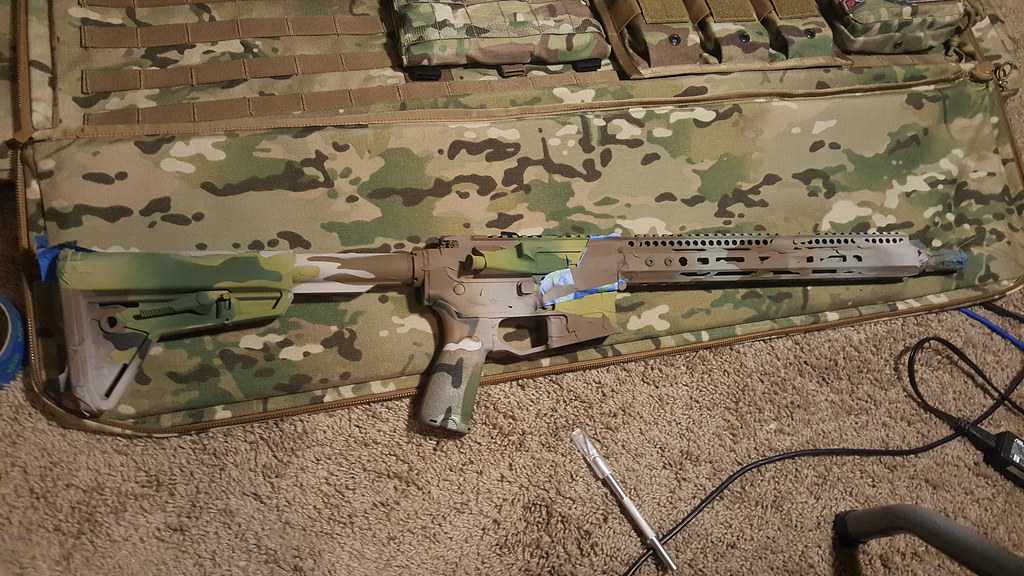
    Fifth, I cover the entire rifle with Dark Green.


    After the paint cures, I then apply the stencils, which are a combination of freehand and traced; the difference here is that this layer has both hard transitions and soft transisions between the Dark Green layer and the Yellow Green layer. This is why I leave one end of the stencil poking up, to help with the soft transitioning of the colors. Again, check for any stencils that might have come loose and press them down before applying the next layer of paint.


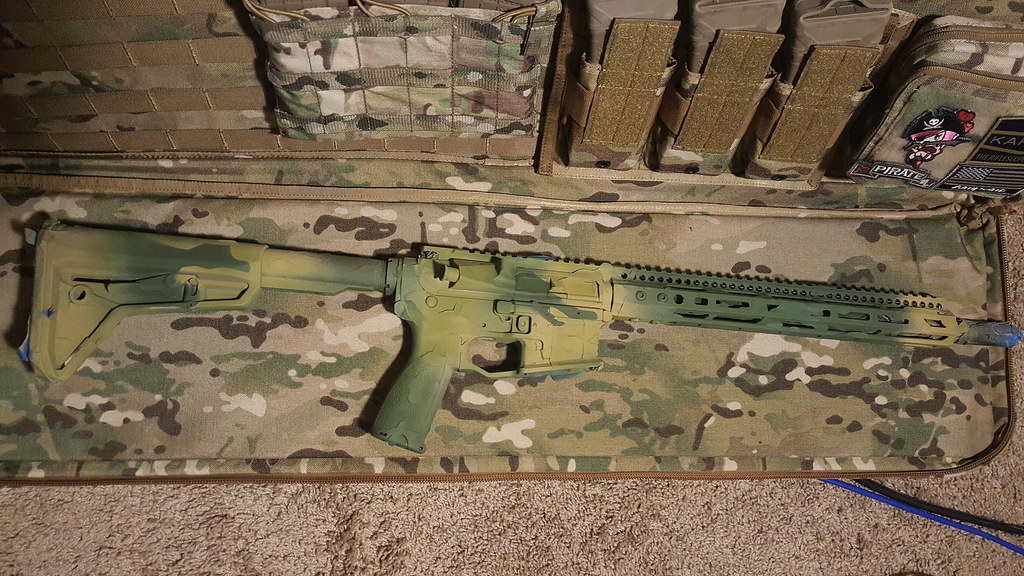
    Sixth, I apply patches of the Earth Yellow, and mist it with Light Green. I then remove the Dark Green hard transition stencils, and mist a bit of the Dark Green as necessary to soften some of the transitions.


    However, if you're lazy, feel free to skip the whole hard transition step, and simply apply the patches and have only the soft transitions of colors. Either way, after the paint cures, I apply the next step of stencils, which are again a combination of freehand and traced.


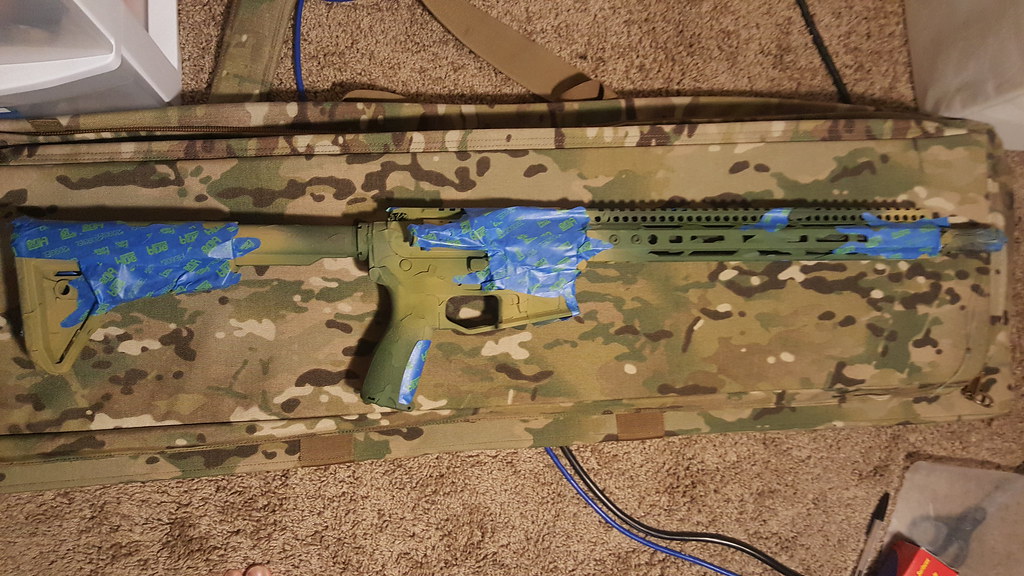
    Seventh, I cover the entire rifle with Earth Brown.


    After the paint cures, I then apply the stencils, which are a combination of freehand and traced. Again, this is a layer with both hard and soft transitions, and can be skipped if you're feeling lazy.


    Eighth, and on to the last layer; I apply patches of Khaki and patches of Light Tan, as the brown layer has three distinct colors. I then remove the Earth Brown hard transitions stencils and mist as need be.


    Ninth, after the paint cures, start removing the stencils. Sometimes, you'll have to use the Exacto razor to pick at the tape until it comes off.


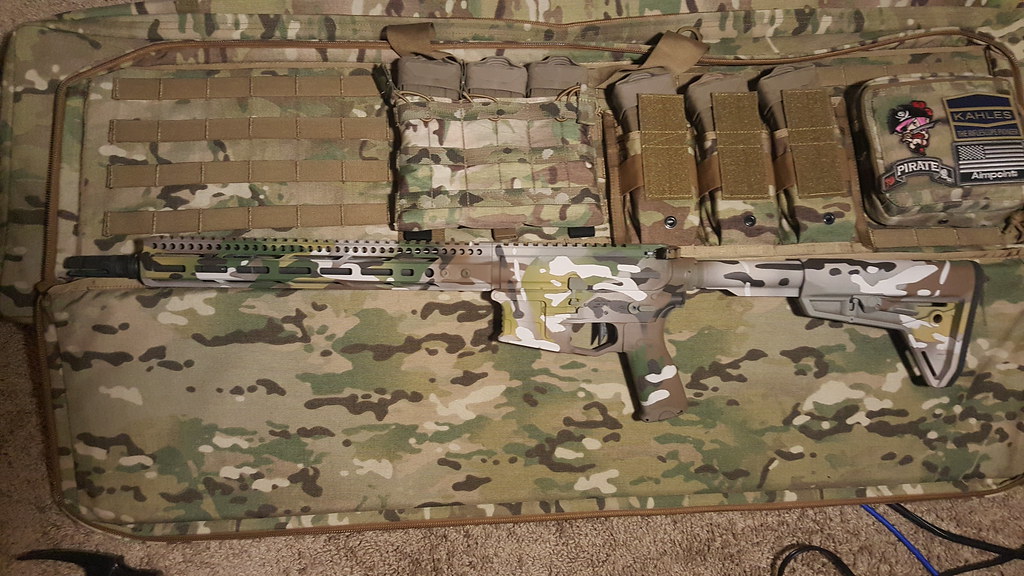
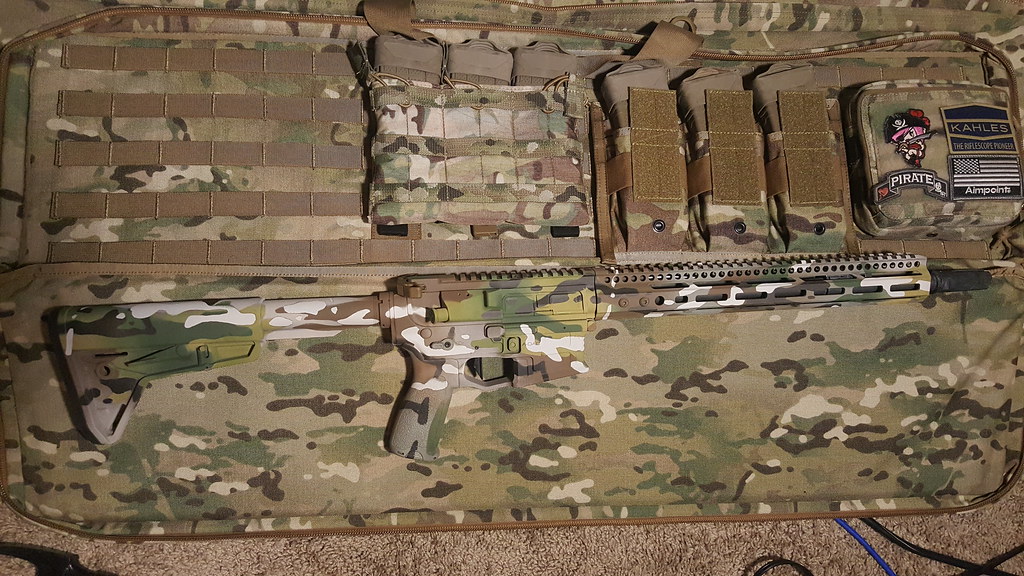
    Once you finish picking off all of the stencils (and be thorough; sometimes I'll find a few stencils left on a day or two later during handling), reassemble your rifle, and then post to Instagram for mad likes.


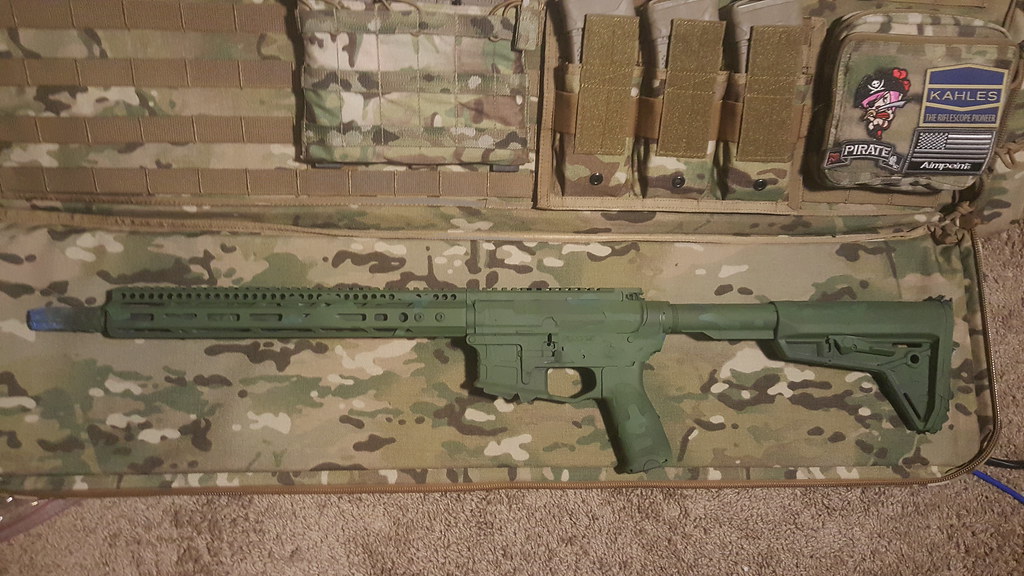
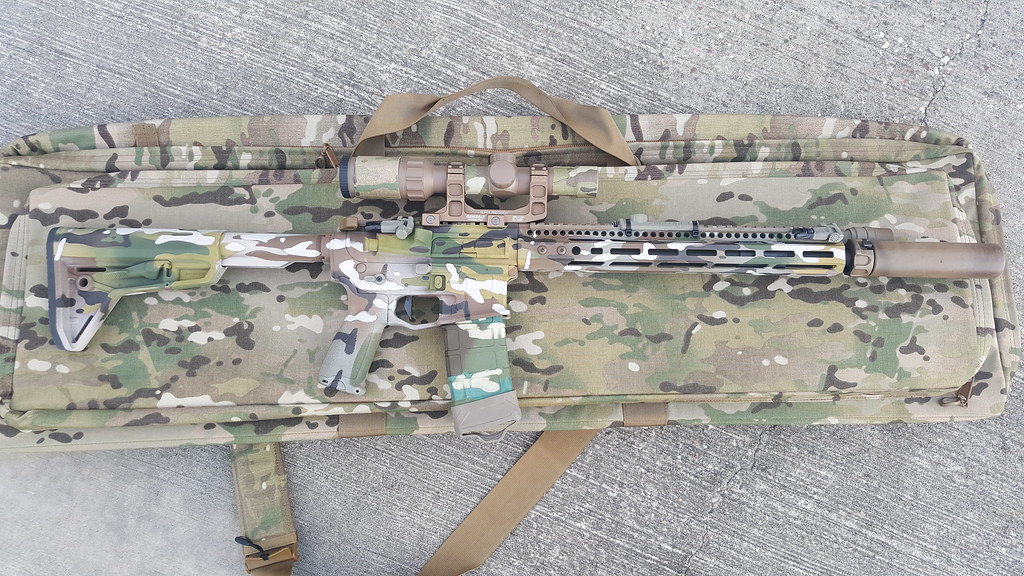
    And here she is mostly tarted up (just missing the sling and suppressor cover in this picture).

    Plus ça change, plus c'est la même chose.

    老僧三十年前未參禪時、見山是山、見水是水、及至後夾親見知識、有箇入處、見山不是山、見水不是水、而今得箇體歇處、依然見山秪是山、見水秪是水。

    https://www.instagram.com/defaultmp3/

  3. #3
    Join Date
    Jun 2006
    Posts
    13,160
    Feedback Score
    2 (100%)
    Nice write up, I'm sure it will help people.
    Stick


    Board policy mandates I state that I shoot for BCM. I have also done work for 200 or so manufacturers within the firearm community. I am prior service, a full time LEO, firearm instructor, armorer, TL, martial arts instructor, and all around good guy.

    I also shoot and write for various publications. Let me know if you know cool secrets or have toys worthy of an article...


    Flickr Tumblr Facebook Instagram RECOILMAGAZINE OFF GRID RECOIL WEB

  4. #4
    Join Date
    Feb 2015
    Posts
    154
    Feedback Score
    8 (100%)
    Thanks for the write up on an awesome paint job, it will really help me out.

  5. #5
    Join Date
    Feb 2011
    Location
    NGAMTNS
    Posts
    1,075
    Feedback Score
    15 (100%)
    Quote Originally Posted by Stickman View Post
    Nice write up, I'm sure it will help people.
    Yep good job. Pat Rogers would dig it I'm sure.
    "Bones Heal, Chics Dig Scars, Pain Goes Away"

  6. #6
    Join Date
    Mar 2014
    Posts
    1,866
    Feedback Score
    3 (100%)
    Nice primer on rifle painting.
    “I predict future happiness for Americans, if they can prevent the government from wasting the labors of the people under the pretense of taking care of them.”
    Thomas Jefferson

  7. #7
    Join Date
    Aug 2011
    Posts
    2,162
    Feedback Score
    4 (100%)
    Pat would have told you that you spent too much time painting that you could have been shooting/training, and maybe thrown in some funny jabs in his thick New York accent.

    Nice work though. Very thorough.

  8. #8
    Join Date
    Aug 2010
    Posts
    12,145
    Feedback Score
    43 (100%)
    I counted 21 days of paint curing time (7 sprays x 3 days)

    How durable is the finish for that kind of work? I think at that point I'd just get it cerakoted, but I can appreciate a good DIY job!
    Why do the loudest do the least?

  9. #9
    Join Date
    Aug 2009
    Posts
    4,383
    Feedback Score
    16 (100%)
    It's really not that hard. I did my MP-15/22, it took about 5 days overall - it was summer to that helped to let it cure in the sun. And it costs about $20 to do several rifles, compared to the inevitable hundreds plus shipping to get it cerakoted.

    Not to mention when times change and your camo pattern isn't 'cool anymore', you can strip it off and go back to black, or repaint it what the current cool kids approve of.

  10. #10
    Join Date
    May 2010
    Location
    Tucson, AZ
    Posts
    1,675
    Feedback Score
    0
    Quote Originally Posted by mlberry View Post
    So how long does it last? What does it look like after normal wear and tear?
    Quote Originally Posted by Eurodriver View Post
    How durable is the finish for that kind of work? I think at that point I'd just get it cerakoted, but I can appreciate a good DIY job!
    Freshly paint:

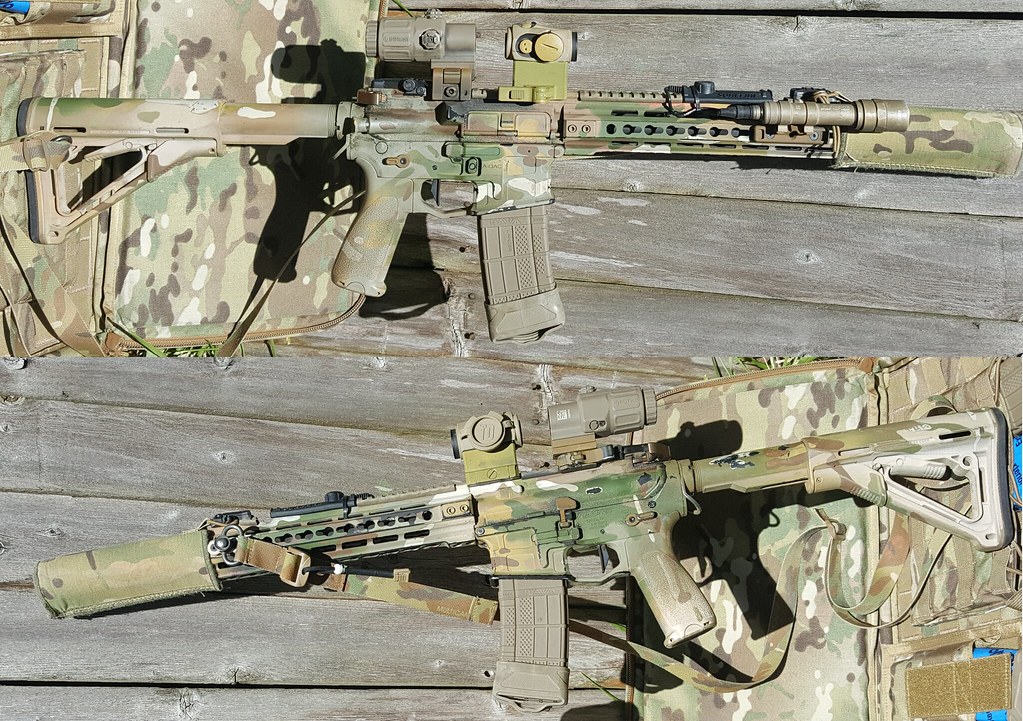
    Three years later:

    Durability's pretty good, IMO. This rifle did not have a base coat, and has seen a class, two biathlons (both 10Ks), and several force-on-force sessions, besides general shooting. I've never cleaned this rifle, so some of the black is actually just carbon seeping out from inside, as I shoot it suppressed 95% of the time; the lighting in the second picture is also rather harsh, so it's a bit hard to compare the colors. The wear from gear is generally quite localized, and doesn't spread. Cerakote would definitely hold up better, but given how my paint job has a pattern with hard transitions, the wear doesn't really affect the camouflaging properties of the paint job until it really gets going. Honestly, I dig it when it gets a little worn, makes it look even better. Of course, I specifically chose Aervoe because of its durability, instead of taking the easy way and using a Krylon to do the colors that Aervoe doesn't have.
    Last edited by Defaultmp3; 03-04-17 at 21:22.
    Plus ça change, plus c'est la même chose.

    老僧三十年前未參禪時、見山是山、見水是水、及至後夾親見知識、有箇入處、見山不是山、見水不是水、而今得箇體歇處、依然見山秪是山、見水秪是水。

    https://www.instagram.com/defaultmp3/

Page 1 of 2 12 LastLast

Bookmarks

Posting Permissions

  • You may not post new threads
  • You may not post replies
  • You may not post attachments
  • You may not edit your posts
  •