A skill saw and jig saw is all that I use. Yes, if you take your time you can make two barricades from one sheet.Originally Posted by rudy99

|
||||||||||||||||||||||||||||||||||||||


 Member
A skill saw and jig saw is all that I use. Yes, if you take your time you can make two barricades from one sheet.
I have found that for the ports you can drill out all the corners with a 3/4" drill bit. This gives you the play and room need to manuever the jig saw blade.
PJ
 Former Member
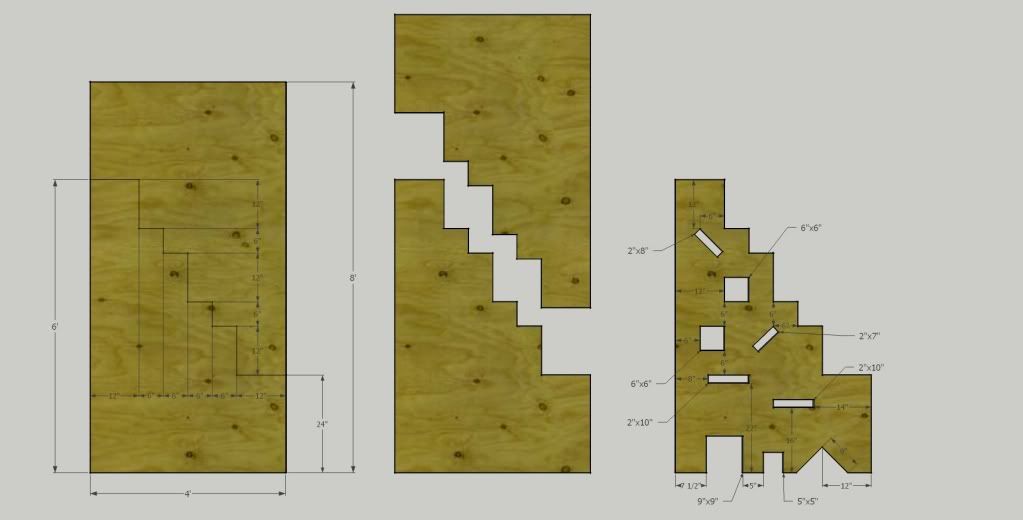
Here's what I wound up with. The dimensions aren't exact but I tried to move the shapes around so that they were easily dimensioned off of known elements or gridlines.
Senior Member
Here is one my kids made me a couple of years ago: http://lightfighter.net/eve/forums/a...283#2181065283
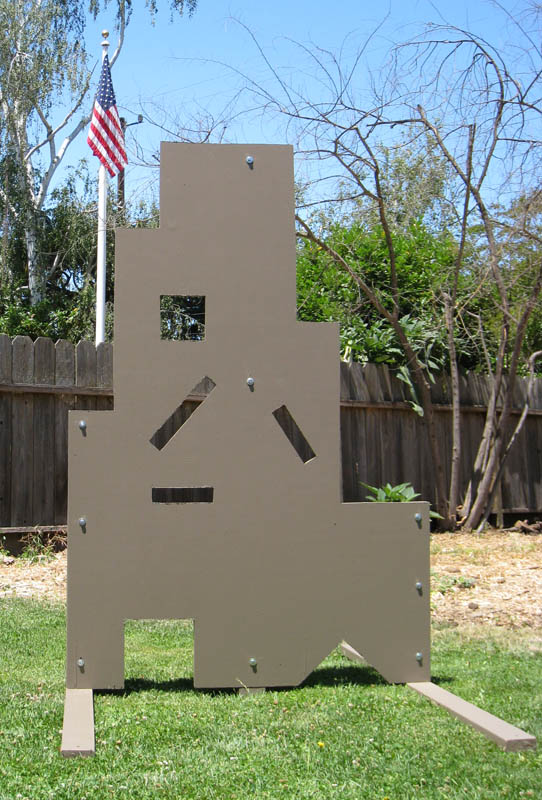
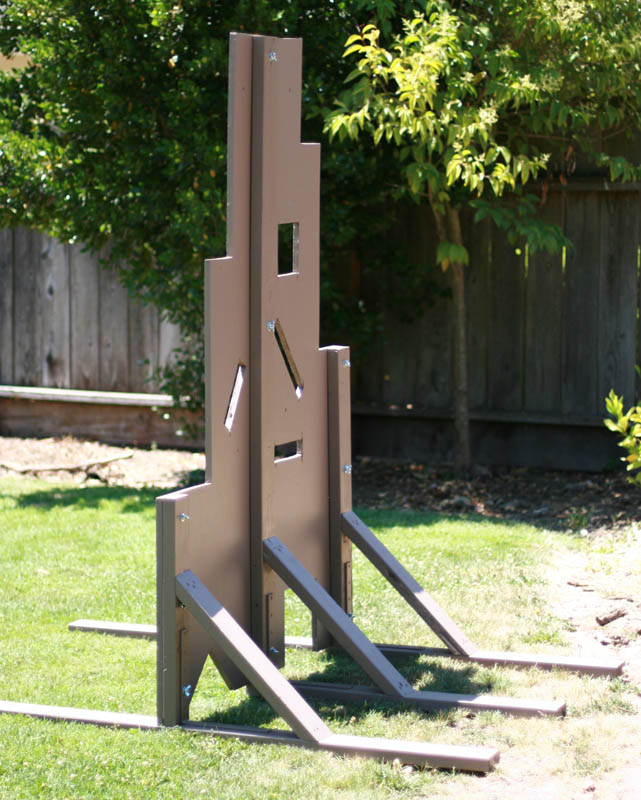
My kids made a nice Father's Day gift--a VTAC inspired training barrier they put together with spare 3/4" plywood and 2x4's we had kicking around the yard. Max dimensions are 4' x 6'. The right side has steps at 2' & 4', while the left side steps are at 3' & 5'.
The three support legs are attached with carriage bolts & wing nuts, so they can be reversed and also easily dismantled for vehicle transport or storage.
Member
Now that's a Father's Day gift.
 Senior Member
Man those 2" wide cuts look tough to shoot through(if thats what they are designed for).
Member
They are (and they are).
It just takes some practice and getting used to. The center rathole is actually the toughest for me.
Member
Wow. I did something really similar a while back.
You can download the sketchup file.
I like Rob's better though.
Disclosure: I'm a dealer/owner of an online firearms accessories store.
 Member
Sweet, I've been looking for directions and should have searched here first.
I'm making one for our squad for our range days and I cant leave it at the range. I take it the frame unbolts from the legs so you can move it? I'm thinking either that or some type of hing system.
Any thoughts?
As required: "I work for ITS Tactical as an editor".
Member
My son and I made two this past weekend. rob_s thanks for posting those directions as Green Eyes Black Rifles doesn't have the placement measurements for the cutouts.
I made the legs per the book but might make the other pair shortened down after watching the new VTAC videos.

Last edited by CENTCOM_Survivor; 08-02-10 at 18:13.
As required: "I work for ITS Tactical as an editor".
 Posting Permissions

 Reply With Quote

Bookmarks