Yeah I forgot about that. Damn the internet and the lack of voice inflection!
|
||||||||||||||||||||||||||||||||||||||

 Member
Yeah I forgot about that. Damn the internet and the lack of voice inflection!
 Senior Member
Subtle sarcasm makes a good trap.Originally Posted by nate89

The number of folks on my Full Of Shit list grows everyday
I am American
Member
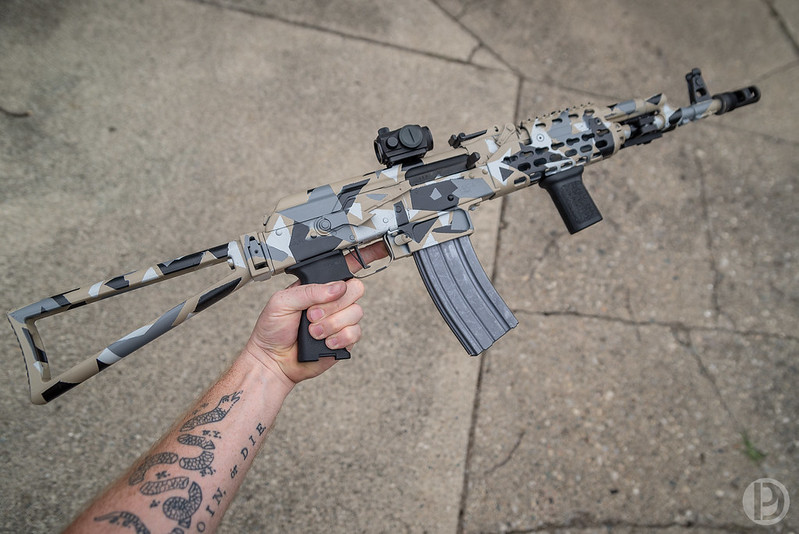
Nice! You do that yourself? Stencils? Cerakote? Would love to do a VZ58 like that
Member
Well, here's mine. Cleaned it all off with brake parts cleaner, then a dark brown. Then used artificial leaves for a stencil and sprayed it with the light beige. Then clear coat.
Took the 3X9 off and replaced it with an Aimpoint. Crap - how do I make the pic show up full size? Click to enlarge.....
ar.jpg
Last edited by Ruark; 11-30-18 at 18:56.
 Site Sponsor
I like the simplicity of that. Its amazing how crazy people go to blend in, when deer do pretty well with a couple shades of brown.
Member
Yup, like the the simplicity of it as well and it looks good. Been thinking of painting my AR, but not sure on how I want to do it. There are a lot of great paint jobs here, but really liking this one.
Member
Here's a couple of mine
Sent from my SM-G955U using Tapatalk
Member
It's pretty simple, just take your time. I used the Rustoleum camo paint - the sand and dark brown - and some clear flat ("matte") finish.
1. Clean the gun off thoroughly with brake parts cleaner. Probably should avoid getting it on your optics.
2. Carefully mask off the scope lenses, sight adjustment knobs, exposed bolt, trigger, etc. I just used that blue masking tape.
3. Hang it up with a piece of wire threaded through the flash suppressor.
4. Cover the entire gun with the dark brown paint. Two light coats a couple of hours apart. Let it dry overnight.
5. Lay the gun flat on a table. Get some "greenery" from a store like Michael's or Hobby Lobby. Doing one small section (about 6") at a time, press the greenery against the gun and spray it with the light sand paint. Don't over paint.
6. Let it dry several hours, then turn gun over and do the other side the same way. Get the tops and undersides, too. Let it dry a few hours, then hang it back up and let it dry overnight.
7. Cover with 2 or 3 light coats of clear flat finish, a couple of hours between coats. Let dry overnight. Voila! You're finished!
If you're a little nervous, try doing this with a piece of 2x4 or something first, just to get the hang of it and check the pattern. It's not a big deal.
Last edited by Ruark; 12-01-18 at 22:08.
Member
DD Mk18 complete upper ( with newer ~.070 gas port)
Aero Precision lower built with LMT parts kit/receiver extension and H2 buffer
ALG ACT trigger
T1 on a DD mount
M4-2000
Streamlight railmount HLX
Magpul and Troy BUIS
Magpul furniture
VTAC padded sling
Sent from my iPhone using Tapatalk
 Member
My MUTT

Last edited by hk_shootr; 12-07-18 at 16:46.
Proper Planing Prevents Piss Poor Performance.......
 Posting Permissions

 Reply With Quote


Bookmarks